Normally I spend about 0.54788716 seconds coming up with the titles to the articles I write, with the exception of today. I agonized on it for almost 10 minutes … I will acknowledge that“agonized” might be a slight exaggeration, but only just barely.
I like to take tile joint patterns pretty seriously and am preternaturally inclined to notice when the tile installer decides to make the joint pattern an afterthought. I have a special place in me that is reserved for particularly bad-nasty tile joint layouts, and it’s located on my posterior, just slightly south of my waistline. So when it came time to redo my own shower – which is the Xanadu of tile joints, you should know that I spent time working how the different tiles and stones would work with one another and how the different sizes would course out. Would you be surprised to learn that I even did 3-dimensional drawings of it to give to my tile installer?
Of course you’re not surprised. Presumably, I am a pro and I know that if you decide to talk about crummy tile joints on your website, people might be inclined to judge your own tile joint pattern layout.
As I’ve said before, working on your own house sucks and I don’t really have the time (or desire quite honestly) to prepare actual drawings so the vast majority of my directions to the General Contractor are pretty minimal and I rely more upon conversations and job site meetings (that awkwardly take place in my bedroom) to review my design intent. I am also cursed with knowing more than I have to spend so I have to be crafty and ingenious with my solutions, and I need to pick the right battles (as you’ll see later).
But to really set the stage, and to somewhat lower expectations, let’s take a quick look at the existing conditions of my master bathroom.

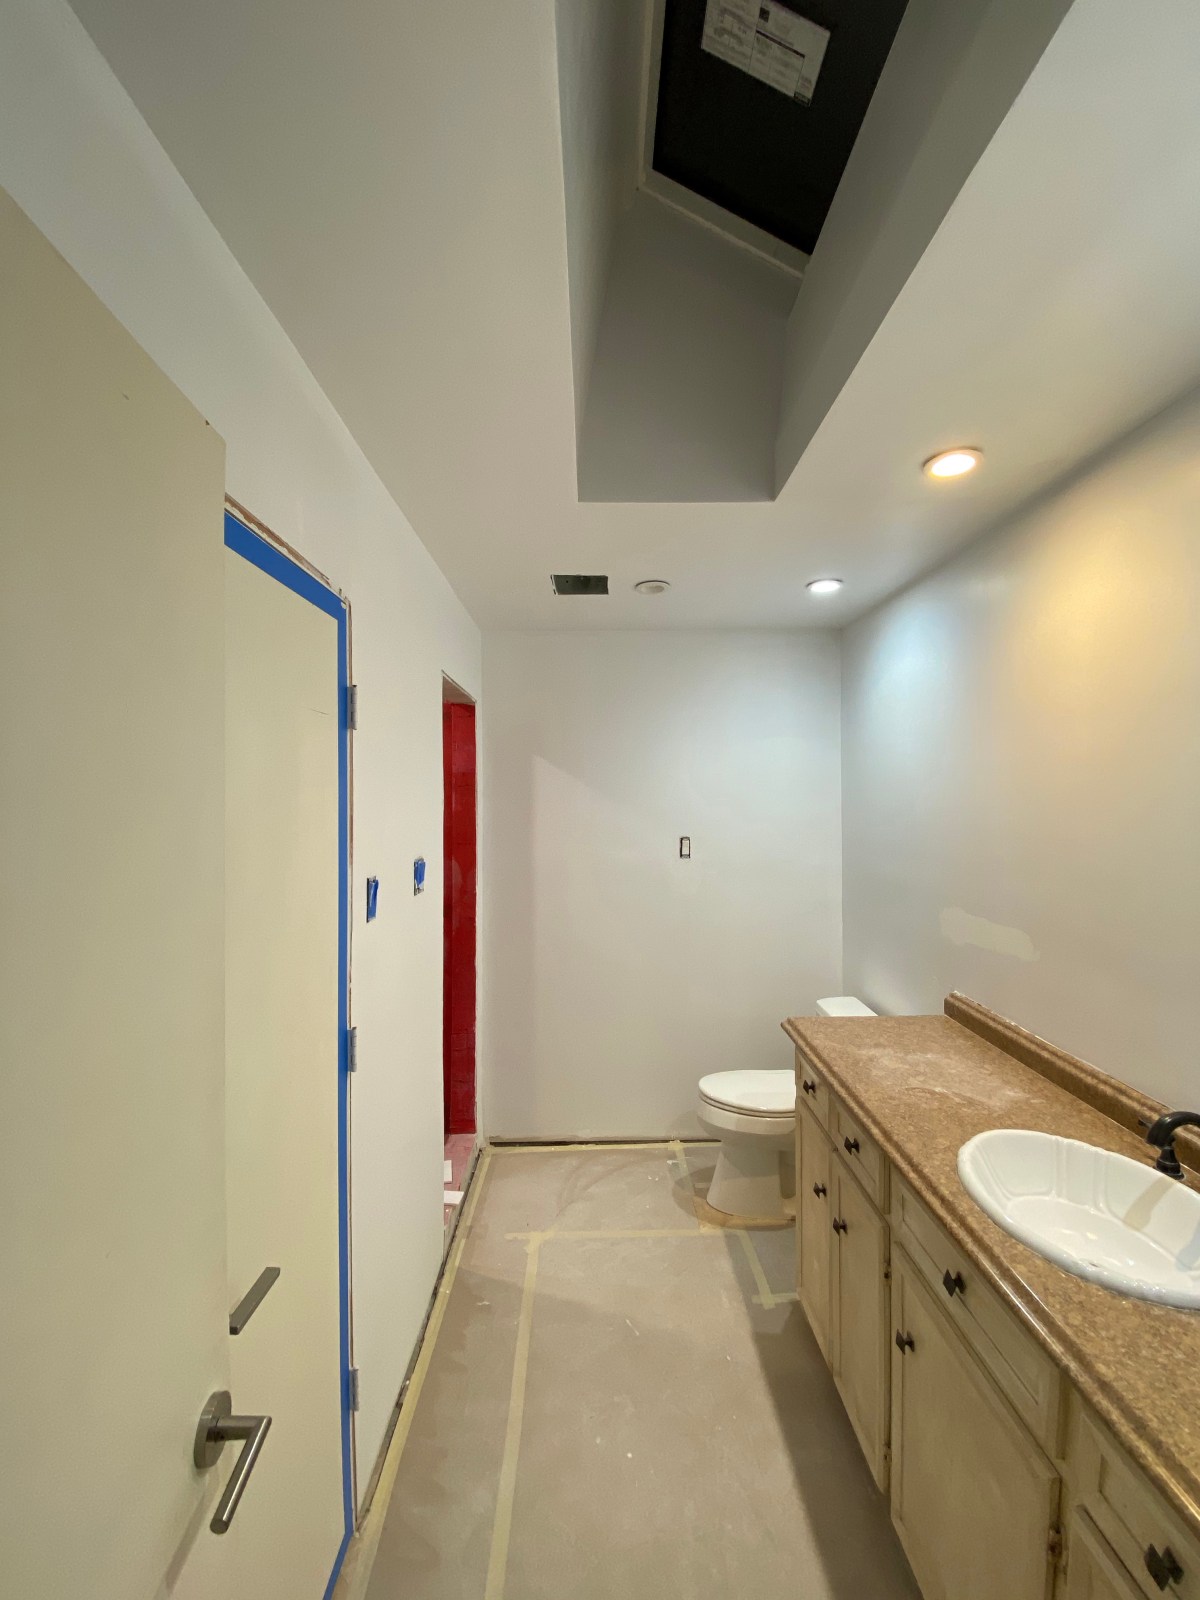
Huuugth, Huuugg, Huuuurggehhh! … or at least that’s how I think what vomiting sounds like if you were to try and spell it out. My bathroom is rough and luckily, I am finally doing something about it (and by “it” I mean about 65% of it). Let’s now look at the improved current state:

Much better even if the new LED lights are a different color temperature from one another – that’s an easy fix. No more cake batter walls, new skylight, no ductless exhaust fan that doesn’t actually exhaust, white primer on the wall, no more soffit above the counter, and you know what, I think the construction paper looks better than the nasty urine themed floor tile so I’ll still count that as a win.
But you really came here to look at mother flipping tile joints so let’s get to it by starting with the drawings I did make that artistically and adequately show the tile joints.
One question that some of you might have will have something to do with why I have some of these joints and the only way I can really explain it is that I am using ceramic tile on the walls and I hate using liners and Schlüter strips on outside corners. Does that make sense to you? The ceramic tile is glazed on one face and if you look at it from the sides, you can see the clay body of the tile that decidedly does NOT look like the glazed portion. So what to do if you don’t want to use liners and Schlüter strips on outside corners? In this case, I decided to use Carrara Marble so that you never see the ceramic tile from the side.
This next part might make your head explode but I’ll do my best to avoid that. The ceramic tile I am using is 3″x 12″ and the marble tile I am using is 3″x 6″ because you would like to think that this would allow all the tile to course out with one another so you can avoid tile joint madness … but it doesn’t really. Take a look at this next picture:

This is where the big “gotcha” is and it is at the root of what makes laying out tile maybe not as simple a direct as you might think. In the image on the left, you can see that two 3″ x 12″ tiles pressed up against one another are the same width as a single 3″ x 6″ tile … obviously. 3″ + 3″ = 6″.
But take a look at the image on the right and you can see what happens when you add the eventual mortar joint between the two 3″ wide tiles. You get 3″ + 1/8″ + 3″ = more than your 6″ wide tile. This is one of the things that can introduce chaos to your tile pattern if you aren’t thinking about it from the beginning.

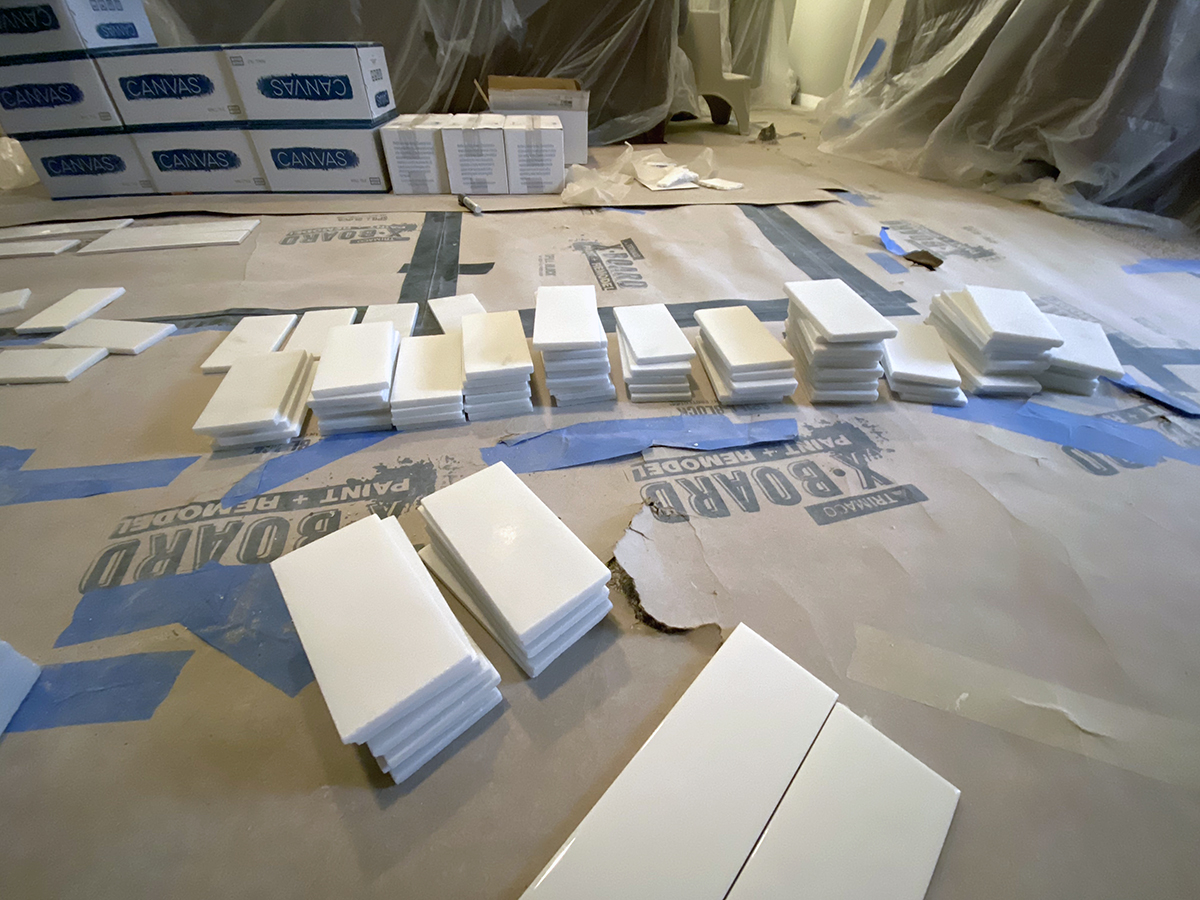
On to the next thing … look at the living conditions in my master bedroom!! Construction paper on the floor and plastic draped over everything to avoid gypsum dust getting into everything. It’s like a mob hit is about to go down and it’s definitely getting on my nerves.
The piles you are looking at are the 3″ x 6″ Carrara Marble that I am using in the shower niche, the floor, and to hide the edges of the ceramic tile whenever there is an outside corner. Why are they all stacked up like this, you ask? That’s a good question …

I am going through all the tiles so that I can sort by color range and discard the ones that are yellow or have some other blemish to them. Variety in the color and tone is perfectly acceptable but more times than not, particularly if you can’t get all your tiles from the same lot, with this particular stone choice you can get some that are this really gross brownish-yellow … like they have a two-pack a day smoking habit.
Pass.

The image above was from a job site meeting I had with the installer to go through all my drawings and my intentions. We look at drawings, I tell him what my priorities are, he tells me that he’s been doing this for 20 years and I should relax …
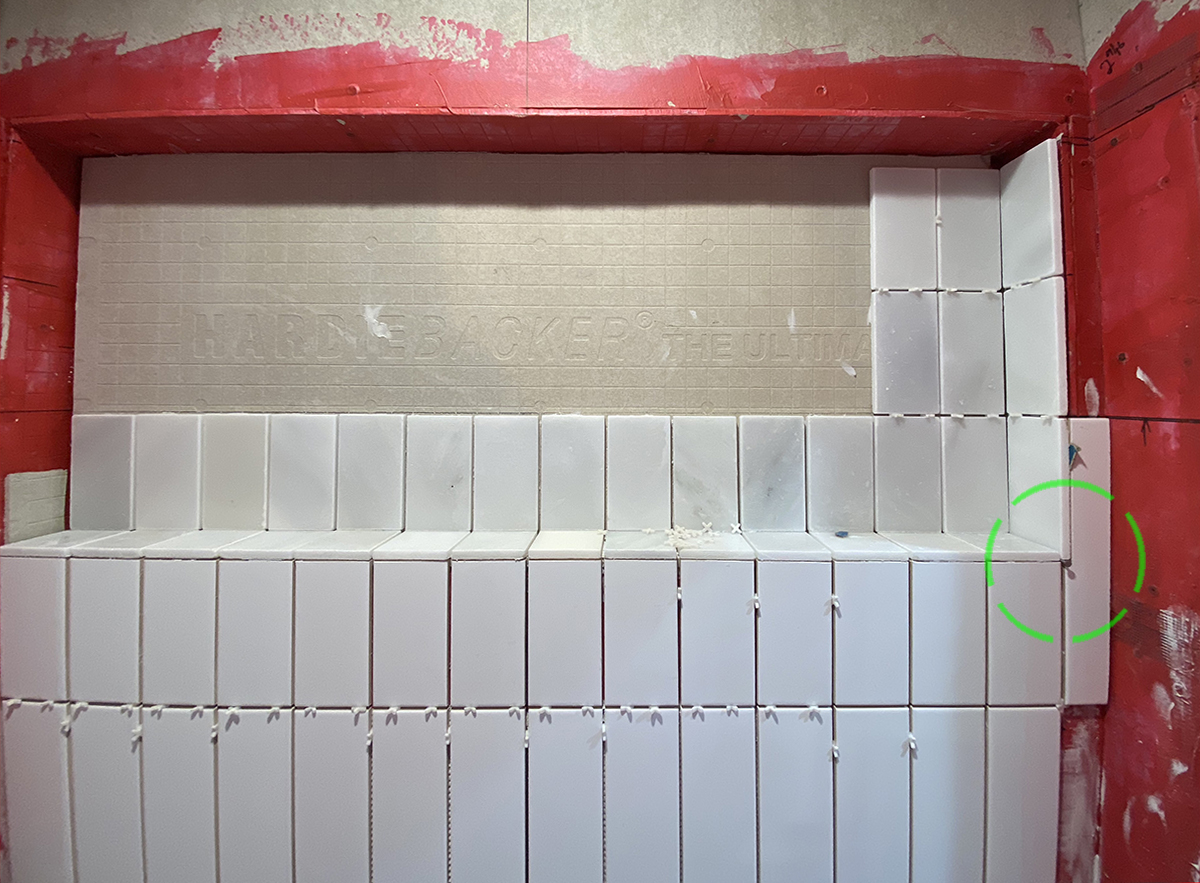
… and then I come home and find the next image.

Nope. See that green dashed circle and more importantly, what it’s circling? Nope.
Let’s take a closer look …

See? This is why I did the drawings. There is a notch in the ceramic tile to accommodate the width of the marble tile. I will give him credit because even though it’s specifically what I did not want, he did do a good job on it.
I thought about leaving it alone, for about 2 hours, and then I realized that this would eventually drive me bonkers so I texted the tile installer and sent him the following clarification drawings.
Two things stick with me from this exchange. First, and probably foremost, is that I didn’t get any blowback on this. I point out what was there and how I wanted it, and he said he would change it immediately. The second thing was that I drew two sketches, added some notes, put a little tone on there just to help it read … and he did the same and wrote: “move”.
Effective.

The image above is kind of hard to understand what you might be looking at, probably because you aren’t a tile joint lunatic and this is not your shower so your interest was lost 5 paragraphs ago and nobody is reading this particular sentence.
Since I want the joints from the ceramic tile on the wall to track through the marble tiles that will be on the door opening, the wall tile has to be centered on the opening and not the wall. I thought that I had made this clear but clearly I did not because he has ignored my sage wisdom on this matter (which means he and I will be having another talk in the morning).
Now – and once again – I give him some credit because I know why he is ignoring me … it has to do with the joint pattern at the ceiling, but we’ll get to that in a minute because I’m a few steps ahead of him and I am already thinking about how the existing openings in the wall are A) not the same size on both sides of the shower, B) not in the same location on both sides of the shower, and C) are not framed square.
It’s the trifecta of suck.
So if you look at the next picture on the right-hand side of the jamb, you can see how he has built this side up and added mortar to it to help square everything up (which has to do in this particular location because this is the hinge side of the shower door).

Take a look at the green stripe along the top of the door opening … don’t worry about the tile hanging down, he’ll end up building this out so that overhang doesn’t exist. If you look closely at the tile joints in that green stripe, you will come to the same conclusion that I have in that the eventual marble tiles will either be wildly out of alignment or there will be at least one really icky sized tile on one side. Considering that we are ordering new show doors, which will be field measured, there does not need to be any misalignments at the top. To solve this particular problem, he is, unfortunately, going to have to rip out the right-hand jamb out and reclad it while adding to the left-hand side of the jamb.

This is really where everything started to fly off the rails a bit. You can see that there is a joint running down the middle of the shower when the tile itself should be aligned down the middle (I drew it the way he installed it but given how everything at the doors is going, we should have revisited this particular decision).
Yes … and the light is not centered in the shower but I will end today’s post on that particular matter in just a moment. For now, we have one more image to look at …

So here’s a look at the ceiling as of this writing. See how the tile joints do not align? This is a result of the tile size and the mortar joint size and I knew this was coming even though I don’t love it. Unless I wanted to put a different material on the ceiling (like I am on the floor) I knew that no matter how I oriented the tile, or if I didn’t run the joint at the ceiling down the middle, I was going to have something like this happen. Of course, I could have had only 2 grout lines instead of the three shown here, but just like the image above, either one would have had two grout lines out of whack, but maybe the light fixture that isn’t centered would have been less noticeable. Which brings me to my final point …
I did not pay for perfection and I don’t think it’s reasonable that I should expect it. The person who is doing this installation has been incredibly conscientious and has put a considerable amount of effort into what I have shown you in this post. Outside of a few small issues, I am pretty happy with the balance I’ve struck between cost and the delivered product. Far too often, people in my line of work have a disconnect between cost and effort and expectation. This is something that I think about all the time and try to temper my thinking away from an expectation of perfection towards one that is in alignment with everything else.
Let’s all shoot for alignment … both in our expectations and our grout joints.
Cheers,


