Renovating my house has not been awesome for so many reasons, but slowly and surely we are getting someplace with it all. The most recent item to be added to the “mostly” completed list is my fireplace. Let’s make this clear right from the beginning – I despise my fireplace in the way that Harry Potter despises Voldemort … it is absolute and with malice.
Let’s take a quick look at where it started:
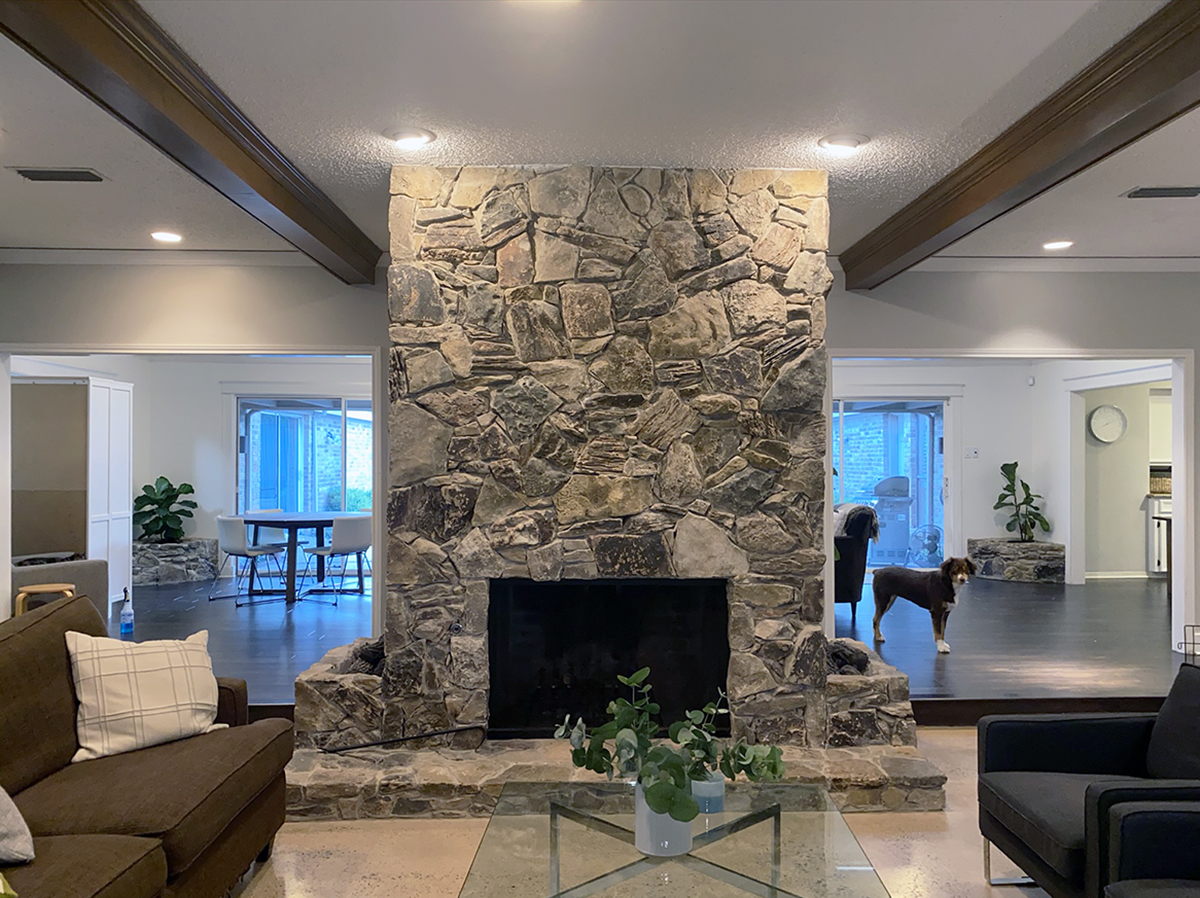
I know what your initial reaction is …
“Bob, you’re crazy, that fireplace is awesome! Cool stonework, nice proportions, the off-center lights, interesting design – it’s got it all!”
If it weren’t for the fact that none of those things is true, I would agree with you. The stone is dingy, impossible to clean, and it has these incredibly odd head-scratching wood bins(?) to either side that simply don’t work. Let’s take a closer look at those bins …
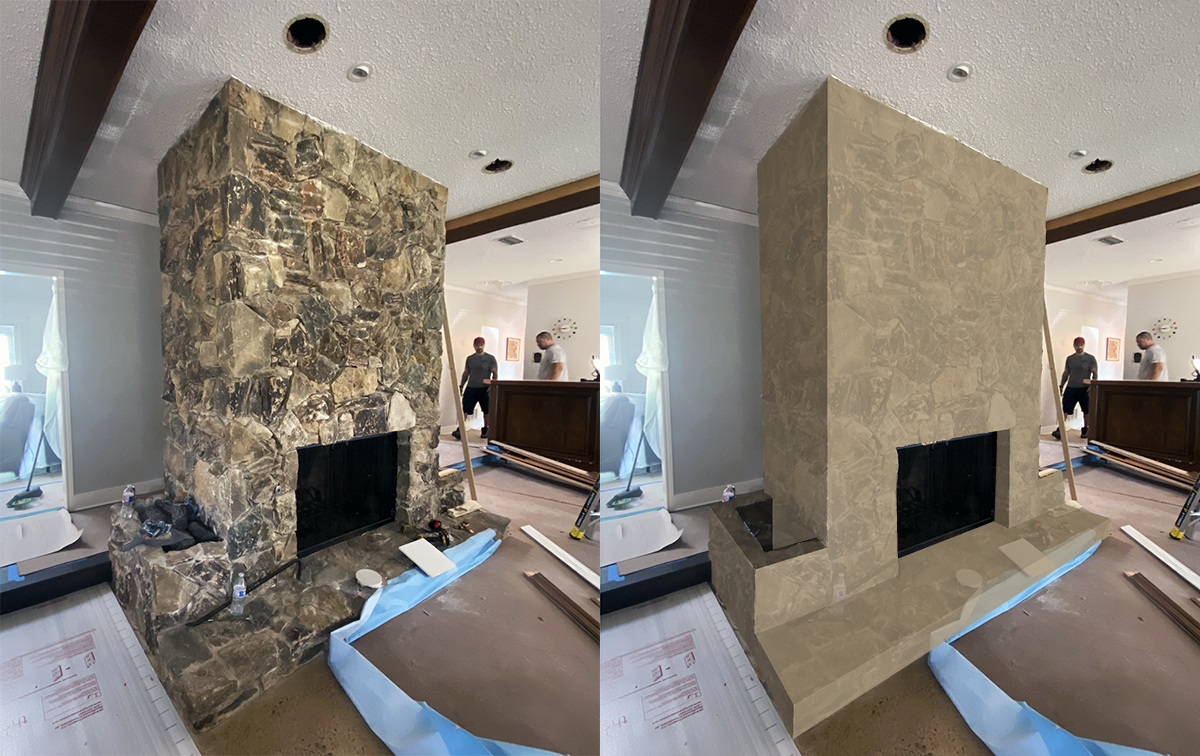
I wasn’t clever enough during my photo documentation to take a better picture of the bins but I took this picture and on the left is the existing condition and on the right, I’ve tried to clear out the garbage and detritus so you could see the bins a little clearer. The bins were approximately 12″ wide x 22″ long x 14″ deep and were on both sides. When we bought the house, the previous owner had lined them with plastic and had filled them up with wood chips.
That’s right. Wood chips.
The bins themselves were not sized well enough to actually function as wood bins, I know because I tried. Ultimately, I started thinking that woods chips weren’t that bad of an idea, which means they had to go.
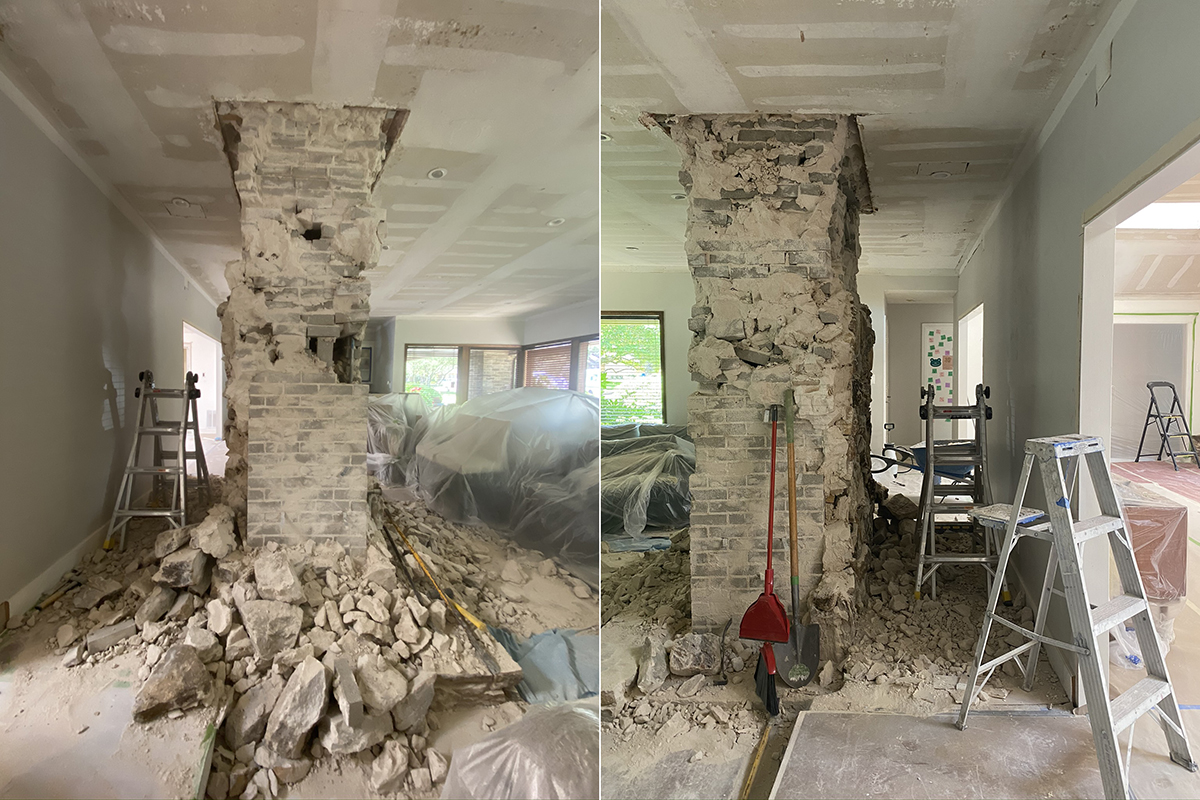
Demolition day began in earnest and as you can probably tell by the photos above, it was a loud and dusty day at the Borson household. Did I tell you that I was working from home during this time? Despite the noise and the dust, the real irritant was the state of the masonry work we uncovered behind the stonework.
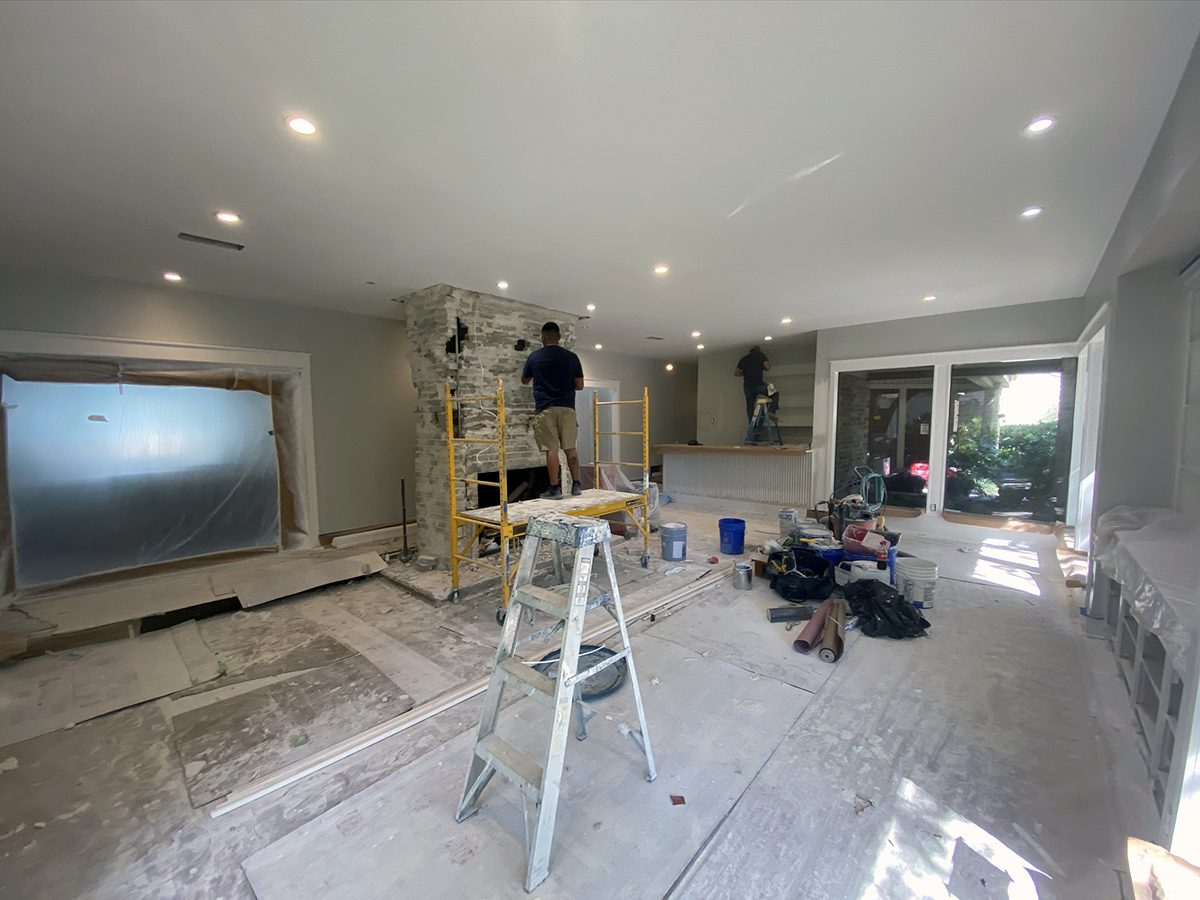
Here’s another look at the masonry behind the stone … the holes you see were not created by our demolition, they were already there. The brickwork was completely random and in my 28 years as an architect, I’ve never actually come across this sort of thing before.
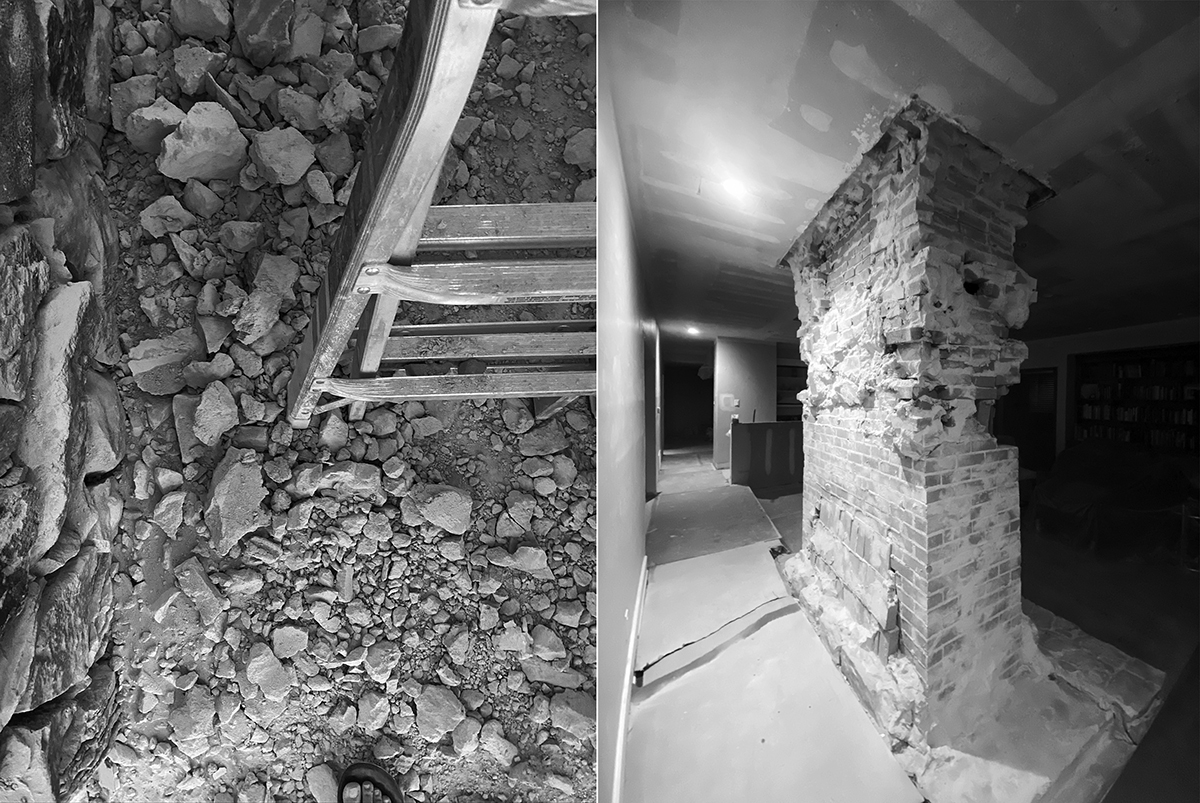
I published the images above to my Instagram account, just to point out how irritatingly random the brickwork was and the response I received was unexpected. I probably heard from no less than 200 hundred people who thought that this uncovered brickwork was amazing and that I should leave it as an “art piece” within my house.
Those 200 people are ridiculous, and I would bet my last $1 on this planet that those same people wouldn’t want this in their own house. However, I can appreciate that it was interesting but since I want to eventually sell my house, there was zero chance that it would ever be left in this uncovered state. But how to immortalize it in a way that would suit both perspectives – showing it and hiding it, all at the same time?
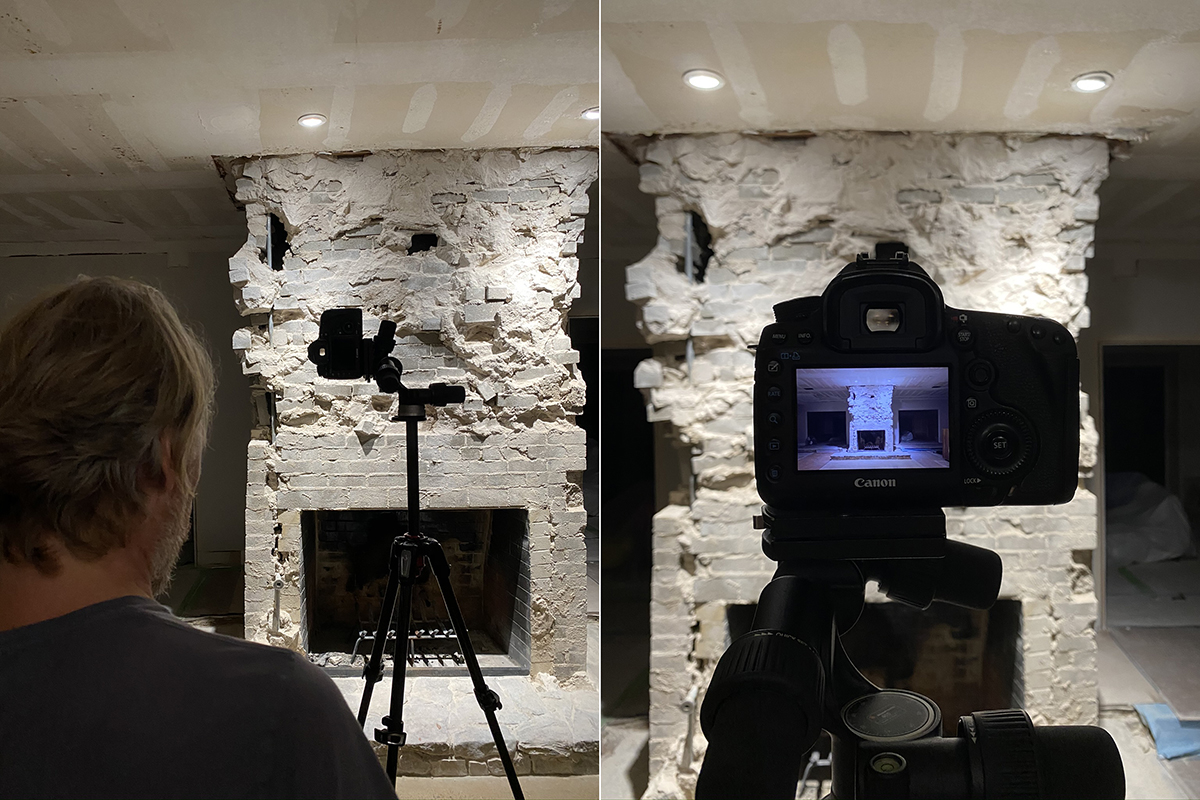
I could call my next-door-neighbor (the professional photographer) and have him come over to take some photos … so that’s exactly what I did. My neighbor, Poul Ober, ended up taking a series of photos and I think ultimately a large format picture will be printed and hung ironically on the wall opposite the fireplace.
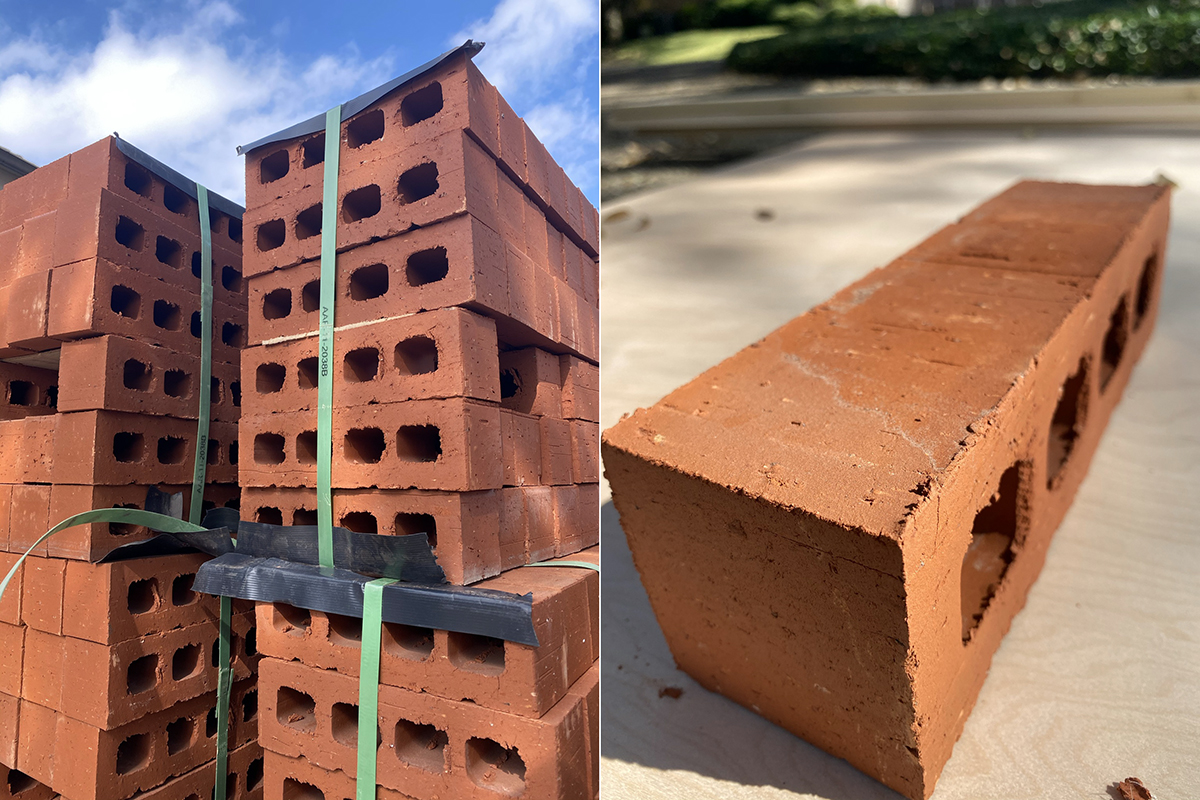
Let’s consider the new brick I will be using. Since I plan on painting the brick to match the millwork, all I really cared about was the cost per unit, the texture of the surface, and the size of the brick. Of course, the contractor didn’t get the actual brick I chose when I told them, so unless I wanted to wait until another load was prepared (few weeks delay) I would need to make a new selection. Luckily, I was able to select a new brick that met all my requirements but I did go with a Queen-sized brick over a modular size. For those who might not know, a modular brick is 3 5/8″ x 2 1/4″ x 7 5/8″ and a Queen sized brick is 3 1/8″ x 2 3/4″ x 9 5/8″ … otherwise known as bigger in almost every dimension.
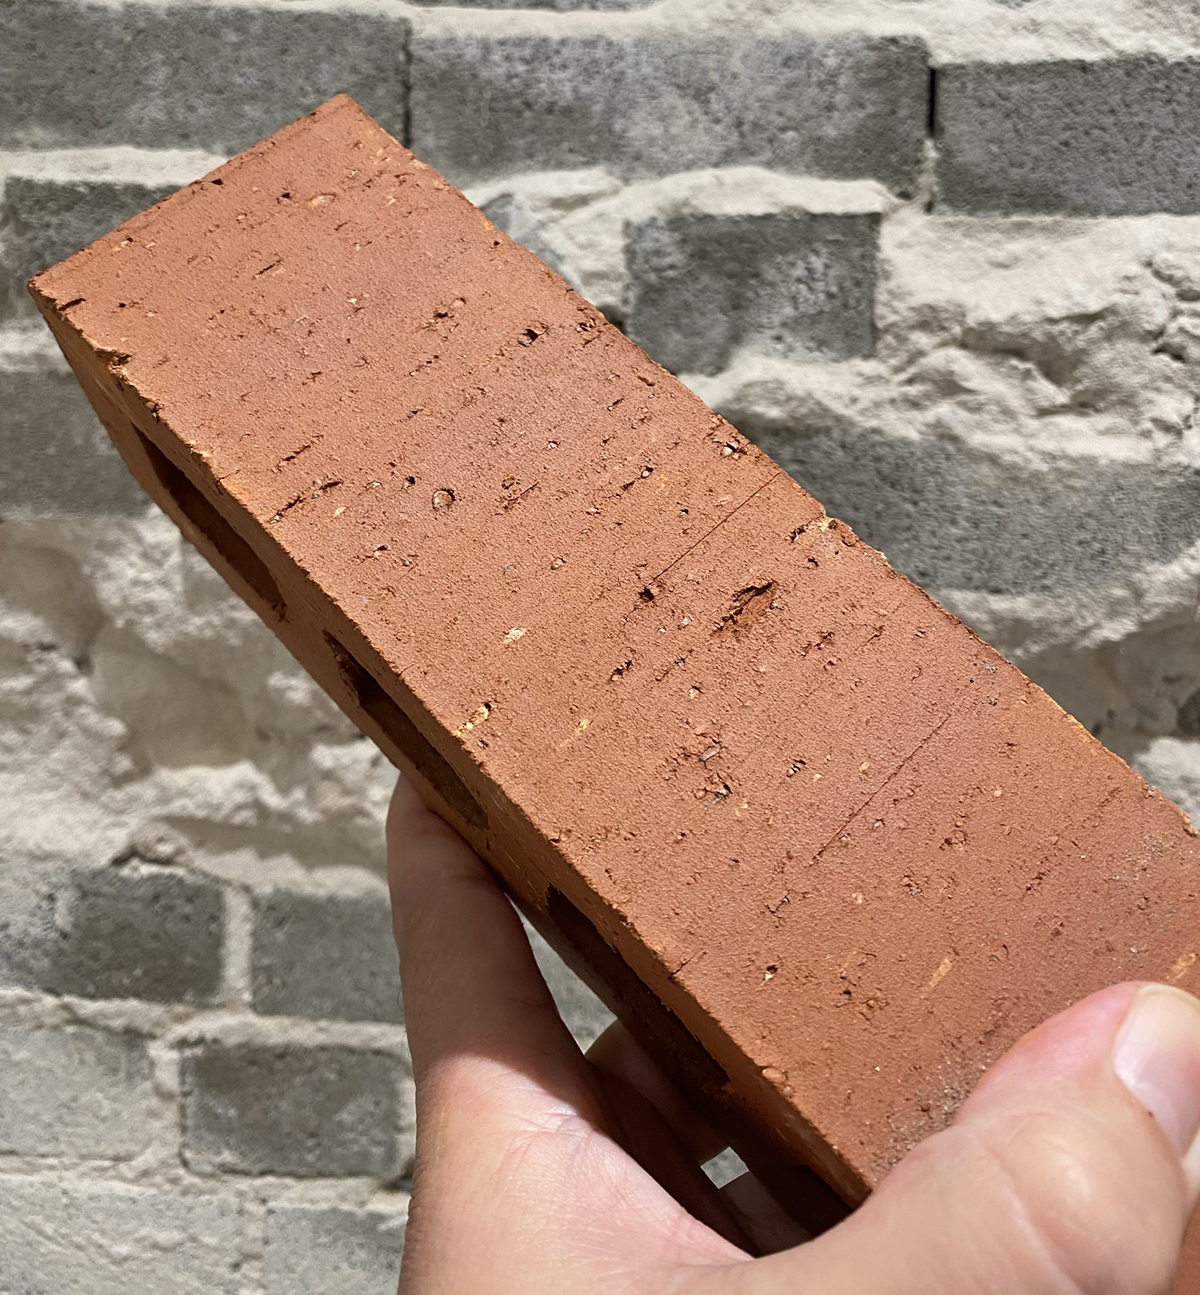
Here is a close up look at the texture of the brick I chose. “Wire cut bricks” are also known as extruded bricks, and get their name from the way in which wires are used to shape the edges of the brick and create the holes. Wire cut bricks are lightweight and typically budget-friendly.
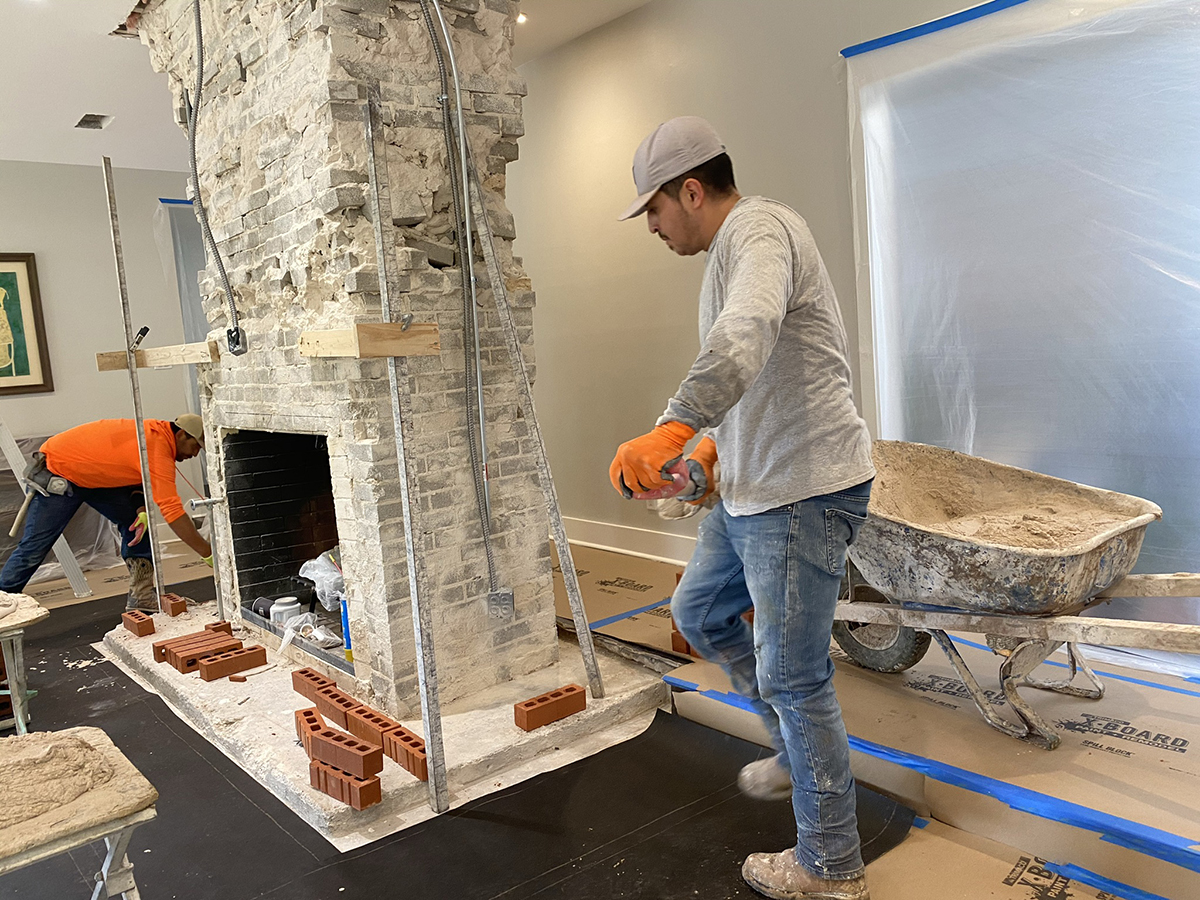
One of the ramifications of switching from a modular sized brick to a Queen size brick was that the drawings I had prepared where I had sized everything so that I could minimize cuts and remnant pieces of brick all went out the window. What this meant was that we did a dry stack of the brick prior to setting it in place with mortar so that I could make sure that the layout would work.
It did, and in some ways, the larger brick worked out better.
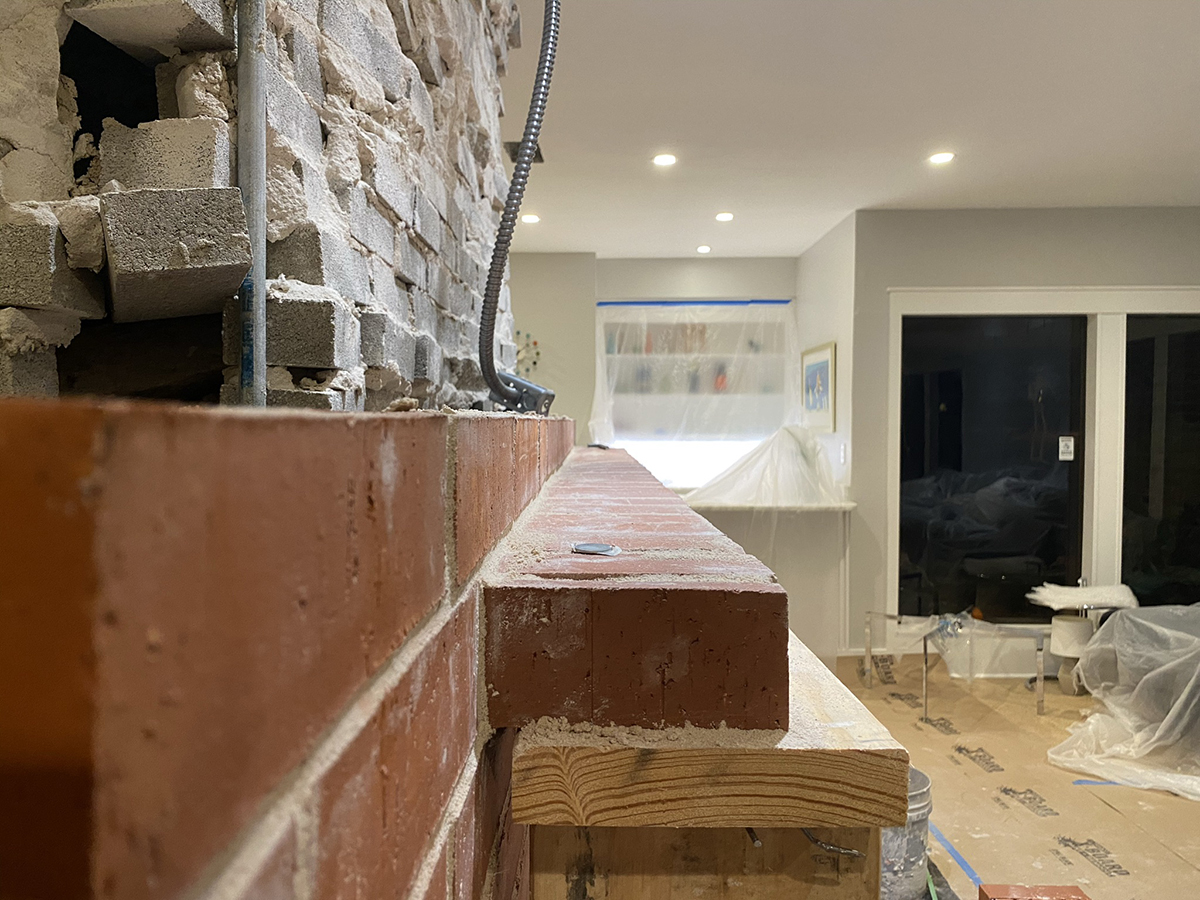
Let’s take a look at the mantel – the image above shows an end view of the brick protrusion I opted to go with. I wanted a minimalist look and as a result, using the same brick at the mantel seemed an obvious choice. This brick is cantilevered out 6″ which means that it is fully set within the depth of the brick wall – it isn’t going anywhere – but that’s not why I decided to showcase it here. Remember how I said that wire cut (or extruded) bricks have holes in them? how do you hide these holes on the very last brick in the row?
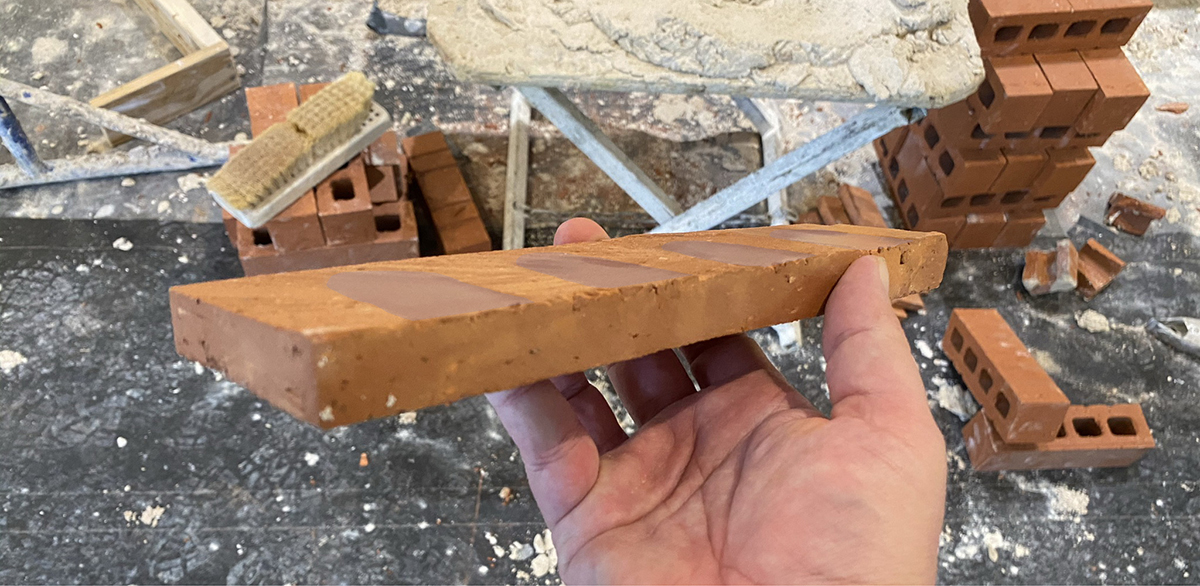
The way I decided to hide them was to cut just the face off the brick as seen in the picture above. The “price” for solving this problem in this manner is that the pattern of the mortar joints is different in these instances – which you can see in the next photo.
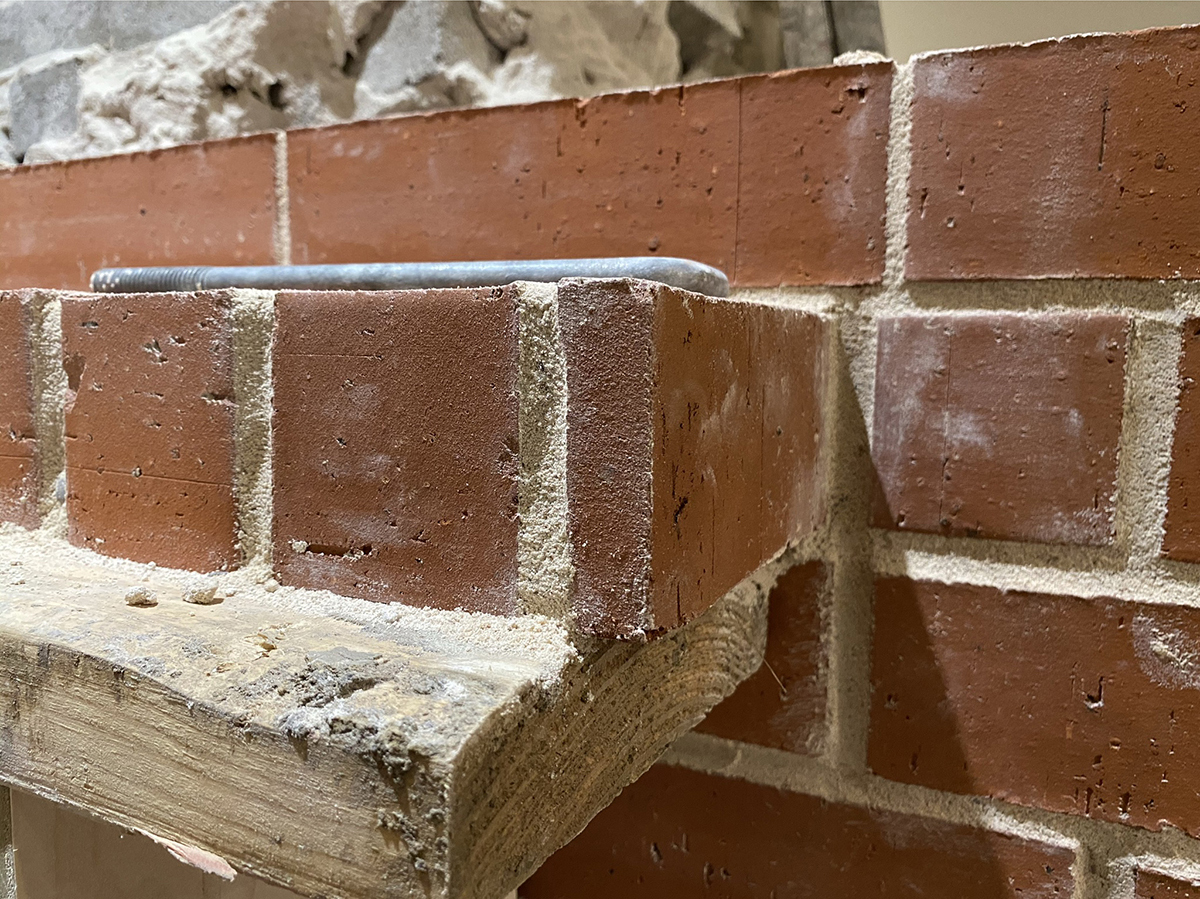
So … here it is, albeit a little bit sloppy. One of the considerations when using a material like a brick is its inherent imperfections. Not every unit is exactly the same size but it is these differences that I was wanting since I was going to be painting everything a white color to match the rest of the trim in my house.
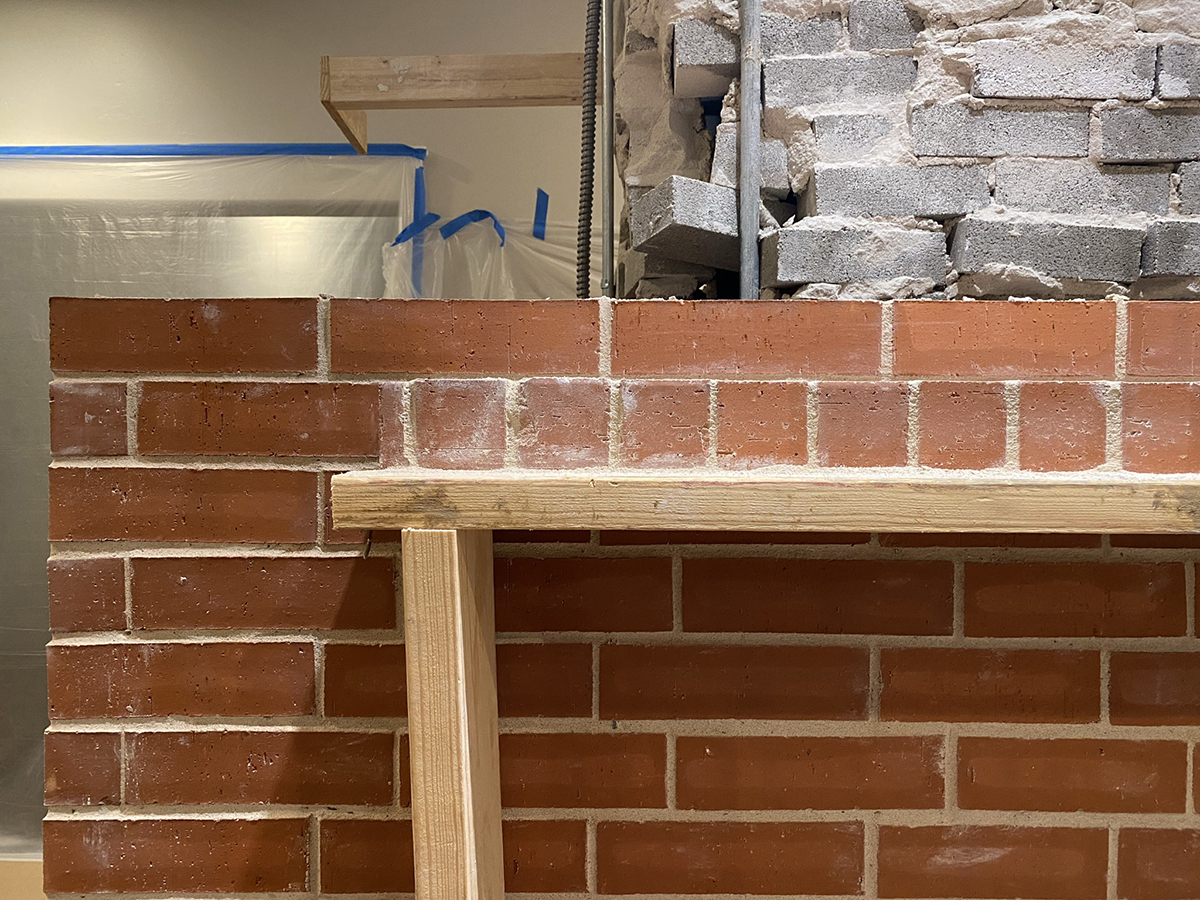
Just another look at the end condition. I could have mitered the last two bricks but that would have been an anomaly compared to the rest and I did not want to have a mortar joint on the outside edge of my mantel.
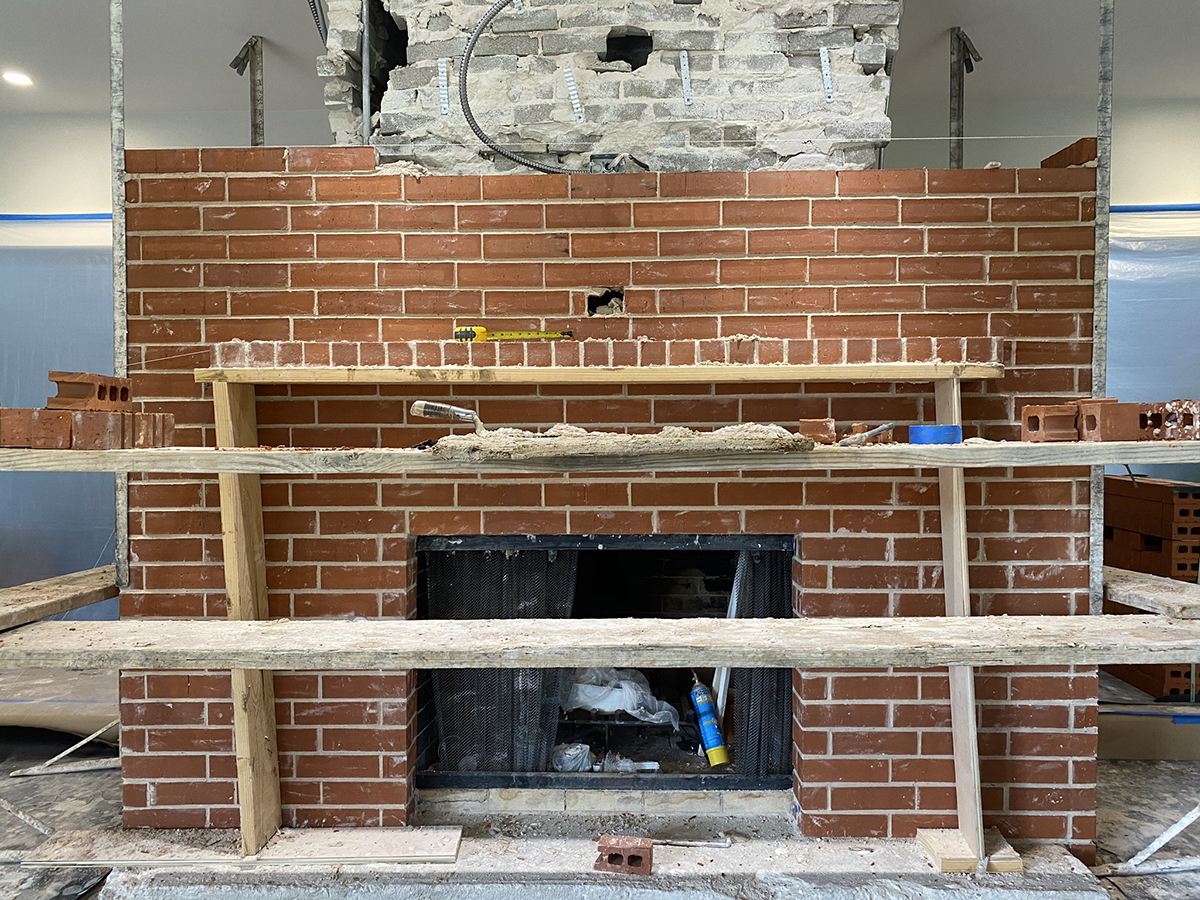
I included the image above to show you two things – the location of the mantel in context with the overall width of the fireplace, as well as a mistake that happened. If you look, there is an outlet that was installed in the second course of the brick just above the mantel. If you can imagine all the different reasons why someone would install an outlet above your fireplace, you’d be hard-pressed to think that locating it 3″ above the mantel would be a good place.
Yes, this outlet will support the installation of a TV, whether it happens while I’m living here or the next person. A piece of art will cover it nicely until that day comes but it just seems rude, or at least bad planning, to not install one in this location.
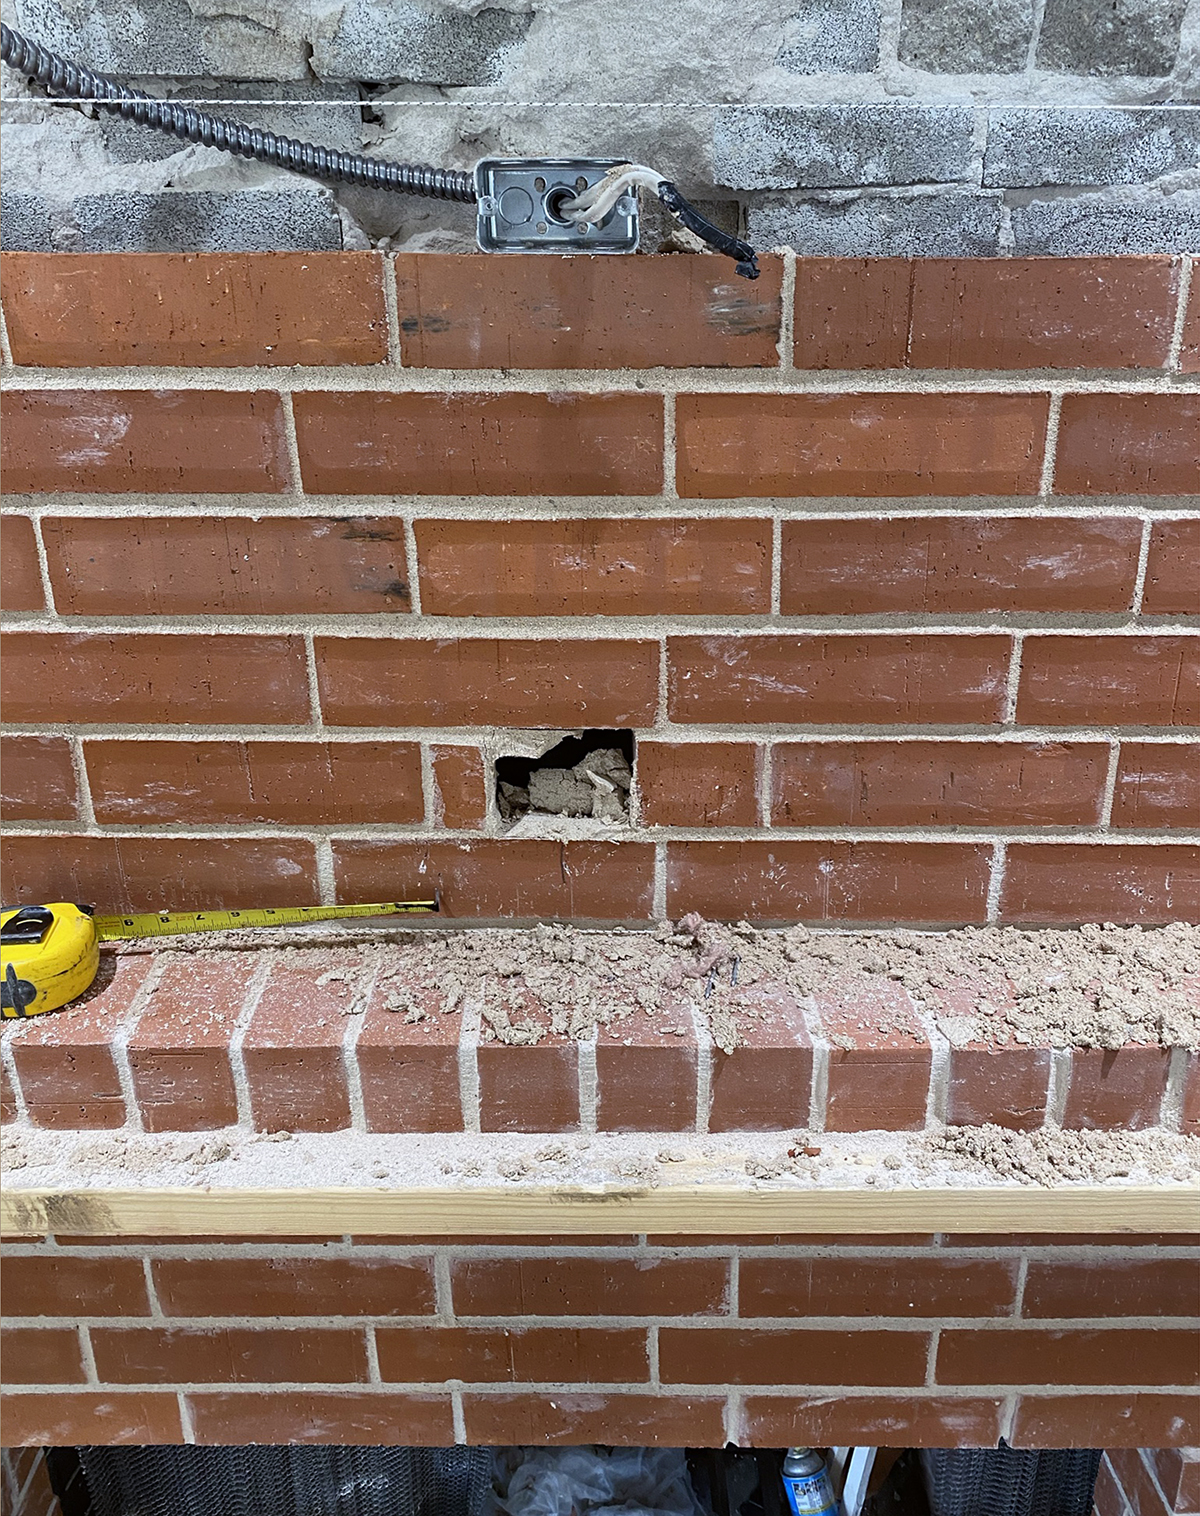
Does an outlet here ever make sense? Of course not, but luckily making this sort of correction is fairly easy considering that it had only been in place for about 15 minutes when I walked out of my “office” and saw where it had been installed. I will say that the mason was a little irritated about moving it but all it took was a finger-point and a raise of a single eyebrow and that was the entire conversation.
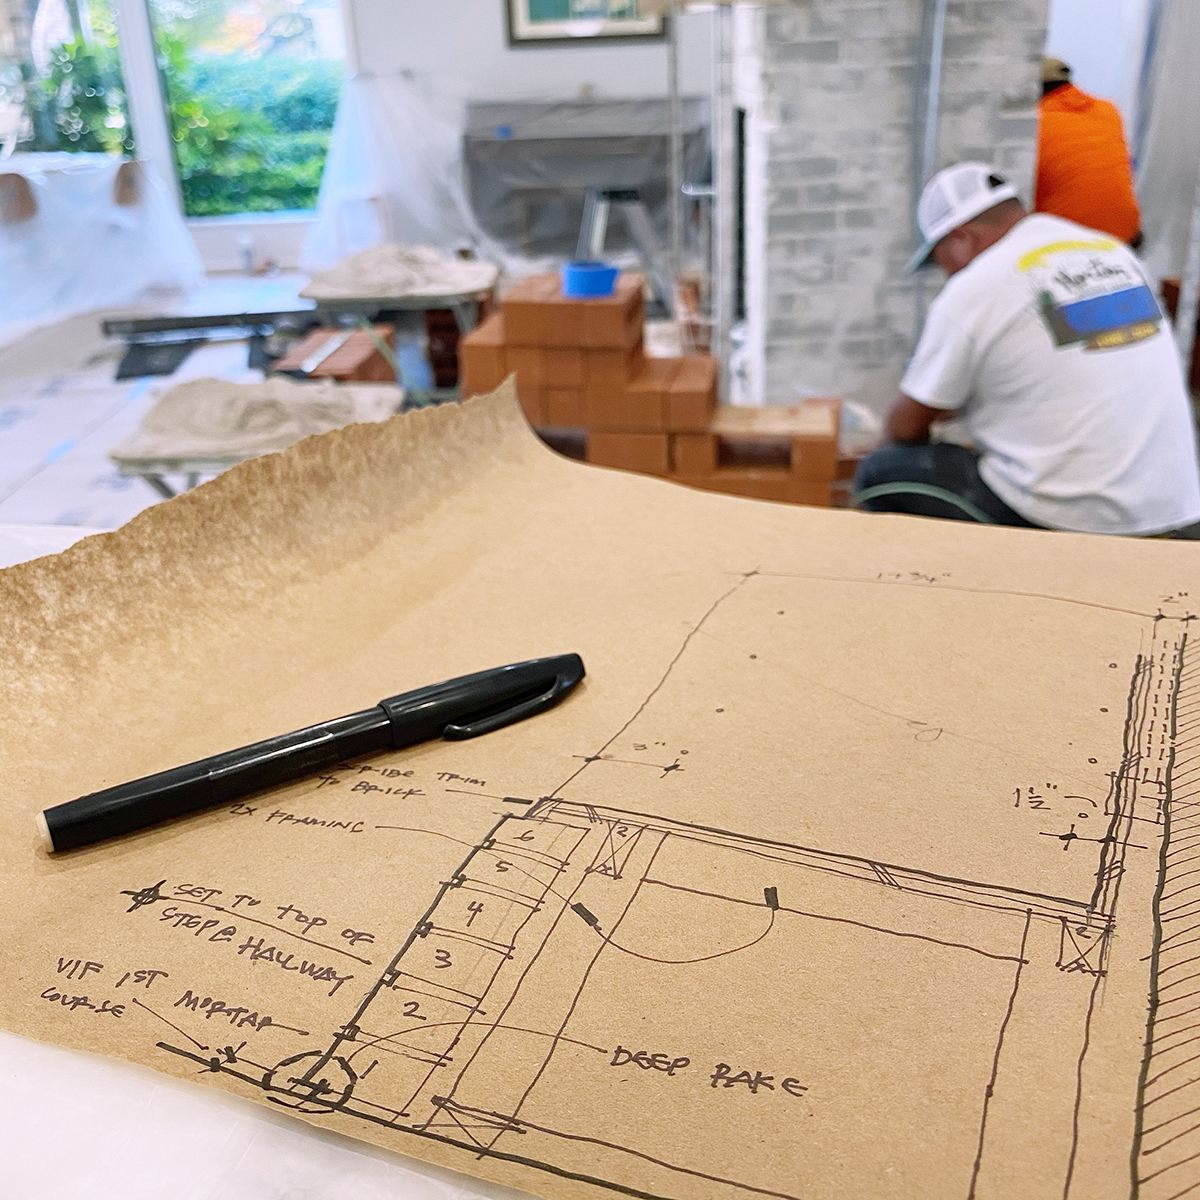
Let’s take a look at another “opportunity”. Due to the change of brick size, the previous drawings weren’t reliable anymore, and to be honest, I didn’t feel that the design was so complicated that a quick revised drawing and a conversation wouldn’t suffice. In reality, there are only about 3 things regarding the cabinets that I wanted to make sure were covered; the depth, the location of the outlet in the back of the cabinet, and that I wanted to make it absolutely clear that these cabinets would be set completely within the opening of the brick, not that there would be some sort trim piece around the perimeter.
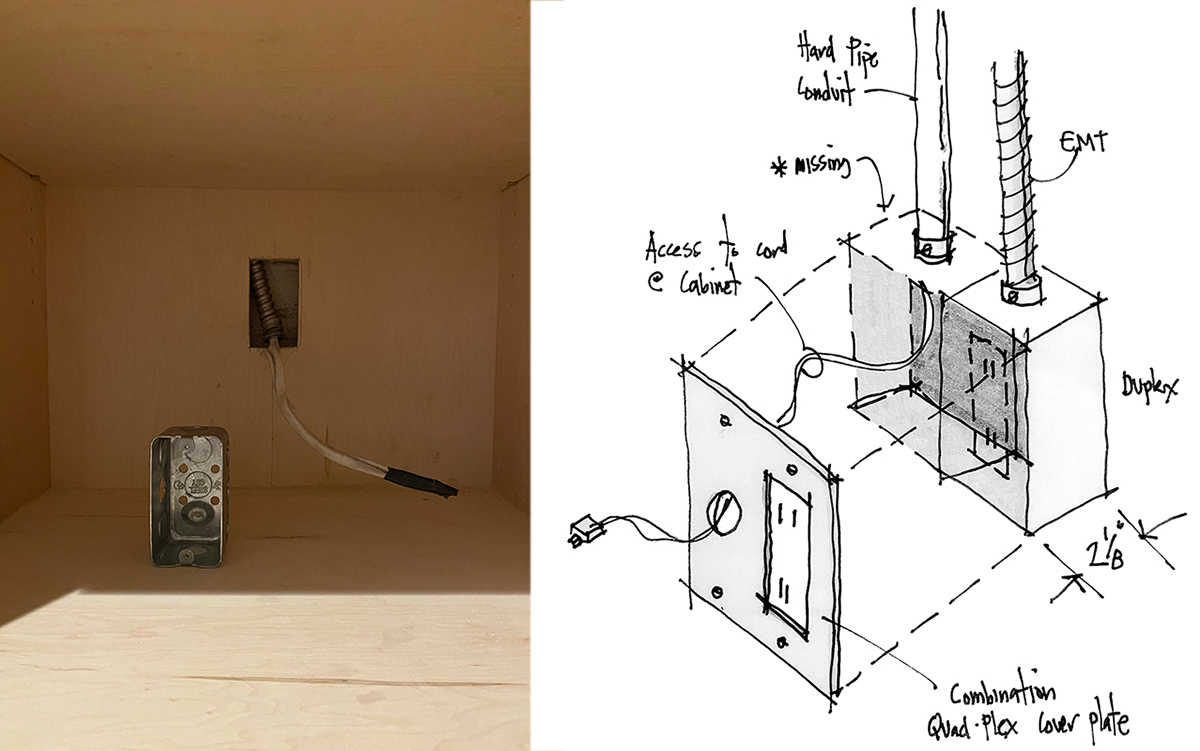
DOH! We had a slight problem when it came to setting the electrical boxes in the bottom rear of the cabinets. Through a combination of 1) the existing fireplace brick being some completely irregular, and the fact that the millwork contractor used 3/4″ material for the back panel instead of the 1/4″ we had discussed, the junction boxes did not fit. They also missed that there was an electrical line as well as a conduit in place to allow for future cat6 cable to be pulled to this location. The solution was to simply diagram it out and leave this sketch behind so that the necessary modification could be made. In the end, they pulled the cabinets and removed some of the existing masonry so that the cabinets would have a little bit more maneuvering room within their openings.
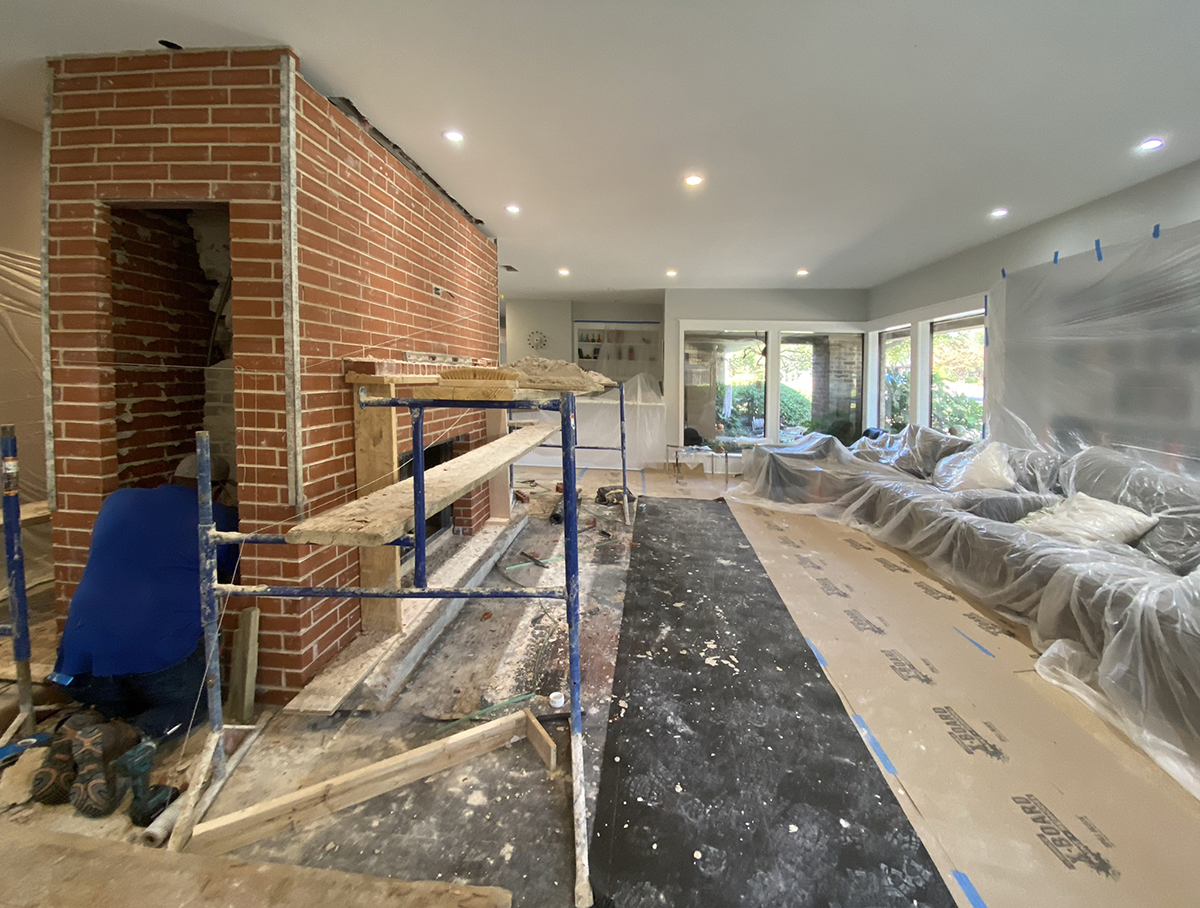
This is the millwork contractor making some modifications to the frames hold the cabinets in place. I only included this image so that you could start to get a sense of the space this new fireplace will occupy … which at this point made me a little nervous. I was wondering if my acceptance of going to a Queen-sized brick was in fact, a terrible decision on my part.
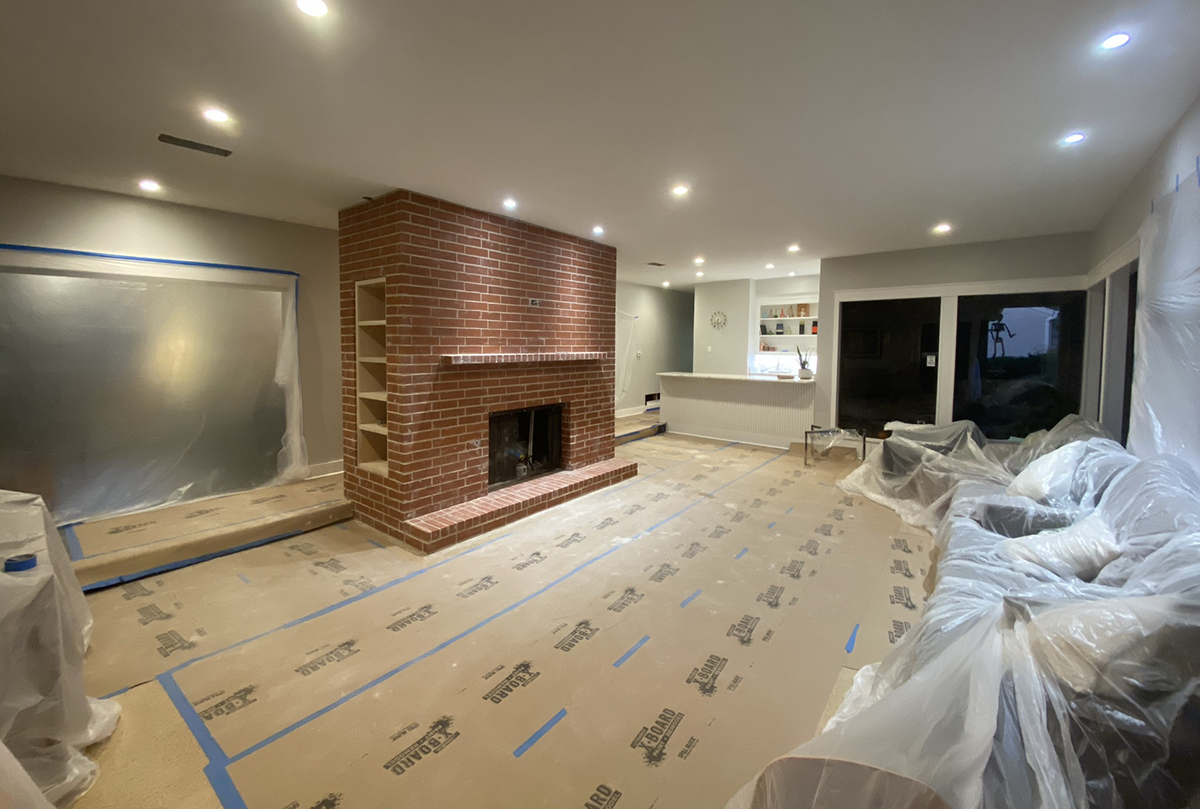
Here is where things stood after two days worth of work – hard to imagine just how fast this process can go at times. I heard from few people that they thought the brick should remain red, but given that there isn’t any sort of precedence for this red brick and that this color really, really made the fireplace mass stand out as exceedingly large and bulky. I had also allowed some craftsmanship issues to go overlooked because a) I didn’t pay for perfection, and b) I was planning on painting everything.
Let’s get a quick refresher on the original design concept …
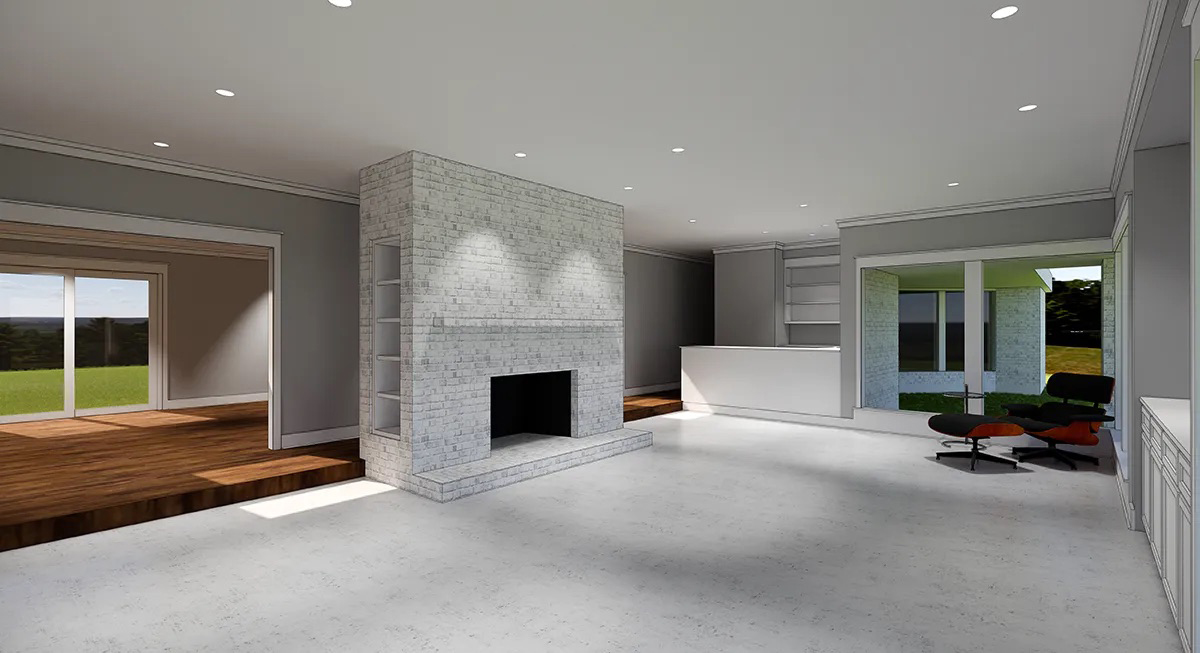
I’m thinking that this the vision pretty much matches the reality at this point and I was still feeling pretty good about my decision to paint the brick red. Before someone asks, let me go ahead and concede that I could have used white brick and left it unpainted, but this was a budget consideration for me in the end. To get the brick white enough was going to require a custom batch (otherwise the whitest of white bricks is still pretty “creamy”) and this just wasn’t something that made sense.
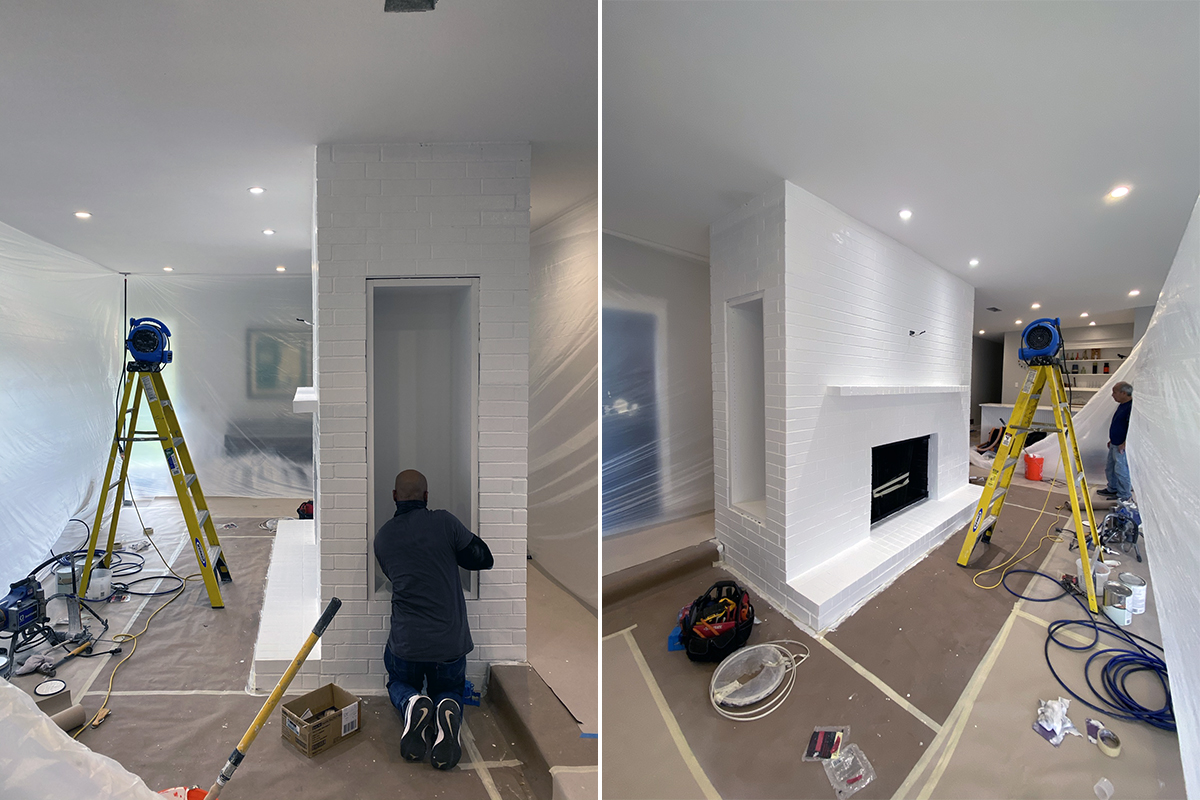
After the mortar on the bricks had a chance to cure (1 day) the painters came in to finish the job. In the image above, on the left is the electrician fixing and setting the electrical outlet and the conduit for the future cat6 cable, and for you eagle eyes out there, he also installed the wall washer light fixtures that will highlight these bookshelves. The contractor tented the work zone so that the millwork could be prepped and sanded down prior to being sprayed.
For those of you who might be curious, we sprayed alkyd paint on the cabinets but we rolled latex paint (after two coats of primer) on the brick.
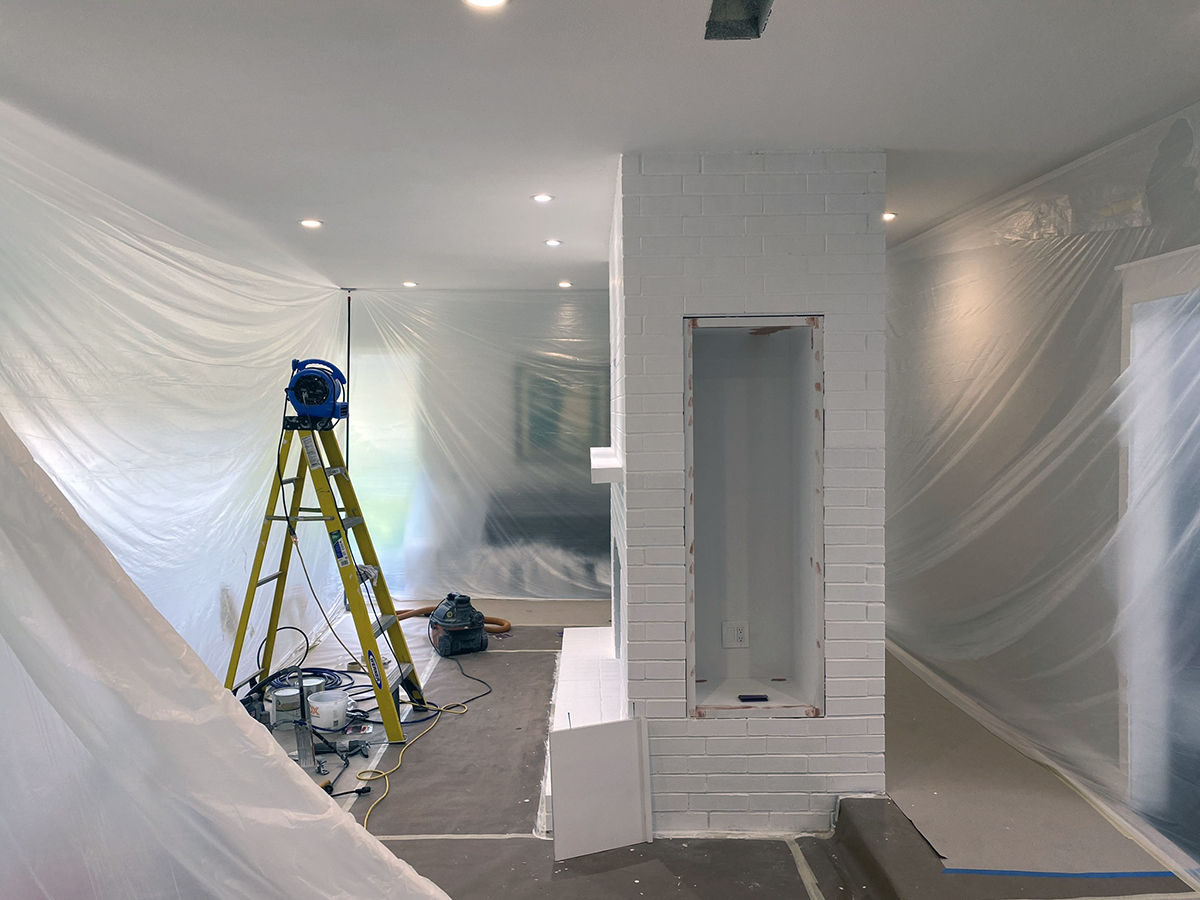
Here is a closer look at the work zone – I snuck in there to check on progress while everyone else was off eating their lunch. The reddish colored material you see on the cabinets with a wood putty that is used to fill in the finish nail holes and any gouges or dents in the wood prior to sanding and painting.
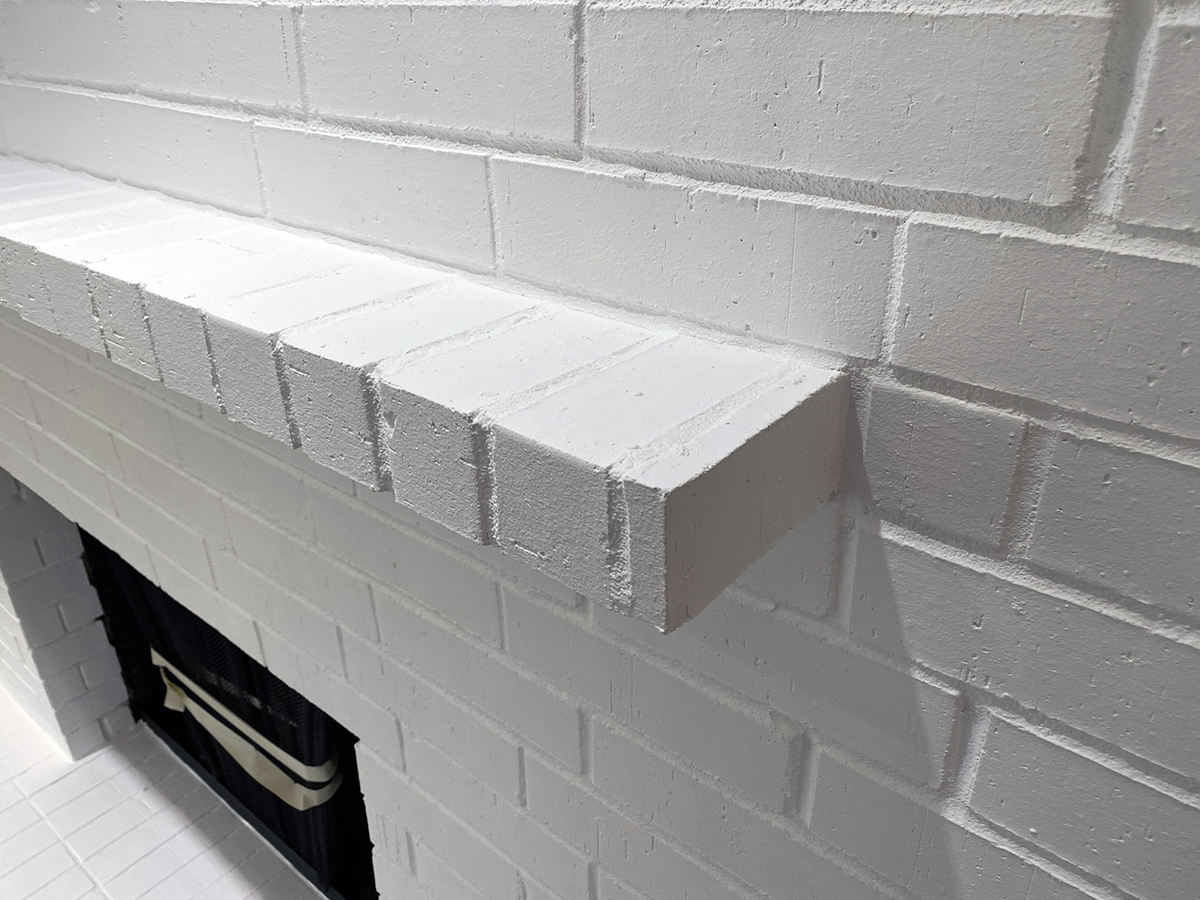
And here is a look at the end of the mantel now that it has been painted. The irregularities are a lot less noticeable since it has been painted. Also, I would like to have it on the record, that you should never, ever, paint brick with semi-gloss or enamel paint. Brick should never be shiny because it looks incredibly weird if it is. As an experiment, just take a while and look at anytime you see brick inside … it will never be shiny and if it is, I bet you will think it looks … wrong.
A friend of mine told me that not only should you never paint brick shiny, but you also shouldn’t ever paint brick at all.
Fair point … but this goes back to the budget.
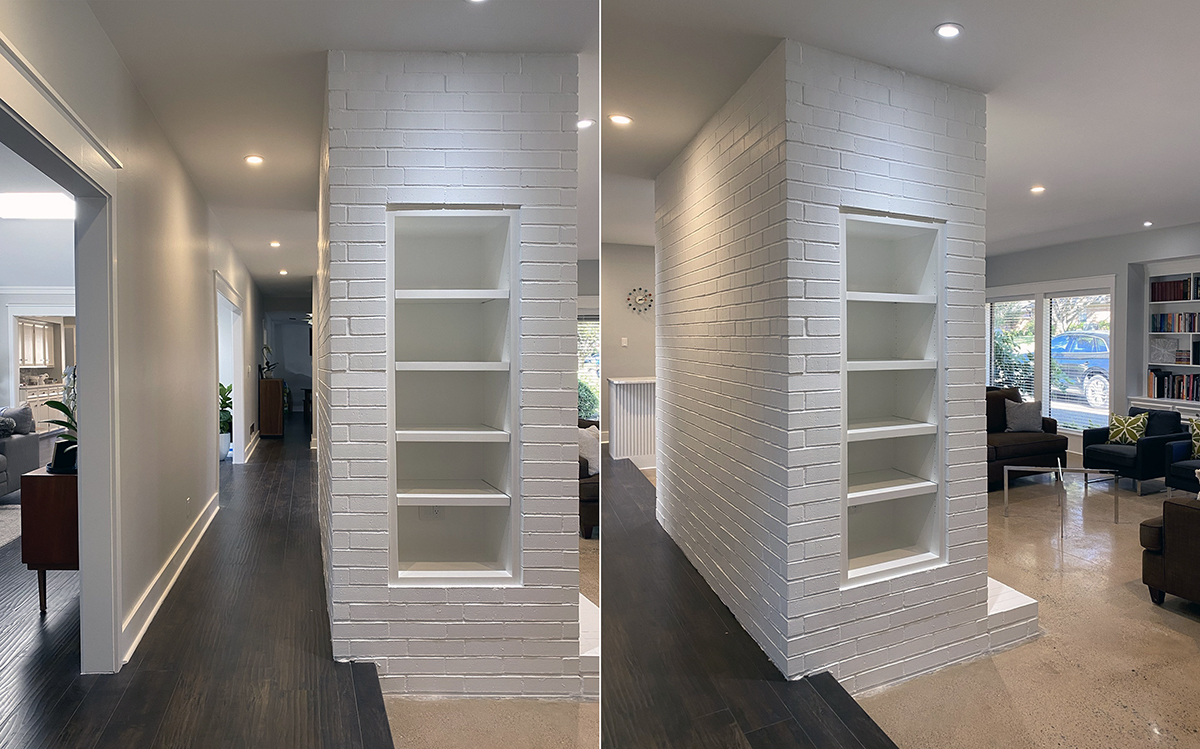
We have a few more steps to take before this area can be considered done, but I thought I would take some pictures as of today (yesterday for most of you) to show you where it all sits. I will happily report that the fireplace does not feel massive and ill-proportioned as concerned. We won’t be putting anything on those shelves for a few weeks (you want alkyd paint to cure for 10-14 days so it develops that “candy shell”) and I am 95% sure that there will only be 3 shelves instead of 4, but there are other people in the house that get a say in the matter besides myself.
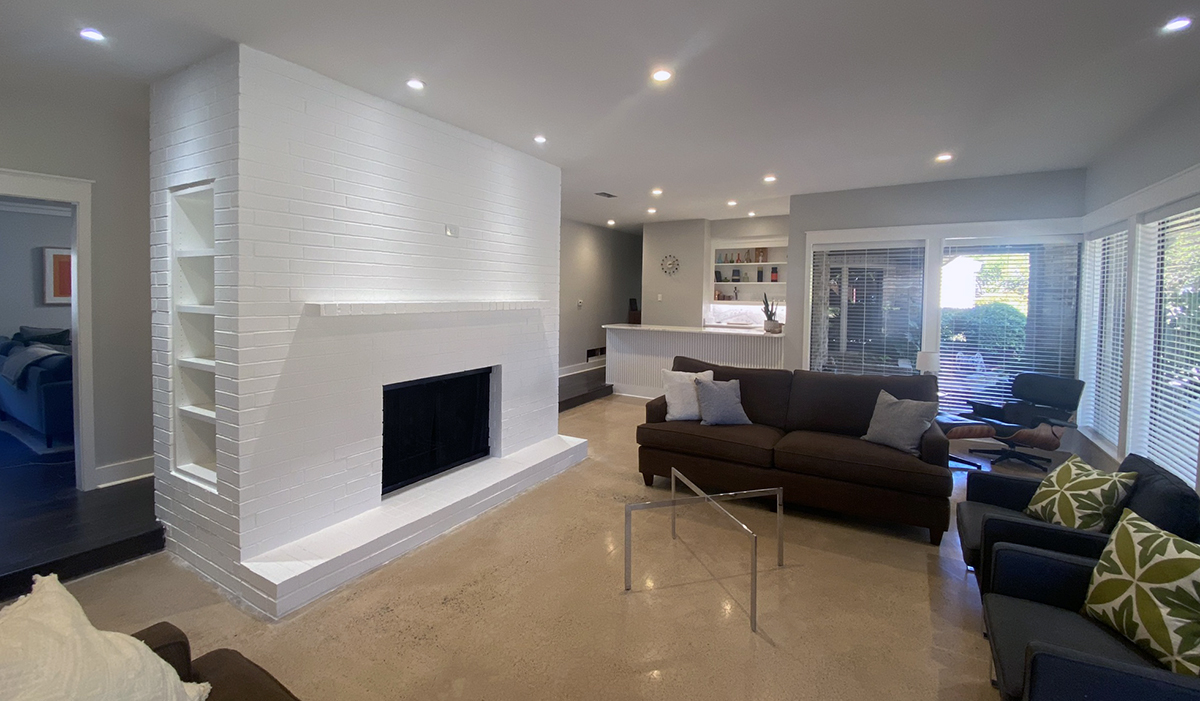
I don’t have the right furniture in the space, this room has been used for “storage” during construction but I did move some of the pieces around to get a sense of scale for how the furniture will be laid out in this room. In typical architect fashion, I am not willing to get the right sort of furniture in this room as long as we still have cats who like to occasionally use the couch to sharpen their claws, but that time is getting closer and I am going to start setting up a savings account for the sole purpose of getting the right pieces in place.
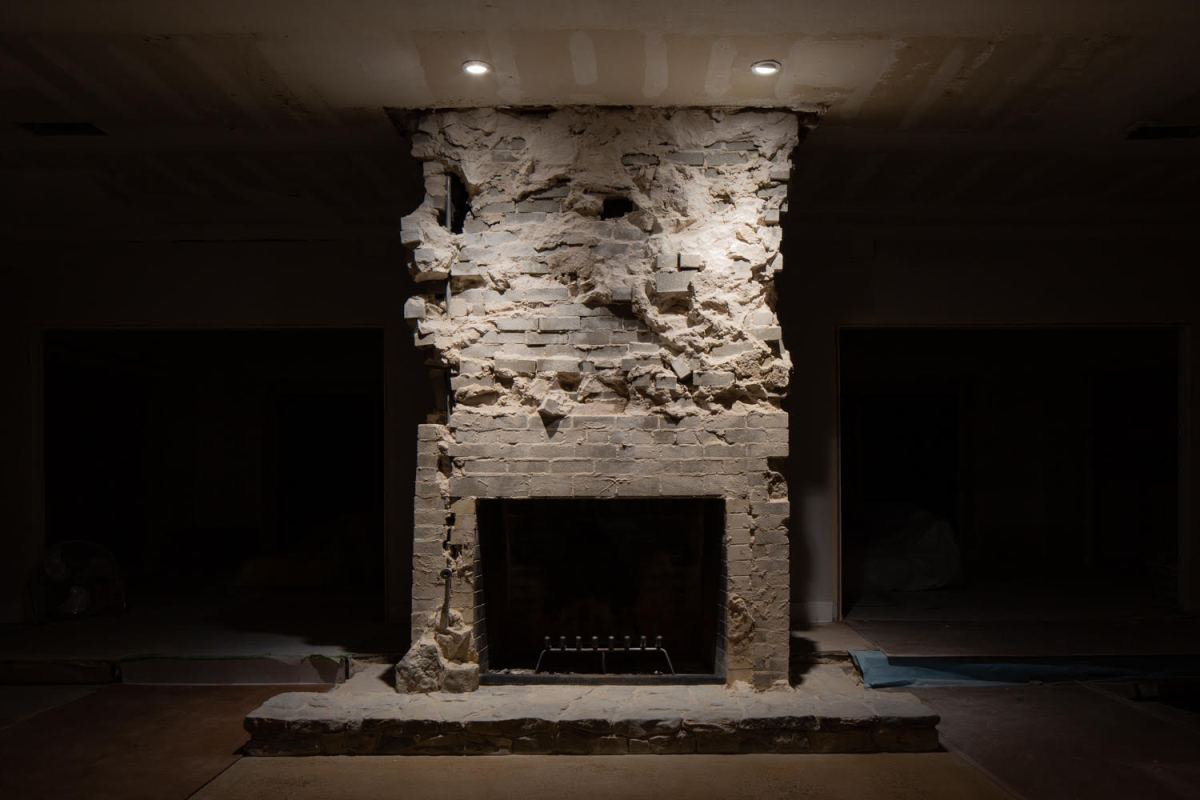
Finally, since I think so many people would be asking if I didn’t show it, here is one of the photos that my neighbor Poul took that is in consideration for framing. Pretty amazing as a framed record of the fireplace … much better than keeping the real thing on display.
Cheers, hope you enjoyed this ridonkulously long update on the fireplace reno in my house. Eventually, I will do one on the millwork at the bar! [eyeroll)

