Welcome to Architectural Graphics 101: Finish Schedules … a topic that I have been thinking about for probably over 5 years. I’m not entirely sure why it’s taken me this long to discuss this particular topic but it probably has something to do with how irritated I get whenever I talk about legends when people don’t agree with me. I am entirely aware of how I sound in that last sentence but I feel like I have to be honest with you in case you have a differing opinion – you won’t get me to change my mind.
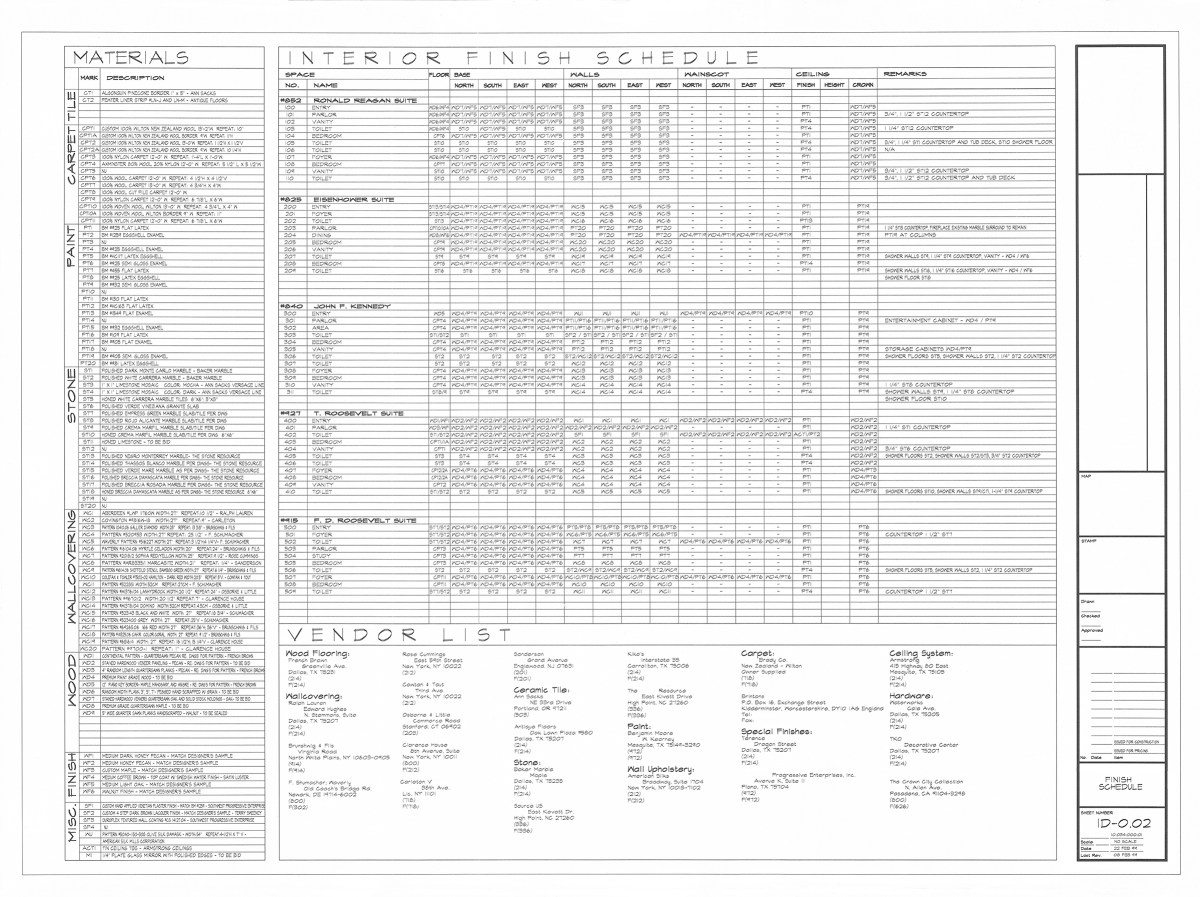
I’m thinking that I don’t need to explain what a Finish Schedule is or why it exists – but if I’m wrong about that just let me know in the comment section and I will explain it. If you spend some time looking at the drawing below, I think you’ll probably figure it out even if you have never heard of a finish schedule before today.

The image above is a finished schedule template that I set up a long time ago – at least 22+ years ago. I was working at an office where I was the only architect on staff and everyone else was an interior designer – I was there just over a year and while this time provided valuable insight and terrific experience to my knowledge base. As a result, I didn’t see a long-term future there since I was basically viewed as “technical support”, a position that didn’t sit well with me at that time in my development.
Anyways.
The thing that bothered me the most with all schedules, and not just finish schedules, is how people interpret how a “legend” works – including how abbreviations come into play. There was a time when I first moved over to this interiors firm where we were struggling to marry up the abbreviations I was used to using versus what the interior designers were used to using. For example … what does the abbreviation “ST” mean to you?
Architects: ST = Steel
Interior Designers: ST = Stone (at least in this particular office it did, we had to debate where “stain” would fit in, I argued that it could go under “Finish”)
Once we can to an agreement on our abbreviations, we had to tackle how materials were broken up in the schedule. In my last office, their pattern was to identify materials by where they were placed (floor, wall, ceiling, etc.) rather than by what they were (ceramic, wood, paint, etc.). The probably with creating a legend around where items are placed is that you could have the same material specified more than once. You could have a Floor Tile (FT) and a Wall Tile (WT), and you could even have a Ceiling Tile (CT) … and they could ALL BE THE SAME TILE!!
That’s bananas.
It is just “tile” and there should only be a single material specification for this product regardless of where you put it. If it’s a different size, or if you are using matte on the floor and polished on the wall, that is a different specification. I should also point out (for you eagle eyes looking to destroy me) that in the schedule I am showing, the abbreviation I am showing in the “Tile” category should just be T-1, T-2, etc. so that you could put ceramic or porcelain tile specifications in this area even though it shouldn’t matter because that’s how legends work.

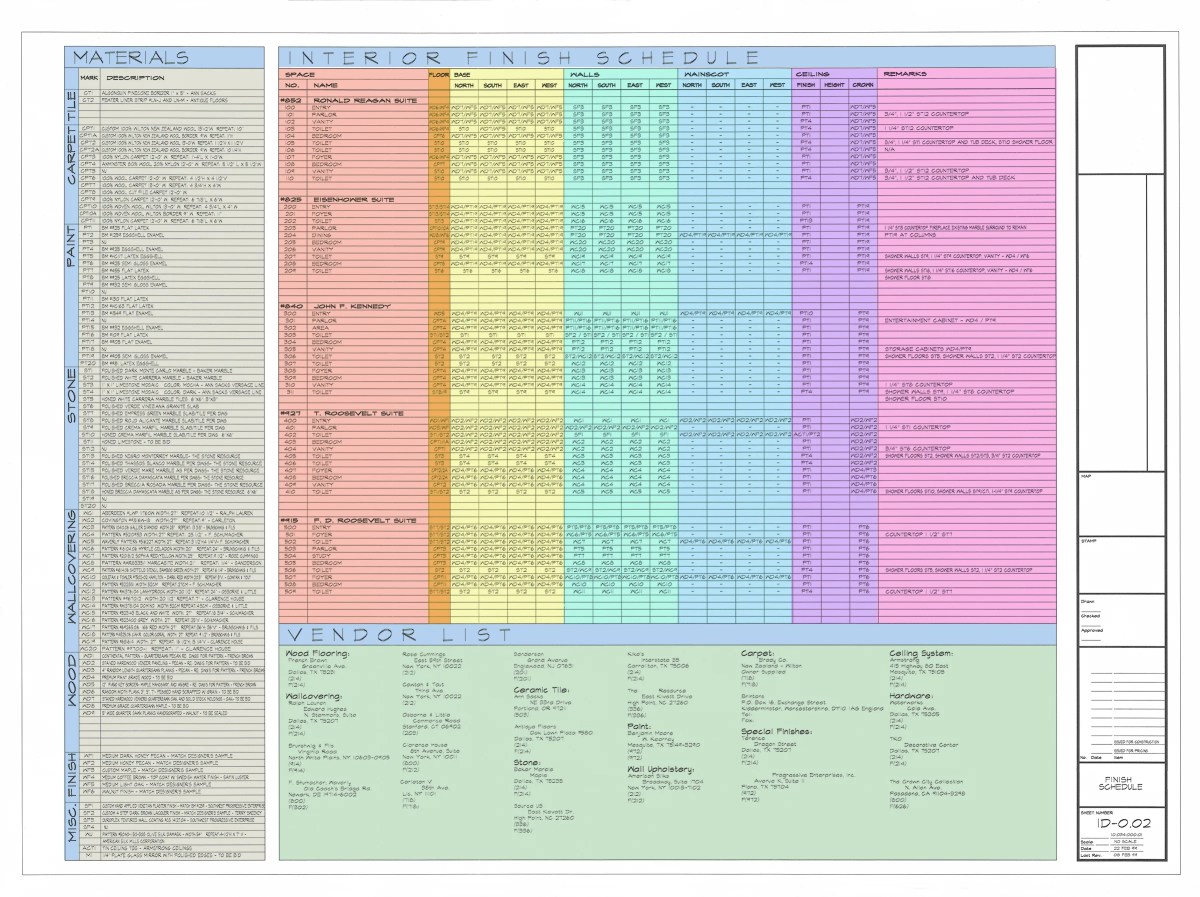
The two main things I want to point out is the Materials Description column and the area which contains the Vendor List, although I have something up my sleeve that I will throw out there at the end. Let’s take them in order:

Materials + Vendor Information
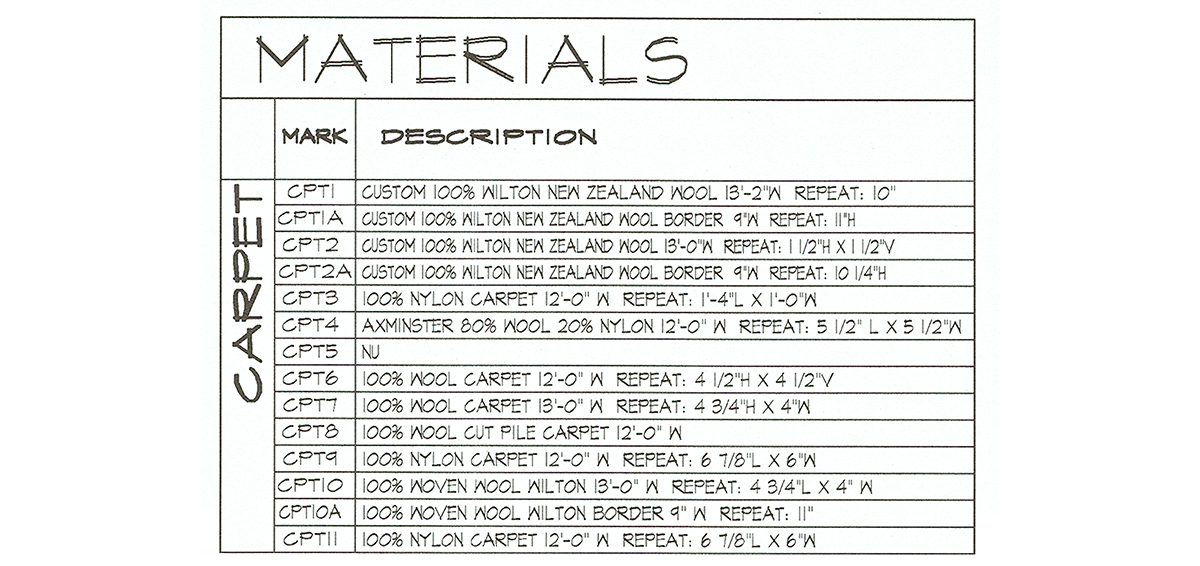
Starting with the “Materials” column, this is a list that contains all the products based on their category (Tile, Carpet, Paint, Stone, Wallcovering, Wood, Finish, and Misc.). In this project, these were all the categories we needed to cover but it is possible to come up with others. For each product, we had an abbreviation associated with the material category (PT for Paint) and then a numerical extension for each product (1, 2, etc.) and this is how we identify which product (or combination of products) go where.
Moving on to the Vendor’s column, it is just what you would imagine. It is the listing of all the vendors, the representative who was helping us, and all their contact information. While it might not seem like a big deal to incorporate this information into the drawing set rather than the project specifications manual – even though that SHOULD be enough – it doesn’t take much practical experience to realize that rarely do all the people who should have both the drawings and the specifications actually have both the drawings and the specifications. Including it here is simply helpful and should help facilitate the end result that we all want.
For all the architects who are reading this, I will readily concede that our interiors finish schedule is a bit more intense than a typical architectural finish schedule (maybe) but columns that we would add (typically in lieu of a “Wainscot” column) are a cabinet type (to identify painted, plastic laminate, and stain grade) and countertop column.
The main thing I want to point out was that we frequently used multiple legend designations in our schedule. You can see in the image above that it happens in several locations but I have gone ahead and highlighted the base finish along the North elevation. You can see that the finish is both WD7 as well as WF5. Seems pretty logical that you would know to use WD7 (Stained Hardwood Quartersawn Oak) as well as WF5 (Medium Light Oak – Match Designer’s Sample). Breaking the wood type apart from the stain type means that we can identify this combination of finishes using fewer intrinsic legend entries. With 9 wood types, and 6 finish types, this could combine for 56 different combinations … but I can cover all of this with only 15 legend entries, which is far more efficient both in terms of my time and taking up space on the sheet.
Finish schedules should exist in some capacity in every set of architectural drawings – and how you present that information matters. Obviously, the goal is to make it easy to find and easier still to understand. It’ll take some time to find which information you need to accurately represent and it is possible that you might have to modify this format between projects – although I highly doubt it. I am a fan of how this particular one is set up since I’m the one who put it together – it makes perfect sense to me. While you might have other considerations that I don’t, this overall format should serve you and the people who need it rather well.
Cheers,

PS – if you want to see other entries in the Architectural Graphics 101 series, topics like Window Schedules, Wall Types, Layers, Line Weight, Drawing Alignment and Notes, Reflected Ceiling Plans, and more, just click here.

