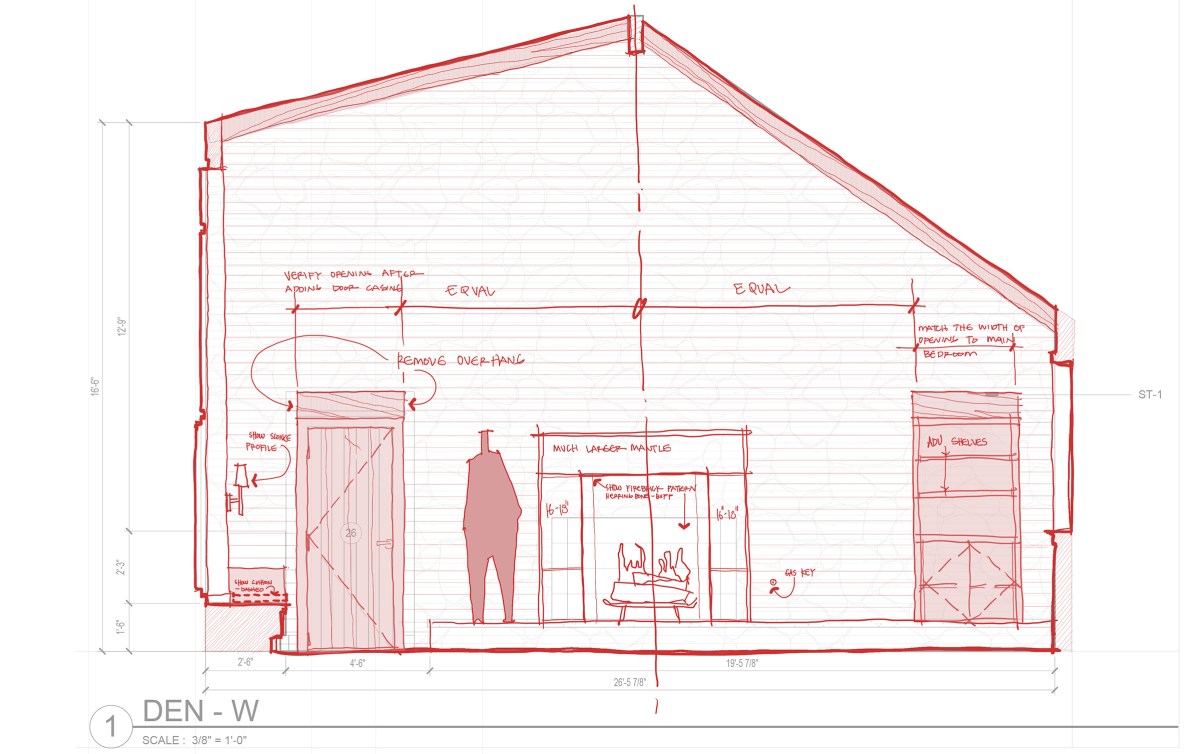
On and off for the last two weeks, I have been reviewing and redlining drawings for one of our residential projects. I wrote about this process a few weeks ago in a post titled Design Process – Redlines and the focus was on the design process and review. I’m not going to rehash that post here but I did get a question the other day from someone asking how I was getting on with my new iPad and I thought I would take just a few minutes and give a partial update. We plan on getting into this question in greater detail a bit later on in the year on the podcast but a little sneak peek never hurt anyone (other than your feelings if you find red ink too aggressive).
So let’s get to it …
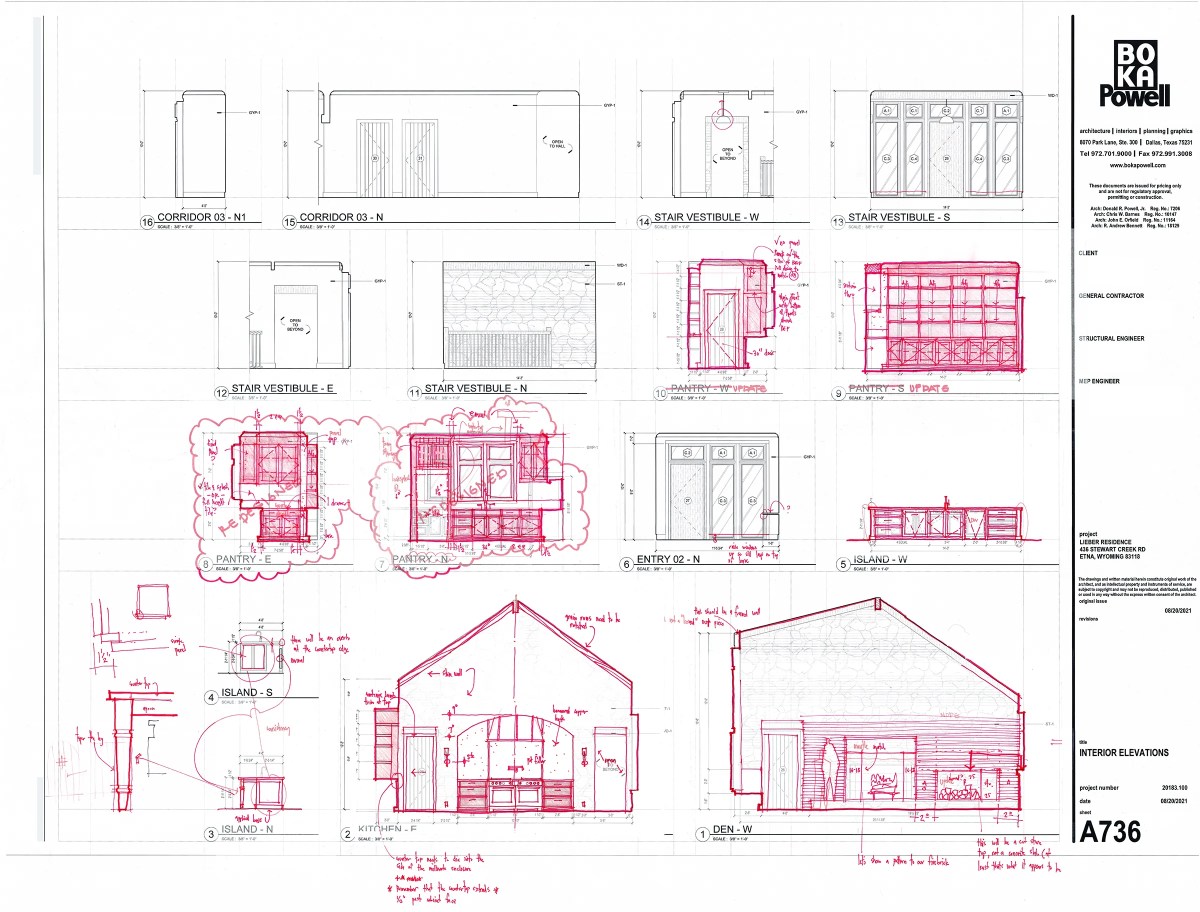
This is what a typical sheet might look like when I am done reviewing things and recording my thoughts. In case you were wondering, I print these sheets out fill size and stand at a table, sometimes for hours at a go (if I’m lucky) and I mark away. I actually prefer to work on these full-size sheets because it allows me to see all of the spaces I am marking up at a glance. Many times I am marking up several of these elevations up at the same time and I actually need to work back and forth when reviewing the work … but let’s take a closer look at one of the elevations –
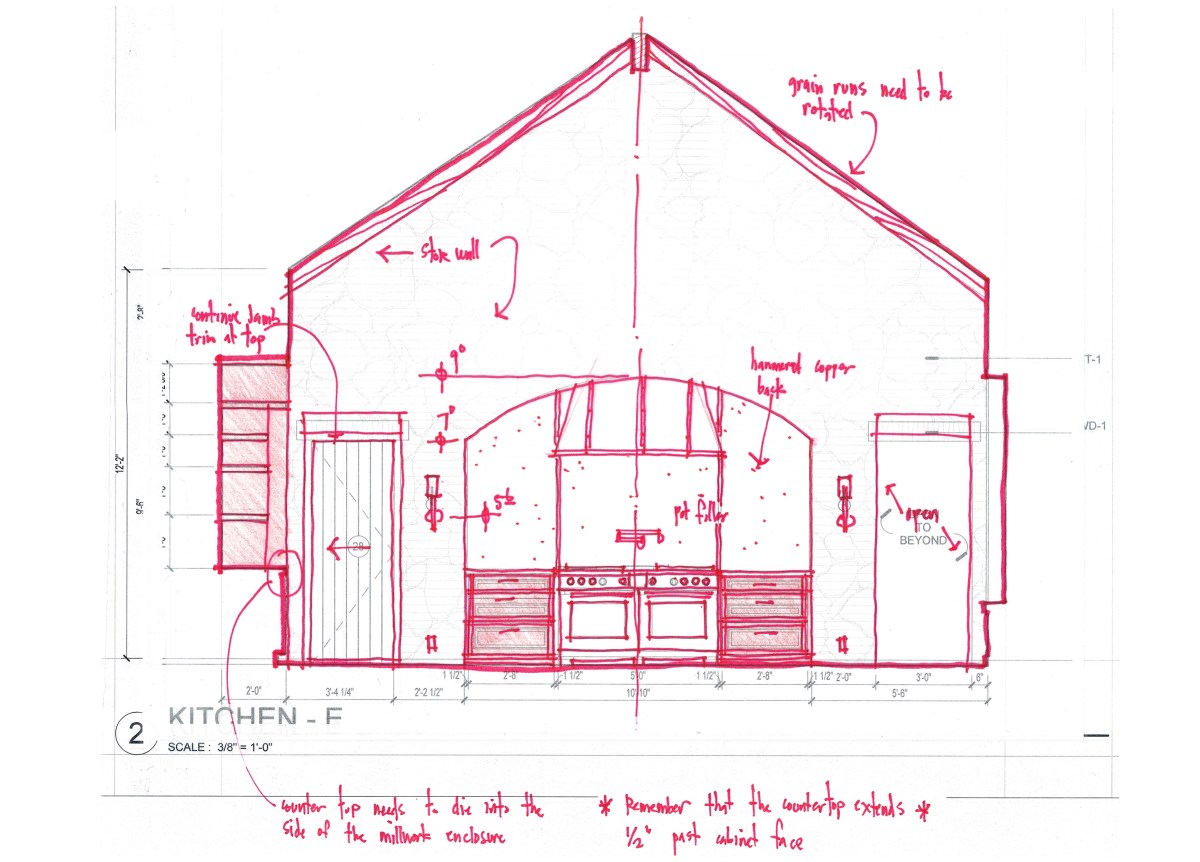
This is a look at the stove wall in this project that we are working on in Wyoming. (You can see some other renders of this project in the post: Renderings for Residential Design). There are some fairly significant changes I wanted to explore and the sketch you see above is about the 4th or 5th layer of trace that I went through before I settled on this layout. From a timing standpoint, this drawing probably took me between4-6 minutes to sketch through – which is neither good or bad – but seemed fast enough to me to not feel slowed down or encumbered in this creative process.
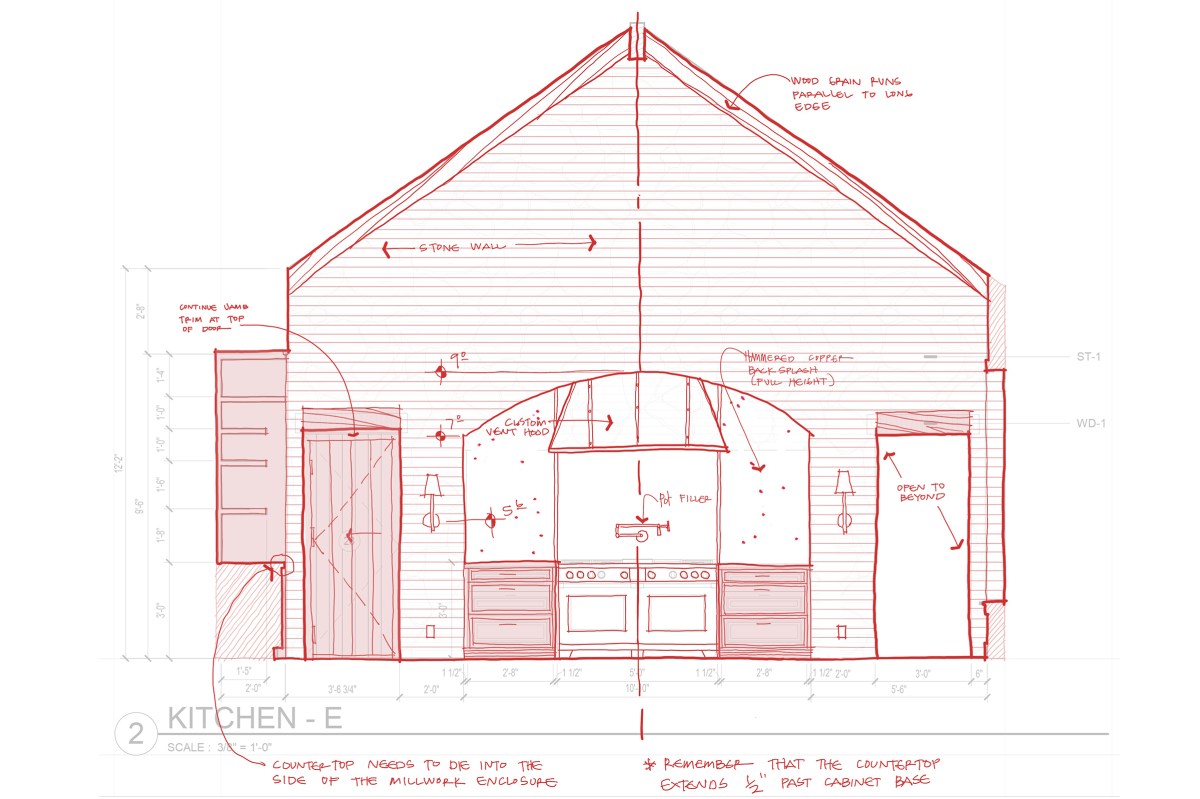
… but I also worked (or at least tried to work) on this sketch using my iPad because quite honestly, being able to sketch on it was the main reason I got it in the first place. SO how did that version of this sketch turn out??
I’d say it turned out pretty similar … however, there are some notable considerations that make this experiment interesting.
Speed – I am considerably faster at hand sketching than I am going through the iPad interface, mostly because I am zooming in and out to make sure that I am drawing where I want the digital ink to go, but mostly because I am dealing with the size of the iPad screen being smaller than the drawing I am working on.
Focus – I will also concede that since I am now zooming in and out on the image, I find myself putting in unnecessary detail, mostly because I am and I am not limited by the thickness of my pen nib.
Setup – getting the images into the software I am using (Procreate) takes a few extra steps and I find myself struggling a bit to get what I want, where I want. I do believe that with time and repetition, I will be able to speed this process up. I do like the ability to export my final sketch directly out of Procreate in a file format that suits my needs, but since I am extra, I still have to bring it into Photoshop so I can resize my images but still keep them to scale relative to one another … so I’m not sure much extra time I am saving myself.
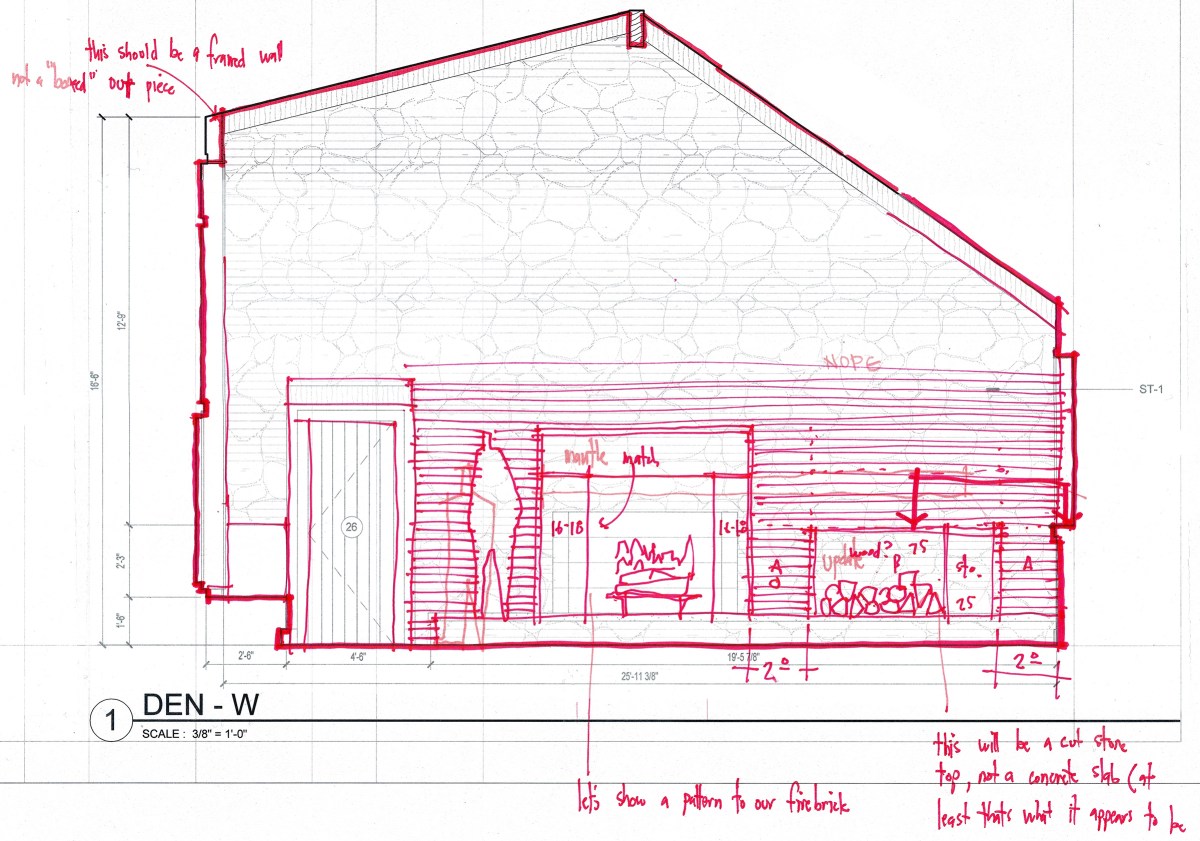
Here is another example – everything is still pretty much the same, just another example of a hand sketch on trace directly over the plotted out elevation. You can actually see both of the hand-sketched elevations I am focusing on in this post in the overall redline sheet I included right at the very beginning of this post. Because these are created as design studies and I expect there to be conversations regarding their final execution, I might actually prepare between 1 and 4 studies when making a fairly significant modification. Even then, and you can see that this sketch is pretty loose and not particularly graceful, it does not take me very long to create this – a few minutes at most.
… this is the same elevation that I prepared using my iPad and I can tell you that this sketch took me 5x as long to prepare. Again, a big part of that was due to my inexperience and I am still experimenting with getting “my” standards in place. Since Procreate has a seemingly endless variety of pens to choose from (I have made three pens specific to my own needs … so far) and I am still messing around with the “penweight” (which is really the pixel size of the line being created). If I want my sketches to have some consistency to them – which is mandatory for me – this is really the biggest hurdle that I am currently working through.
So, is it worth getting an iPad for sketching purposes? I’m going to give it a solid maybe …
Architectural Redlines on an iPad
My experience sketching digitally this time around is substantially better than when I tried this several years ago, enough for me to be encouraged by my progress in such a limited amount of time. I still need to work through the inputs and outputs of the process, reducing the number of steps to getting started or to wrapping up, and seeing the information out as needed, is still taking longer than I want. Currently, I get the most value out of my iPad by using it as a smaller and much lighter laptop and I have started to bring it along with me to meetings for the purposes of taking notes for distribution. I also use a few different pieces of software to coordinate all of my calendars and to make a list of tasks for myself that I can assign to projects and put a deadline to them – something that is an absolute necessity since I am no longer juggling 2 or 3 projects at a time any longer.
For now, consider it an interesting work in progress.
Cheers,


