The process of entering your house is important. There is a sequence of events that should happen from the time someone arrives at the curb and makes their way to the front door, and preparing this narrative of experience is something that we spend a fair amount of time addressing. There is a myriad of things to consider when preparing the entry narrative – things like security (both real and perceived), protection from the weather, is it warm and inviting, does it set the tone for the rest of the house, etc..
We have a project that is close to wrapping up, and by “close” I mean: “the owners have moved in.” The landscaping isn’t done and there are still a handful of punch list type items to address – but – everything was technically ready for occupancy and as a result, the owners move in and as a result, the front door is needed to be done (and this is a post on the front door after all).
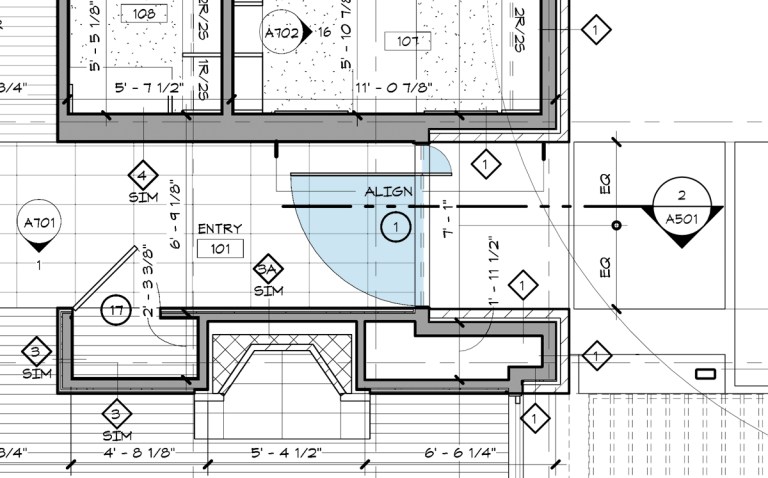
I’ve talked about this particular front door before in a post titled “The Front Door to Your House is Important“, but today I thought I would show how everything came together. The plan for the front door is shown above but I want you to pay particular attention to the arc of the front door – shown in blue. This door is just over 5′-7” wide and is called an “off-center pivot door” because rather than having the door hinged along one side like almost every other residential door in existence, this one is hinged at a single pivot point along the very top and bottom of the door, at a point located some distance off the edge of the frame. As a result, part of the door swings in, while the balance of the door swings out (corresponding with the location of the pivot point). The door is designed so that it is the same width as the entry hallway it serves so there are a handful of coordination items to address to ensure that the interior finishes align with the exterior finishes, a detail that is important when designing a door such as this one.
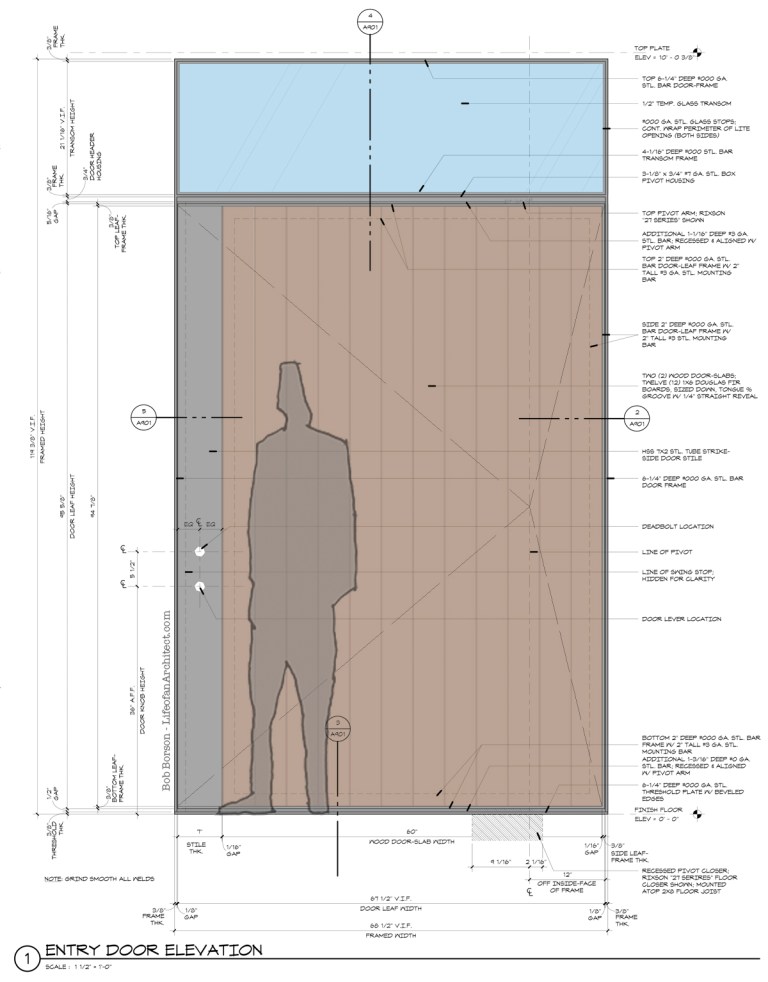
Here is a look at the construction drawing we prepared on this front door. As you can see in the drawing above, this is a large door. At 6′-7 1/2″ wide and just a shade under 8′-0″ tall, this single door is basically the size of two standard sized doors.
Last time I talked about this door, a sub-conversation broke out regarding peepholes – which this door does not have. You’ll see in an image later on that the owner’s elected to install a camera viewing system so that they can see the entire entry porch rather than just the face of the person standing out there.
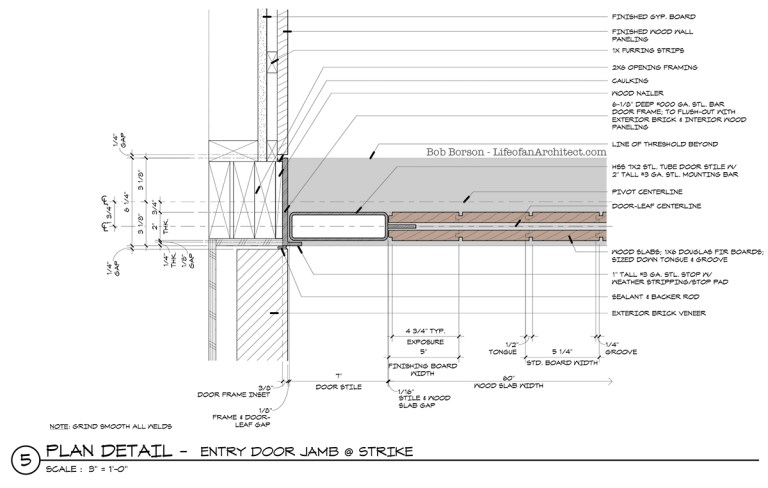
I decided to include the detail for the strike hinge at this door for no other reason to help illustrate how the interior and exterior finishes align with one another. This is a level of detail that I don’t think many people will miss when they use this door. I’ll admit that there are times when architects go to great lengths to achieve certain details that are completely missed by 99% of the people who interface with their projects. While I think those details typically have merit, whether or not most people notice them enough to acknowledge their existence, this is not one of those times. The execution of this detail did present one special consideration to resolve … can you guess what it was? I’ll tell (show) you what it was towards the end of this post but until then, I’ll let you try to study the detail above and figure it out for yourself first.
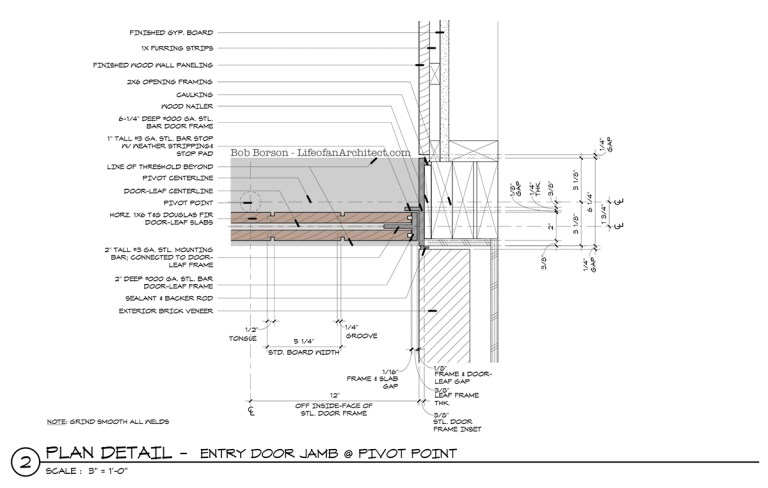
This is the hinge side detail – opposite the strike side detail one image previously. If you look at the drawing above, you can see that 12″ off the face of the steel edge, is the location of the pivot hinge. You can also see how the interior finishes align from inside to outside once again … you have to do it on both sides or you lose the effect.
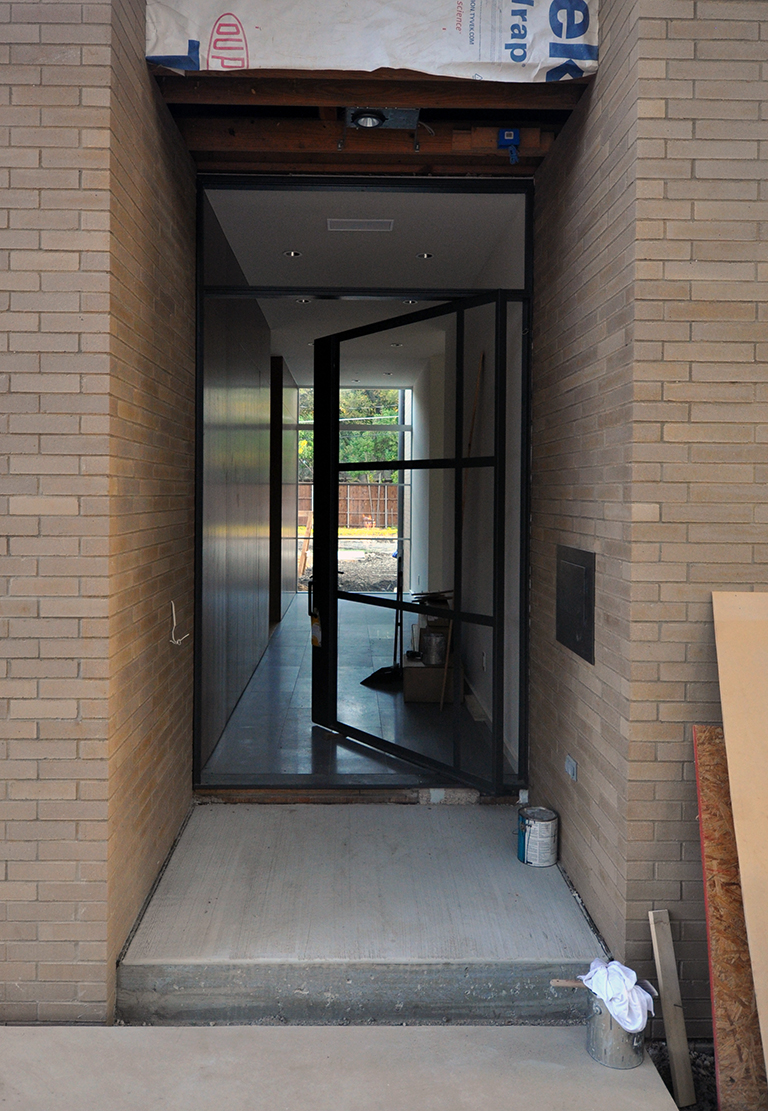
Here is a look at the steel frame of the pivot door and the fixed pane of glass that is the transom above the door. The horizontal steel members provide a place to attach the individual wood boards that make up the finished face of this door. The exterior wood boards are set and then screwed into place through the steel frame. The interior boards are primarily glued into place and further secured using hidden finish nails set through the slot of the tongue and groove profile of the boards.
I should also point out that the entry porch will be finished in slabs of Leuders limestone to match the window sills and the caps of the low walls that surround the front entry patio. (Check out the steel trellis seen in this post – it is part of this entry sequence along with the floating concrete pads used for the entry sidewalk) .
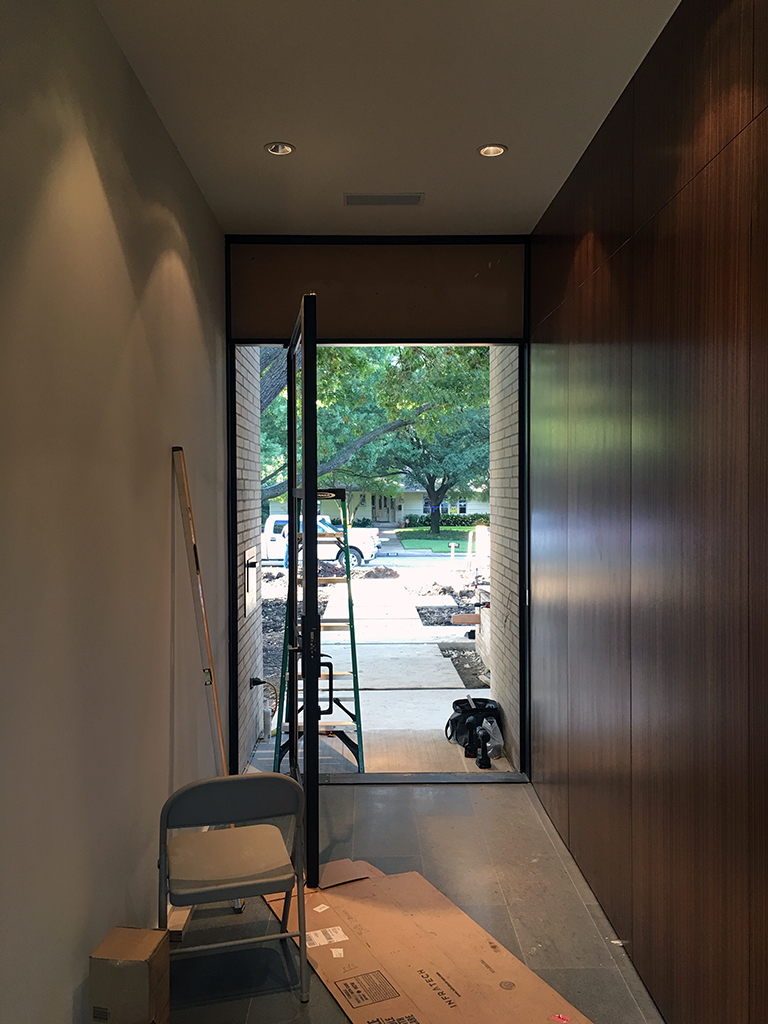
This is a pretty good look at what I mean when I say that the interior and exterior finishes align through the door opening.
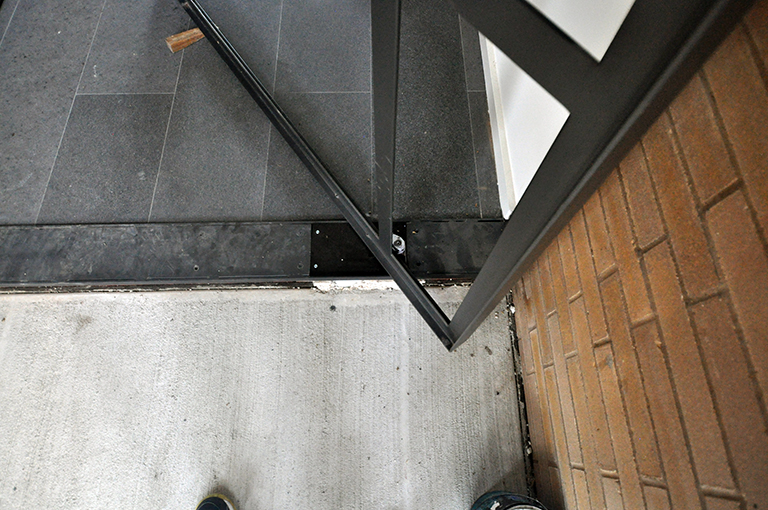
Here’s a look at what the off-center door pivot looks like – you don’t actually have to look at most of it since it’s recessed into the concrete slab. This sort of installation allows us to keep the threshold from the interior floor finish almost level with the sill of the door. We lower the finish floor level of the exterior porch by 2 1/2″ so that we end up with a 1/2″ threshold once the Leuders limestone slabs get set.
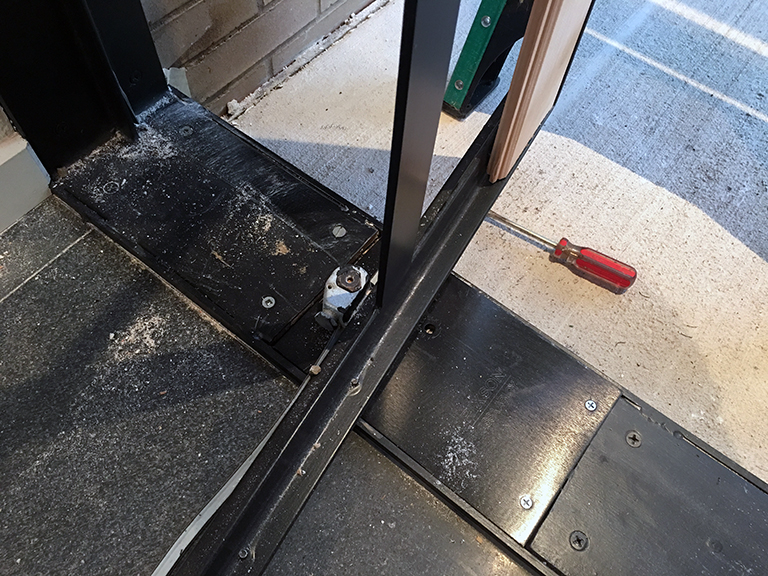
We are using tongue and groove Douglas Fir boards as our finished door veneer – you can see how the interior frame holds the interior and exterior faces of the wood boards off from one another by 3/8″ – the thickness of the steel we used.
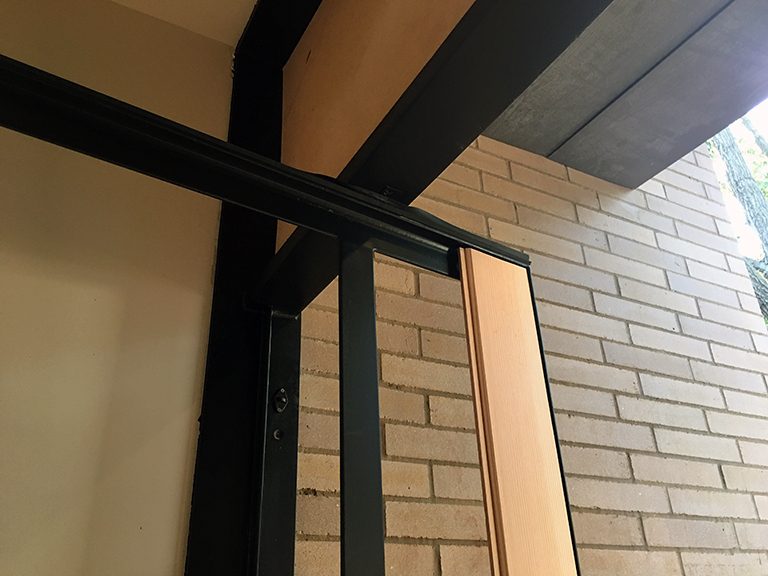
Here’s the top of the off-center pivot hardware (basically a pin that allows the door to rotate) as well as how the top of the Douglas Fir board sets into the steel frame.
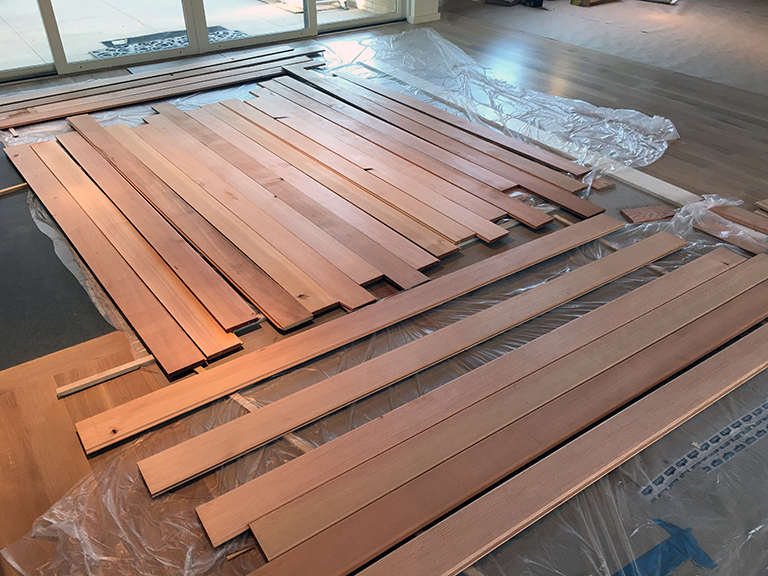
We specified Douglas Fir as the wood for the front door because it’s terrific as an exterior grade wood. You can specify Douglas fir in two major categories – board grades and timber grades. Another way of thinking about it is by its appearance and for its structural capacities. The highest appearance grade you can get is “clear vertical grain”, which is what we wanted for our front door. Doug Fir can go red on you with exposure to sunlight so you have to be careful when staining if you want to keep the tone in the brownish range.
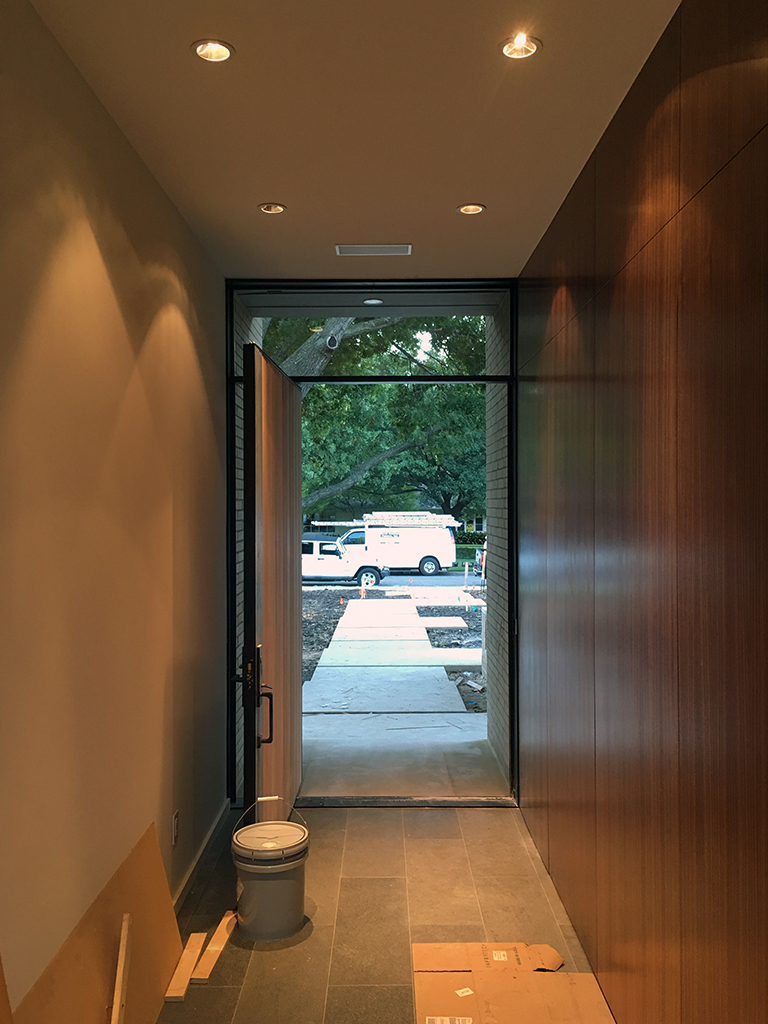
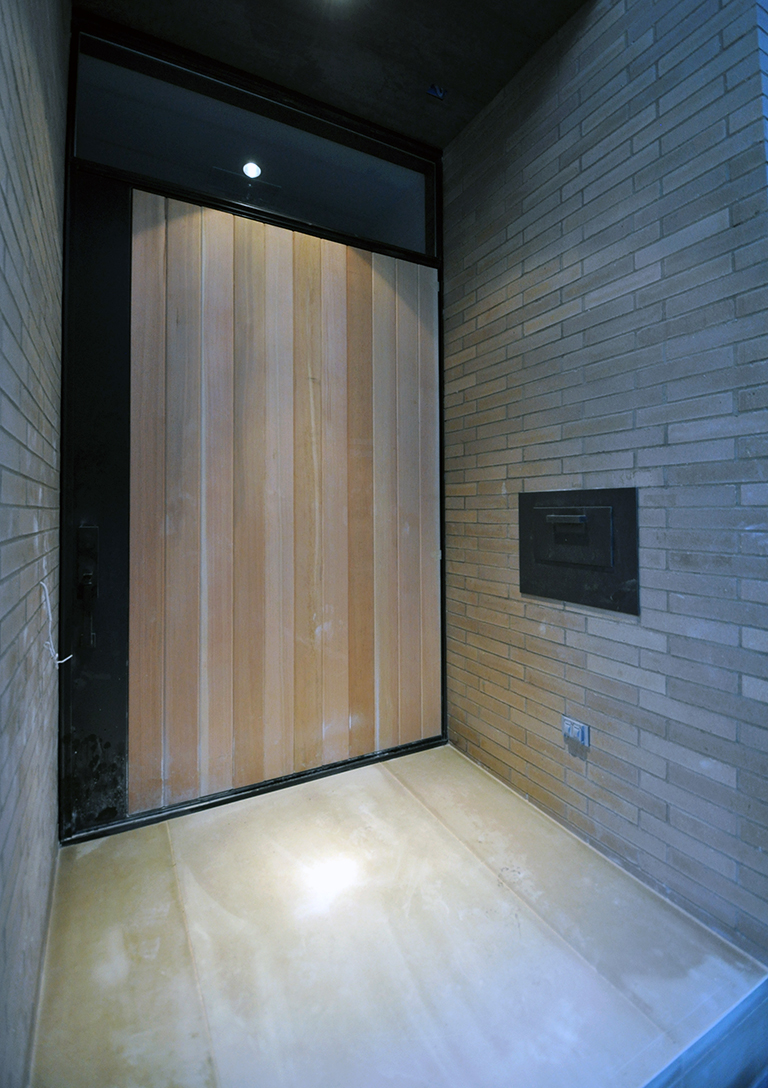
Other than receiving the stain, the entry door at this point is basically completed.
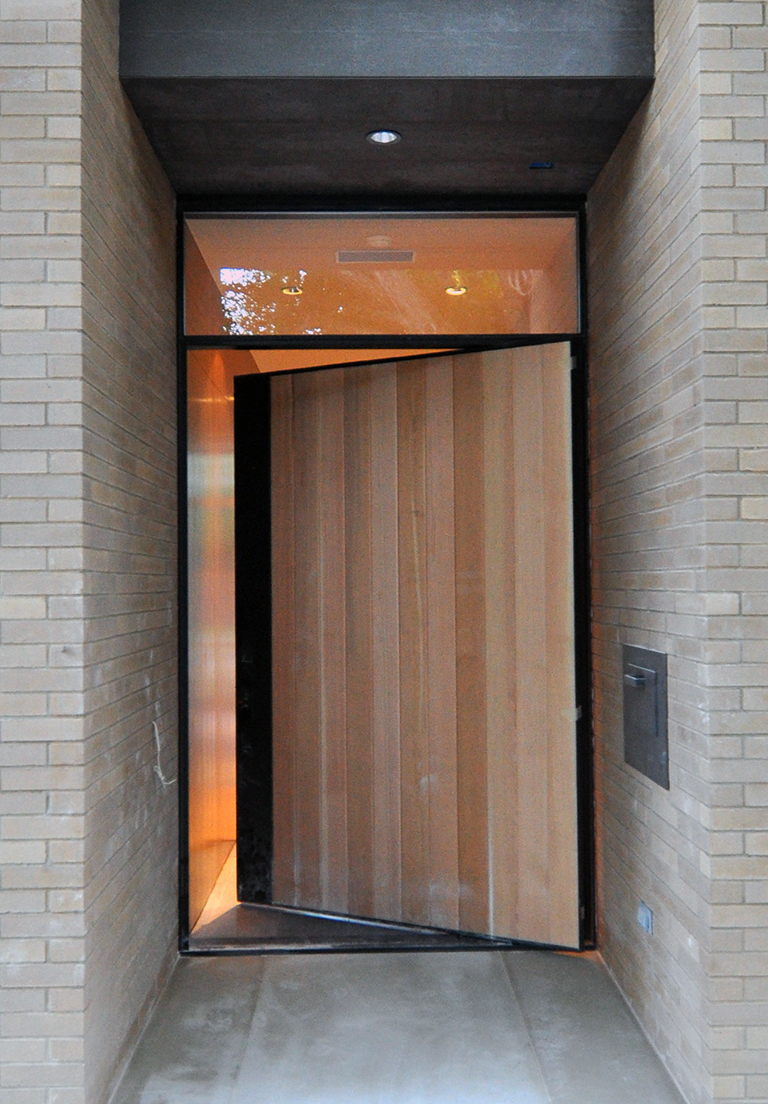
The Leuders limestone slabs have been set at the entryway, glass is installed at the transom, even the G90 metal paneling is set at the soffit level … time to clean the door and start staining.
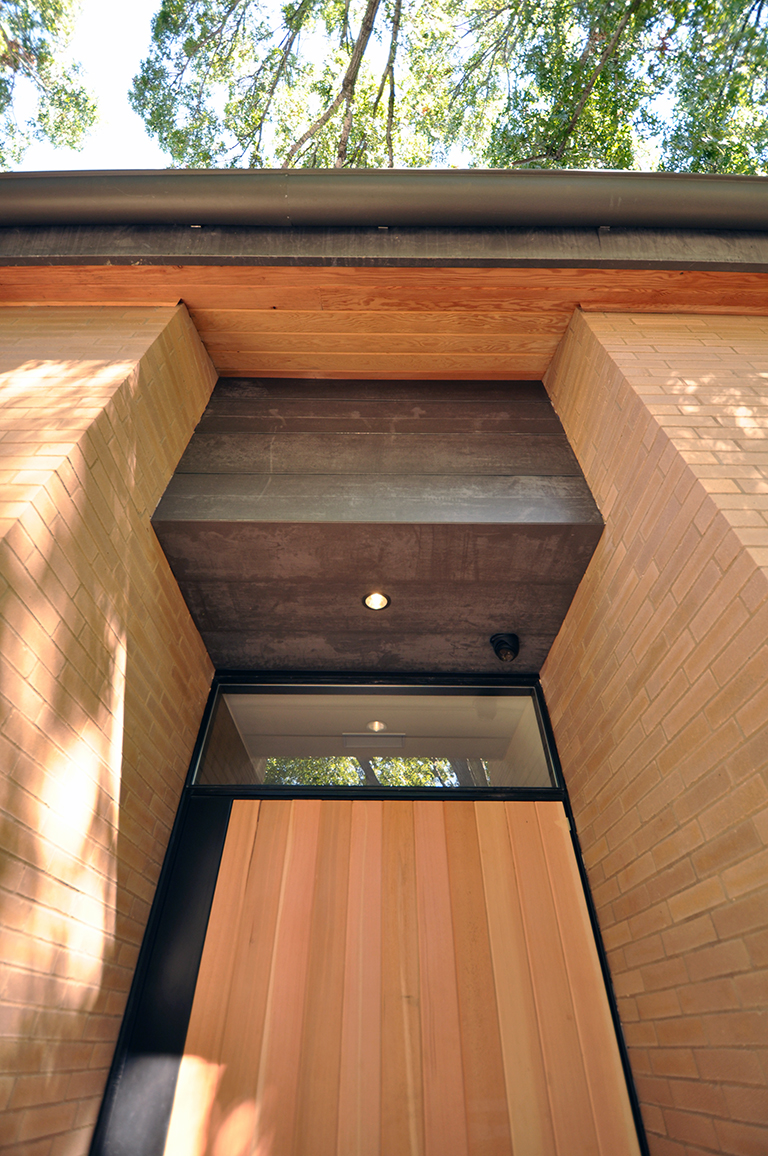
I thought I would include one dedicated shot of the G90 soffit above the entry. This is one of those pieces that has a long story behind it that only one or two people actually know. Originally the building massing of the house was broken along this entry corridor and there was a flat roof separating the two geometries – but as a result of a handful of modifications and budget considerations, the lowered flat roof was eliminated and the pitched roof continued above this entry corridor. I still wanted to delineate the building massing so that required a material change. This was accomplished by interrupting the brick from one side to the other, changing the plane of the exterior wall, and by introducing a new material – in this case, G90 metal siding. This is one of those gestures that I think most people might miss, although I think subconsciously something would have felt off if this architectural gesture wasn’t executed.
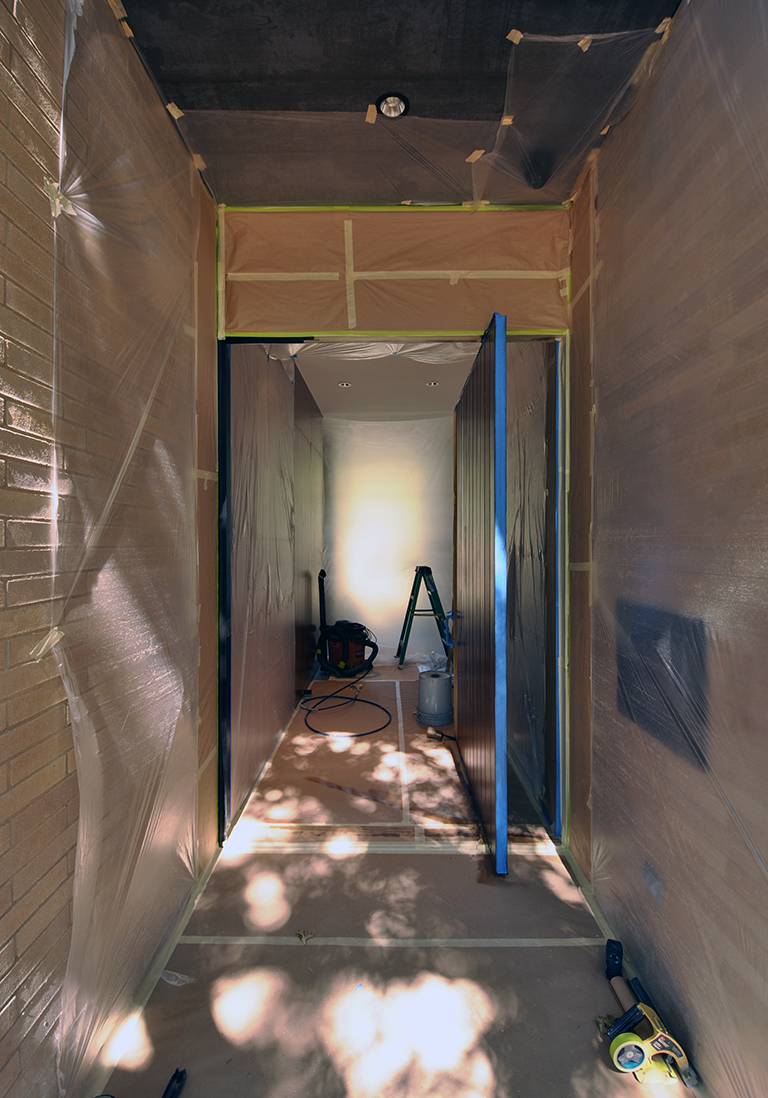
Even though the stain for the entry door was all done by hand and with a brush, everything was masked off to protect the surrounding areas. This is one of those “attention to detail” items that lets me know that I am working with a subcontractor who cares about the big picture. Who gets excited about seeing protective paper and plastic everywhere? Me! … I love it.
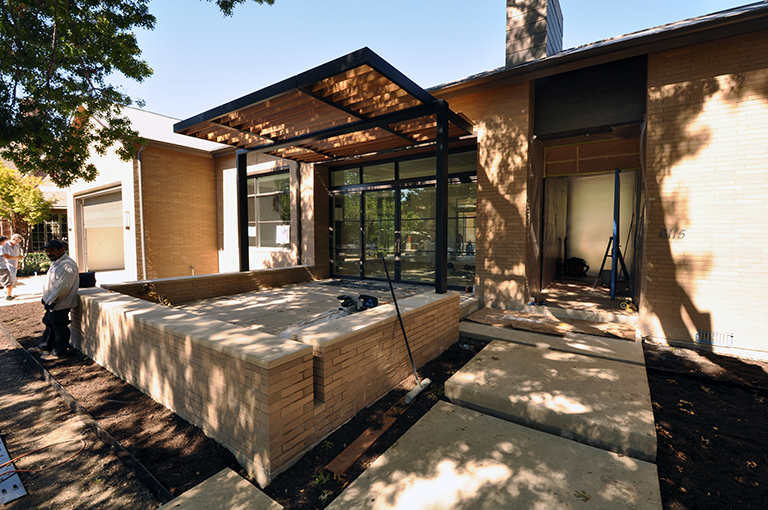
There are three things that are contributing to the entry sequence narrative in this home … the floating concrete pads for the sidewalk, the front entry patio and trellis, and finally, the oversized off-center pivot entry door.
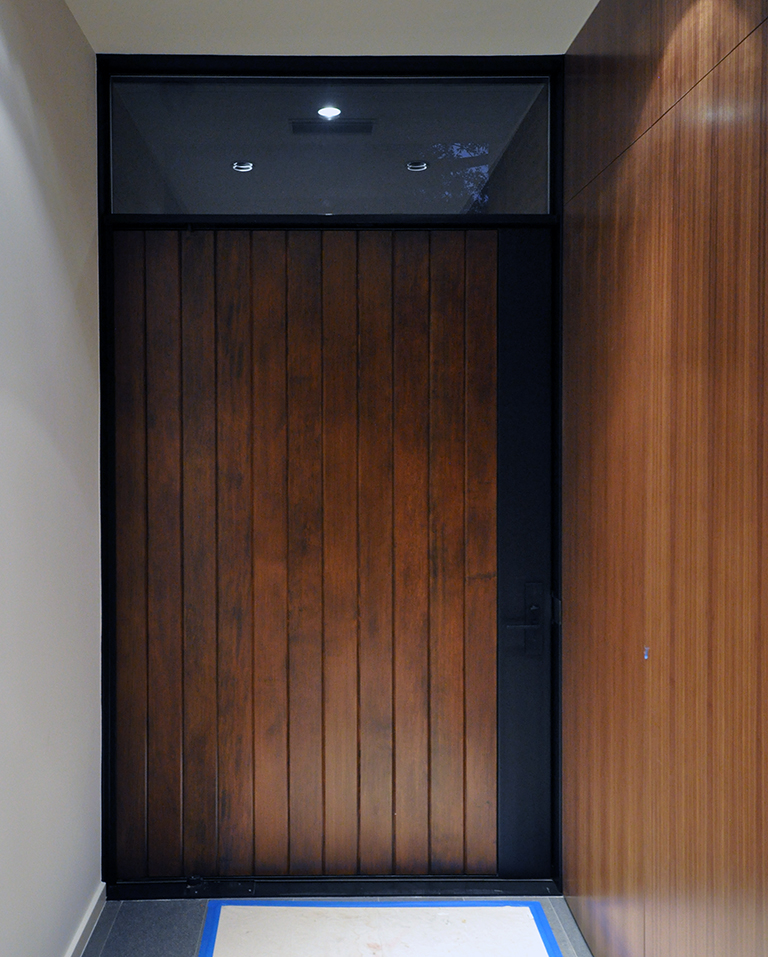
And finally the interior of the door as a finished product.
I’ll be glad when this project can be professionally photographed … my camera doesn’t seem to be working anymore, or maybe I’ve always taken crummy photos. Either way, these pictures don’t do this door justice.
Do you remember the strike side construction detail issue I mentioned at the beginning of this post? Did you figure it out what the special issue was that we needed to address?
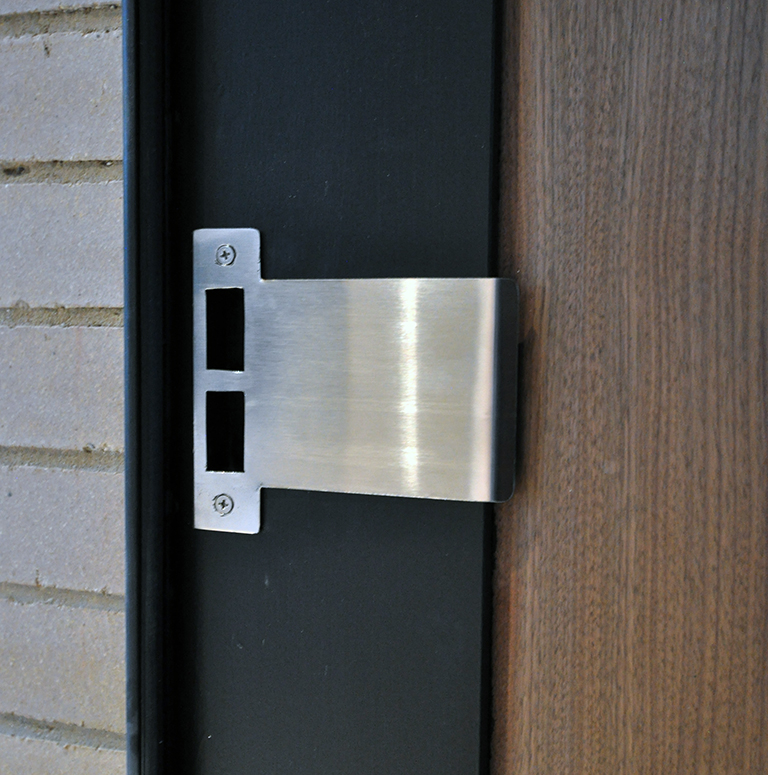
Did you think it had to do with the strike plate? Bonus points for you if you did. Because the interior and exterior materials are in alignment, the catch on the door hardware had to be filed down so that it wouldn’t rub along the finished millwork paneling on the wall. In addition, the catch would have rubbed the paint off the steel jamb over time (and by “over time” I mean “the first time”). The solution was pretty easy – we just made a strike plate the was the length of the door jamb.
If you figured all that out from looking at the strike jamb detail, you are amazing at thinking in 3-dimensions … that or you have gone through this before on one of your own projects.
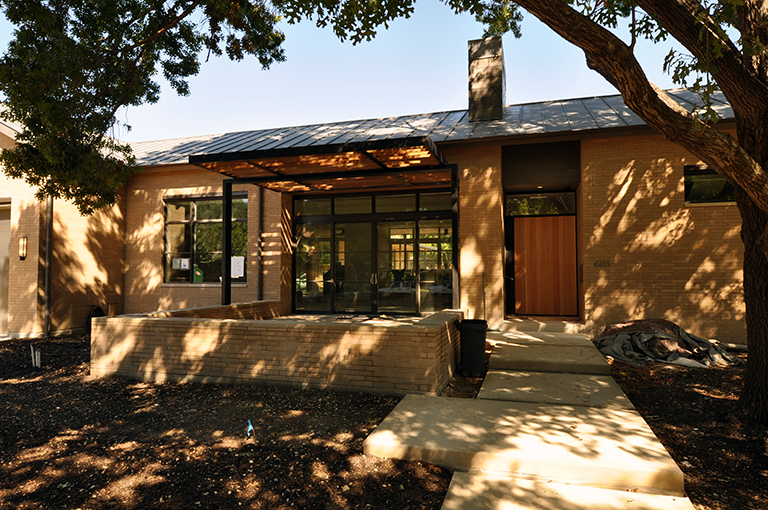
Eventually, I will replace this last image with the final product – something that also includes the surrounding landscape. I find myself cruising by the house on my way to work just to check out the progress of the installation – the landscaping is the final piece that brings everything together and I am anxious to see it installed.
I am really happy with how this entry sequence came together – it was everything that we had envisioned and I know that anybody who drives by this house will be able to imagine what it will be like to walk up to this front door. I read an article years ago that stated that people take 90 seconds to decide whether or not they like a house, and the first 45 of those seconds is spent from the time they pull up out front to the time they make it to the front door. With an entry sequence like this one, I don’t think anyone will need those next 45 seconds to make up their minds.
Cheers,

