Architectural concept sketches, construction details, construction photos … these are the sorts of posts that are both my most favorite, and least favorite, to put together. What makes them enjoyable is that they force me to reflect back upon a process from the original concept through final execution, and then evaluate what did and didn’t work. This is an important process for me because I am a big believer in trying to understand why things worked so that I can duplicate my successes without replicating my solutions.
These types of posts are a pain to write because they take forever to put together and there will always be those people who want to redline my details after the fact. I’ve grown a thick skin so it doesn’t bother me as much as it used to – particularly when the suggestions are offered in the spirit of furthering our collective knowledge.
Onward!
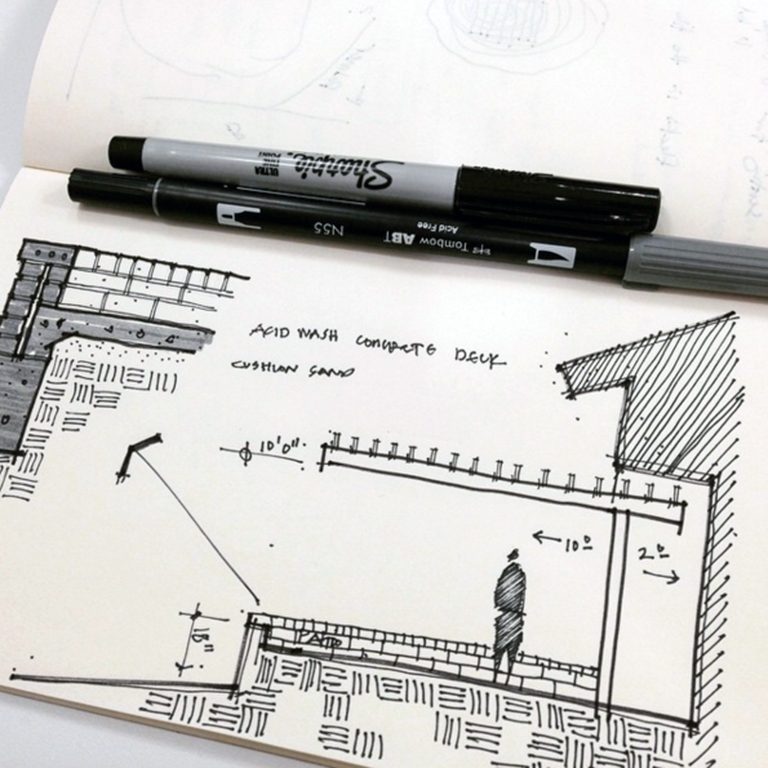
The drawing above was my original concept sketch from June 2015 – pretty simple and direct … and a little unrealistic. It would have been something to create this trellis structure with a 10′ cantilever (in the end, the largest cantilever was 5′-4″).
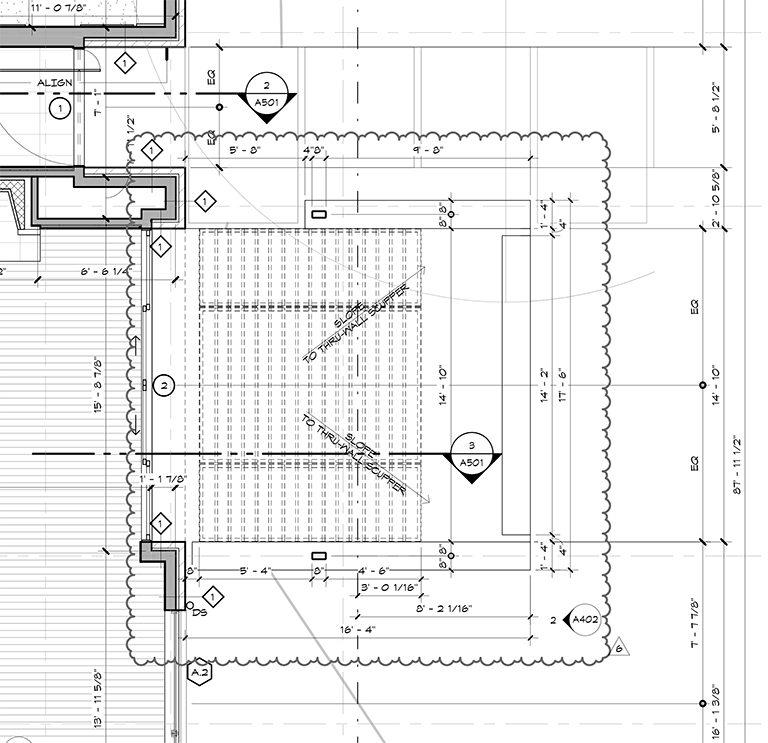
I decided that I would include some of the construction details for a few reasons: mostly to help give some scale to this front porch and steel frame trellis, but partially because I get asked to include more technical drawings in my posts. The floor plan above is focusing in on an elevated front porch that is a visual and physical extension of the main living room to the inside. The interior footprint of the exterior porch space is large enough for a nicely sized seating arrangement of chairs (approximately 15′ square) with part of the space covered by steel trellis, and part open to the sky above.
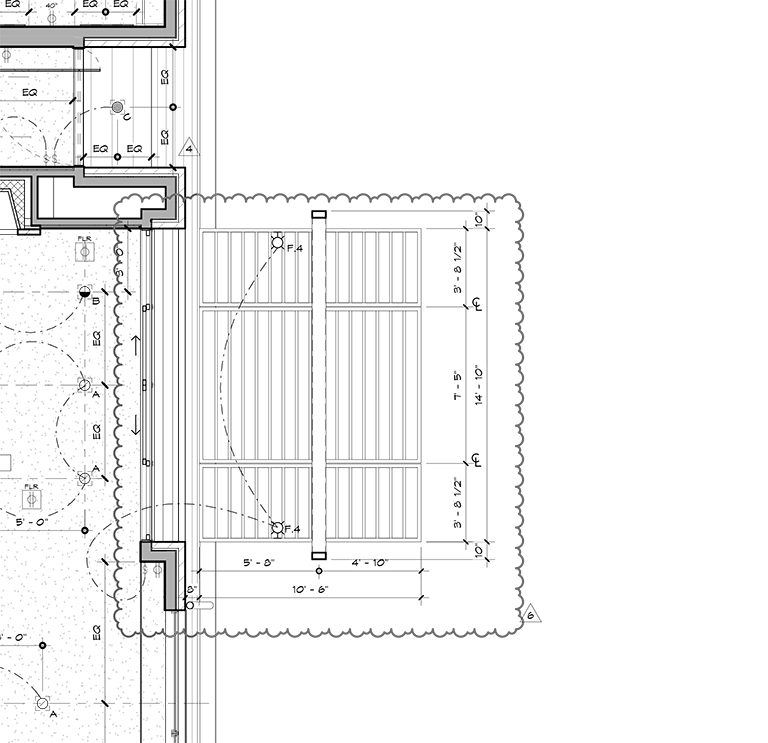
Here is a look at the “RCP”, which stands for “Reflected Ceiling Plan”. I had to explain to a contractor the other day why these plans were called “reflected”. If you were to simply lie down on the ground and look up and the plan above you (in the same way that a plan is you floating above the floor looking down) the ceiling plan would be reversed from the floor plan view. A reflected ceiling plan is the same idea as a floor plan but it’s as if the floor was covered in a giant mirror so that the ceiling is reflected in your view … that’s what keeps the plan orientation the same.
Did you know that? #themoreyouknow
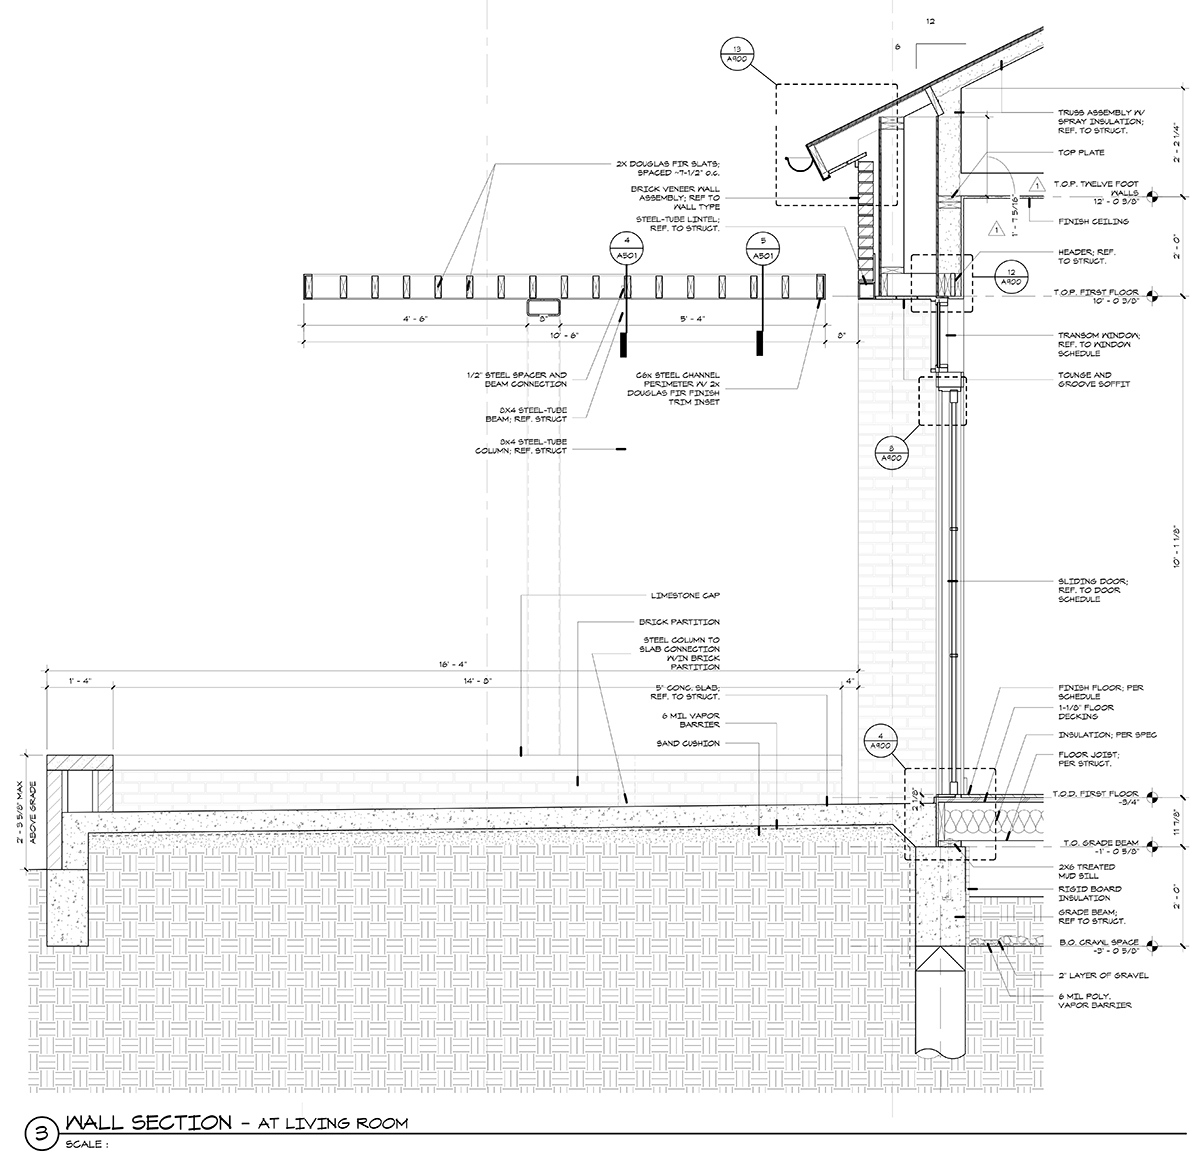
Finally, I am including a wall section through the house and the front porch/trellis. There are a few things in this drawing that are different from my initial concept sketch but overall, I’m pretty happy with how the initial design held up.
So let’s take a look at how this thing came together in real life …
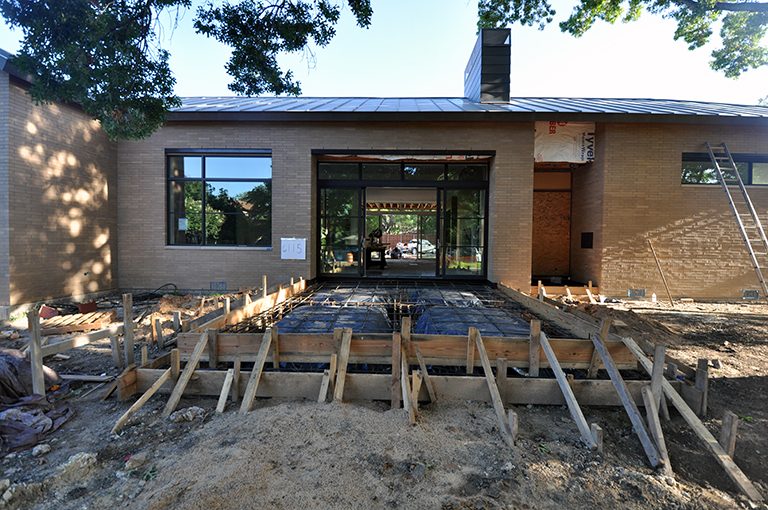
This front porch and trellis were one of the very last things to get built – which drove me a bit crazy. This element was extremely important to the massing of the house and the overall entry sequence. For the vast majority of the construction process, this element was missing and it threw everything off. By the end, I was begging the contractor to start building this area out.
And it came together extremely fast – and I missed a bunch of photos of this process. One day there was nothing … and the next day all the concrete formwork and steel were in place.
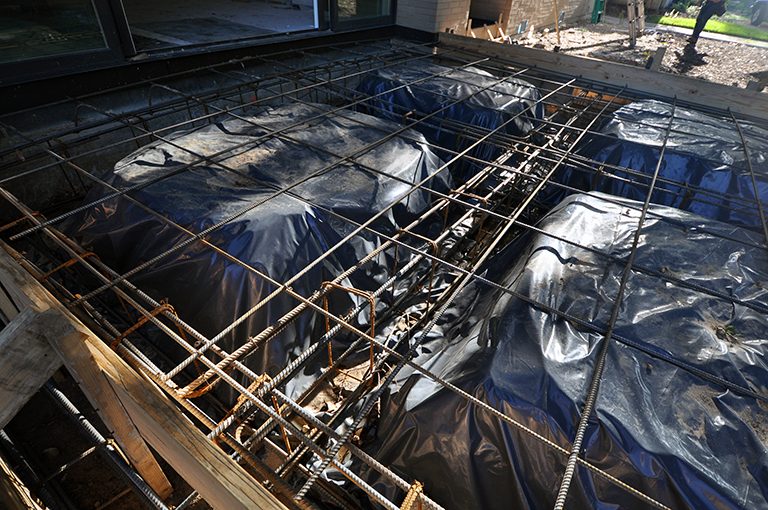
Because of the cantilevered trellis, there is a fairly sizable grade beam that runs through this slab. I’m not going to try to explain everything that’s in this photo other than to say that there are grade beams that run around the perimeter and then through the middle of the slab in both directions. The shape of the 4 elevated parts that you see are defined by the surrounding grade beams and that should help you visualize how the concrete is formed structurally.
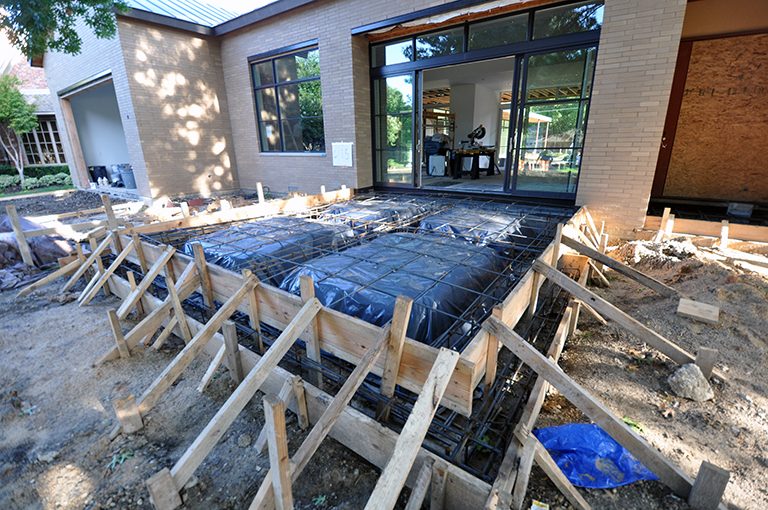
The reason you see two rows of concrete form boards is that we are creating what’s called a “brick ledge”. This is what you have when there is a wall with brick on both sides, but the brick on one side of the wall goes down further than the other. That’s because the finished height of the concrete slab of the porch is higher than the surrounding ground – and since we didn’t want a bunch of concrete being exposed, the brick on the outside face of the wall goes down lower than the interior portion of the wall.
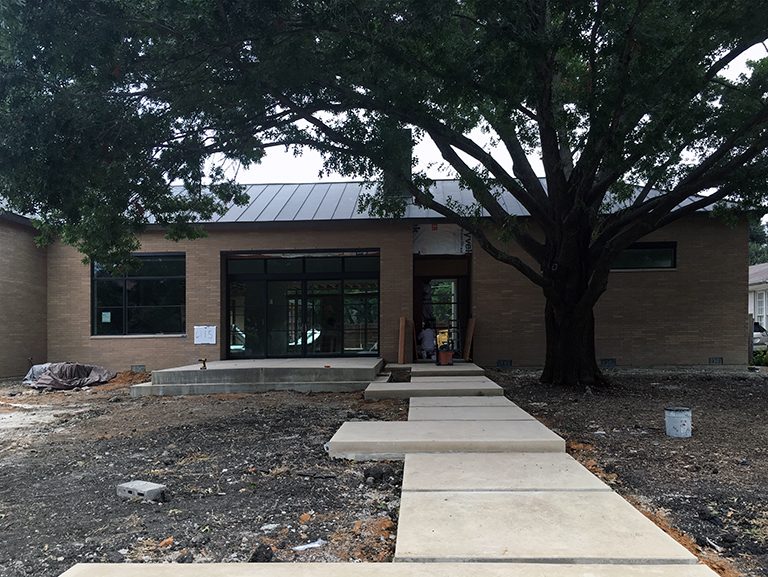
Next thing you know, the concrete has been poured and the formwork has been removed. I thought this would be a good picture to show because you can clearly see the pitch of the concrete on the porch (to help direct and shed water). You can also clearly see the brick ledge.
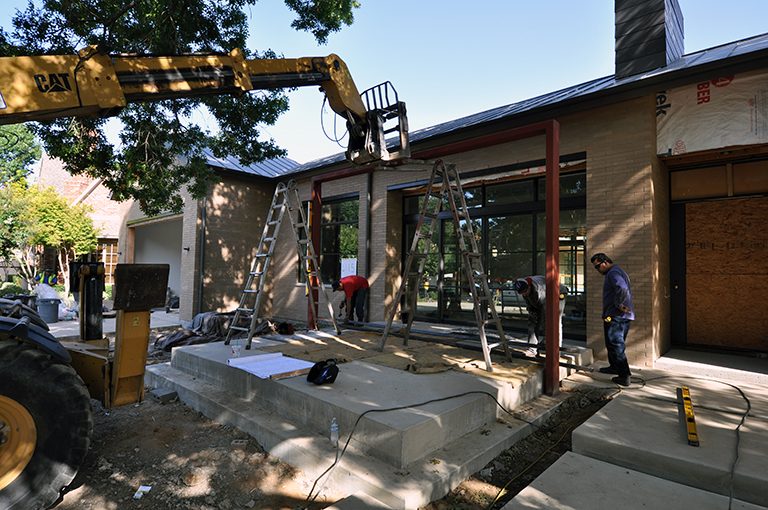
Fast forward a few more days and the steel for the trellis shows up for installation. Most of the fabrication work was done in the shop so the guys who installed this piece showed up and got their work down in a single morning. In the picture above, they are setting the main supports – which is an 8″ x 4″ rectangular section of tube steel.
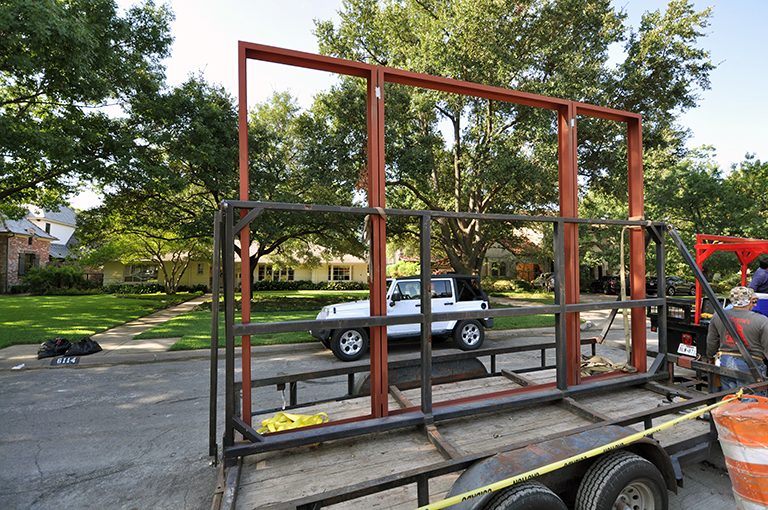
Next came the trellis portion. As you can see in this picture, the trellis is formed into 3 rectangular sections. You might not have noticed it in the plan drawings above, but those breaks coincide with the portion where the doors slide open. (maybe you want to scroll back up to the plan and take another look …)
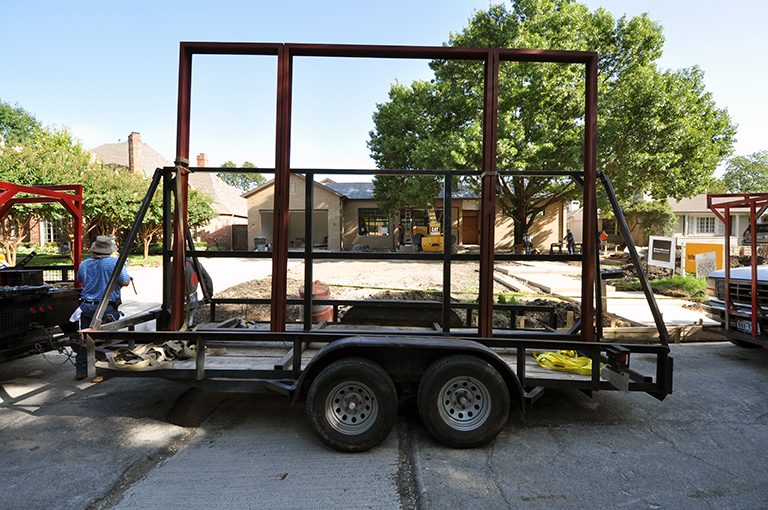
Here’s another view of the steel trellis. One thing that is slightly more apparent when you are on site and standing underneath this trellis, is that there is a 3/4″ gap between the metal frames for each section. It would have been a lot simpler to make this portion of the trellis into a single element, but this is a level of detail that we believe people notice. I definitely know that I notice these sorts of gestures.
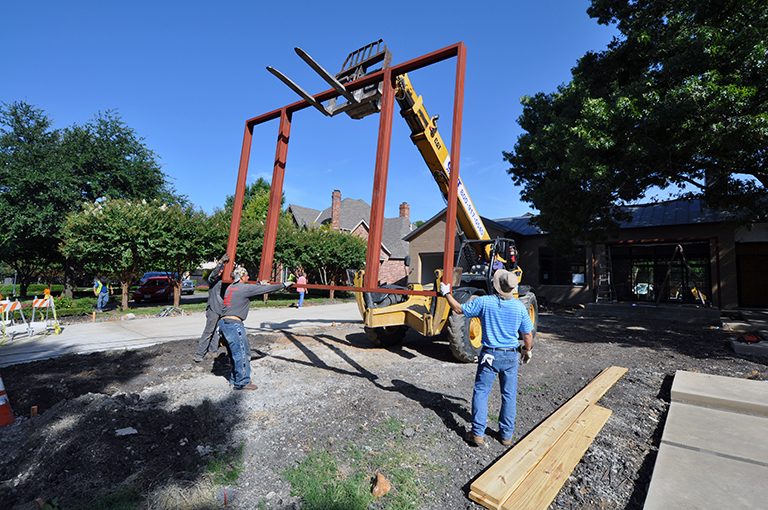
I actually have about 100 pictures of these steel fabricators moving this trellis into position. This guy was really skilled at operating this equipment.
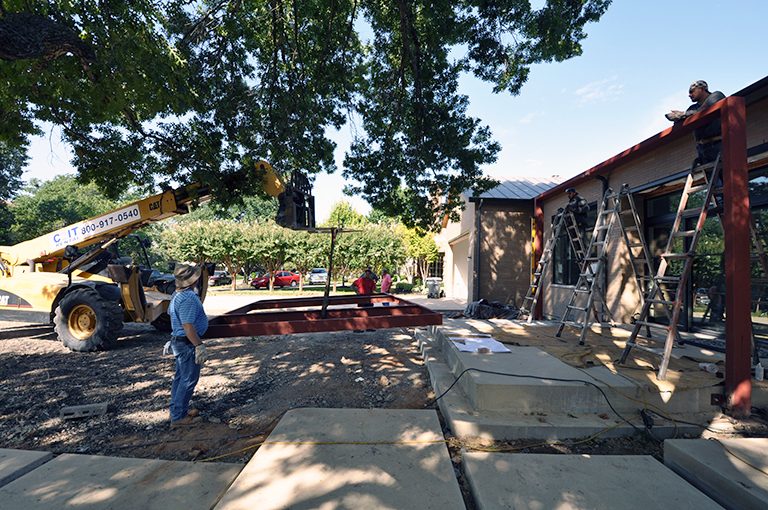
Once the trellis was in position on the ground, the fabricators tied it off to some straps and lifted it into position. This was a nerve-wracking time for me. They had to slide this fairly large element up and underneath the canopy of the very large oak tree that is in the front yard.
There was also the part where I thought someone was going to die in the most gruesome of ways … specifically, the two guys standing on ladders over by the main support.
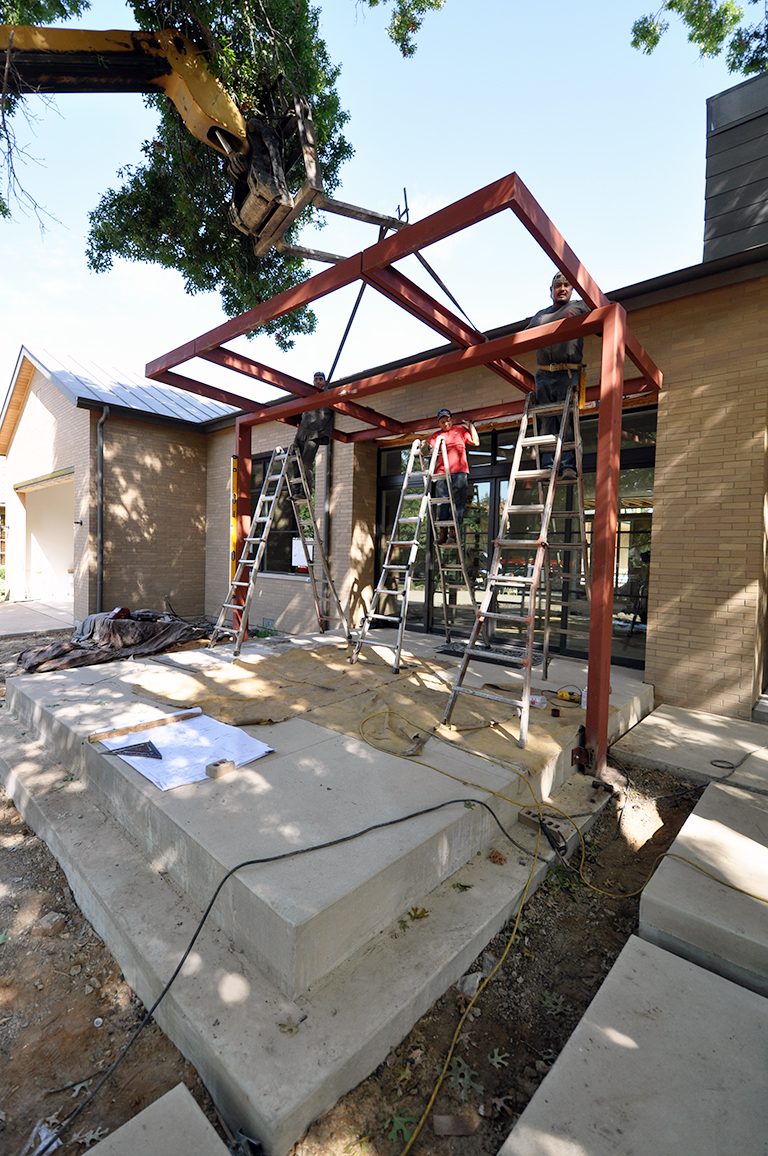
I asked the foreman on the job if this was safe and he literally looked at me like I was the dumbest person he had ever met. I don’t know if it was dumb because “Of course it isn’t safe!” or “Of course it’s safe!“. Either way, I really didn’t want this trellis element to slip and blunt force trauma those two guys on the ladders into four half guys.
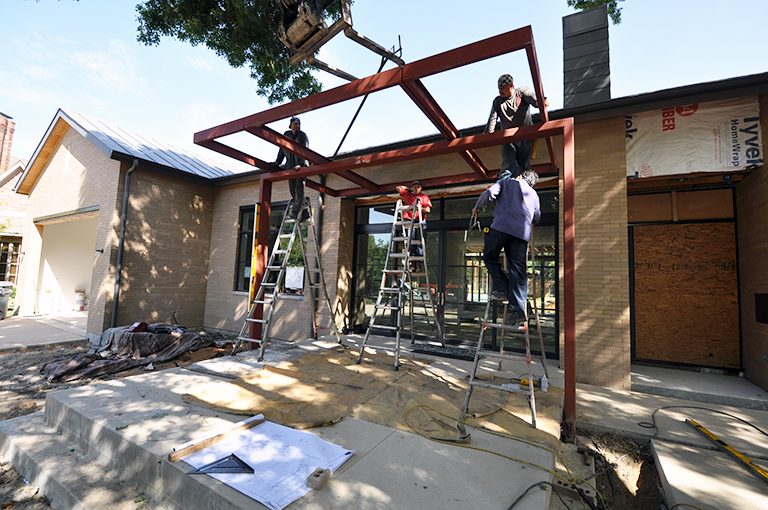
One more picture but after that I couldn’t take it anymore … I had to leave. I went a got a sandwich and when I returned an hour later …
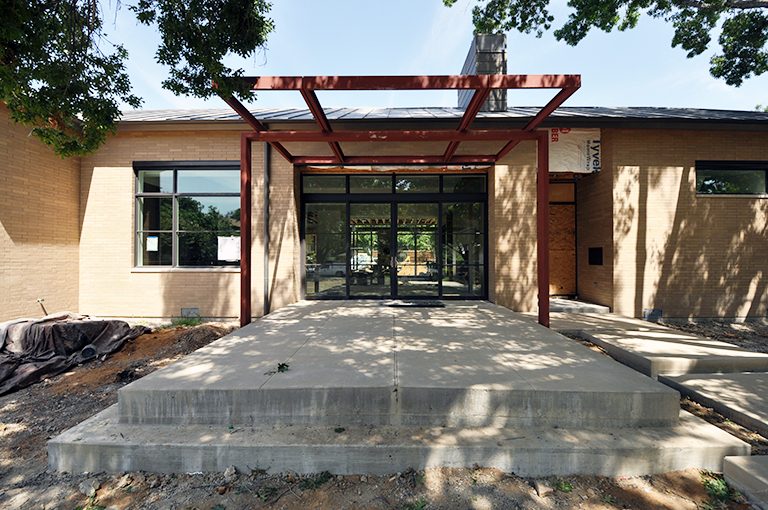
Done.
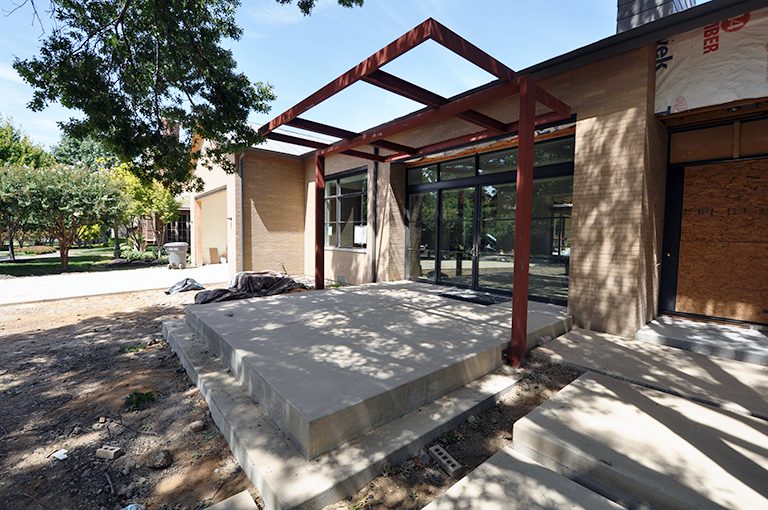
So far, so good. Things are coming together, now it’s time for the low wall that will help define this porch as a specific space.
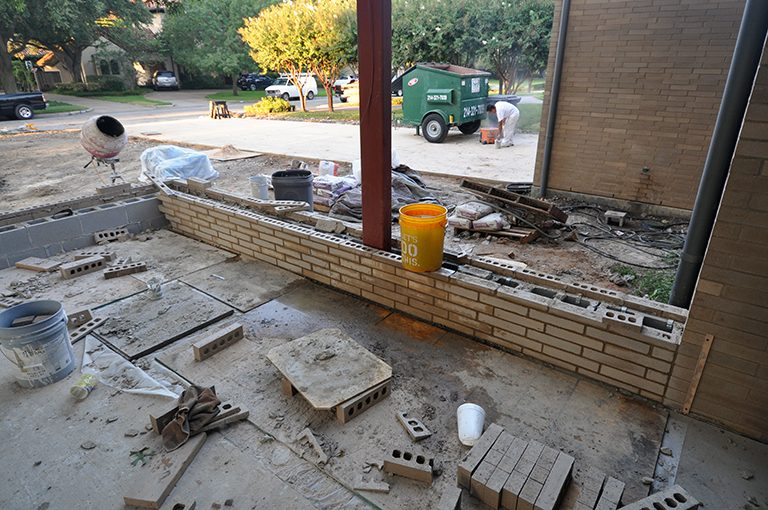
Boom. Brickwork.
Can I just tell you how spoiled we are here in Dallas with the masons available to us? These guys were amazing and it has become par for the course, that however good you think you are at laying out brick and thinking through all the issues, these guys are always better. Take a close look at how the brick joints align from the main house to the low wall. Perfect. Now take a look at the bottom most course of brick. Do you see it?
The porch is sloped to the front corners so that water will run out. Because of this slope (and because we wanted the brick joints to course out with the main house) the bottom row of brick are all cut to follow the pitch. That’s pretty nice work if you ask me.
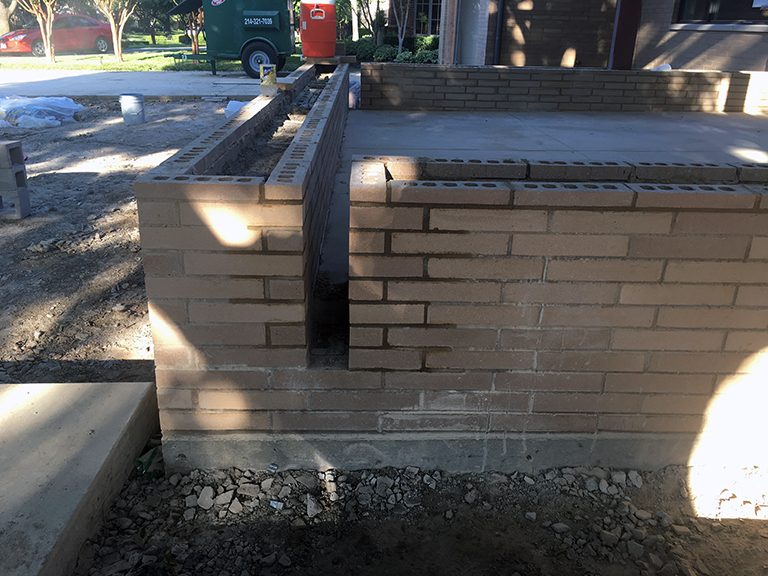
Here’s a closer look at the gaps we put into the wall to allow water to run out. It turned out to be a very simple solution but a very nice bit of added detail.
But how do you deal with the bottom of the gap where the water comes through?
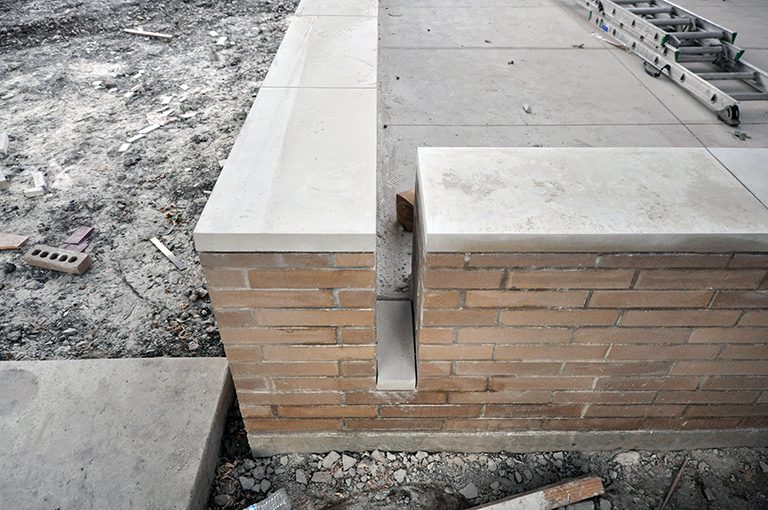
We added a piece of Leuders limestone to flush out with the top of the concrete porch with a slight taper to help convey water to the perimeter.
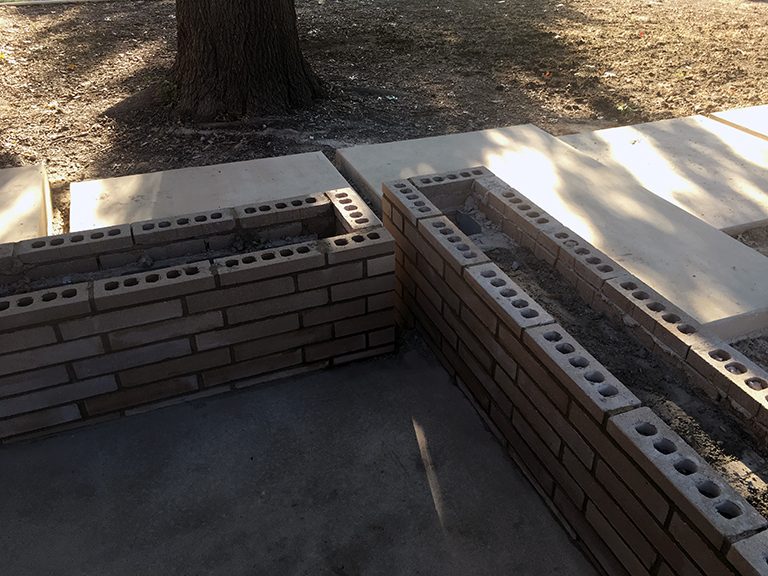
One more look …
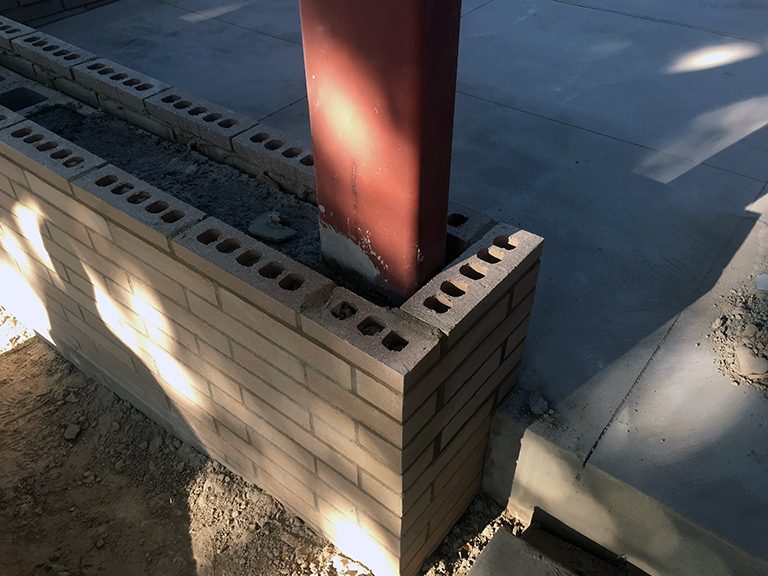
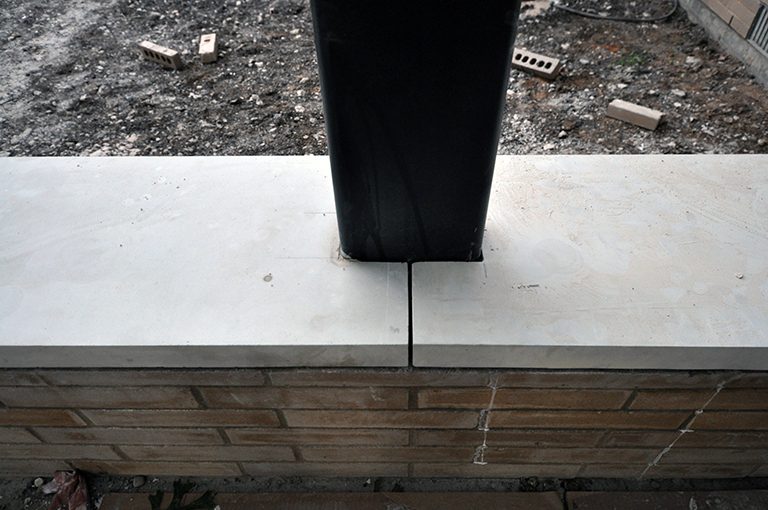
One of the things that changed from my original concept design sketch was the location of the main support element. Originally I had it isolated from the perimeter walls but once we drew up the details, it made more sense to me to move them into the footprint of the low walls.
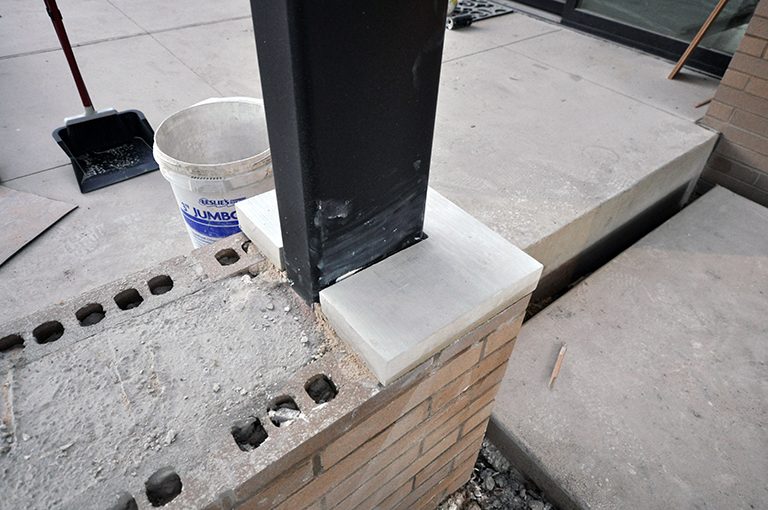
One of the final touches for the low walls was the top cap. Originally I had envisioned this as a brick cap but once we introduced Texas Leuders Limestone into the landscaping (it’s on the front porch and rear patio) it made sense to make the switch here as well.
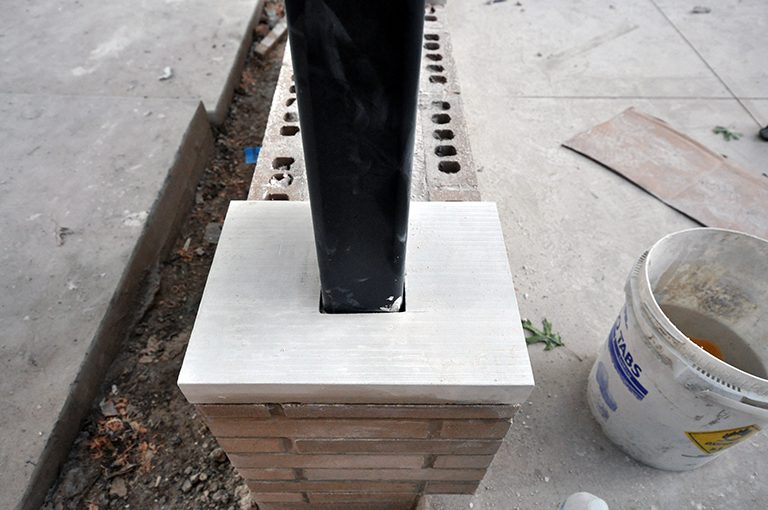
.
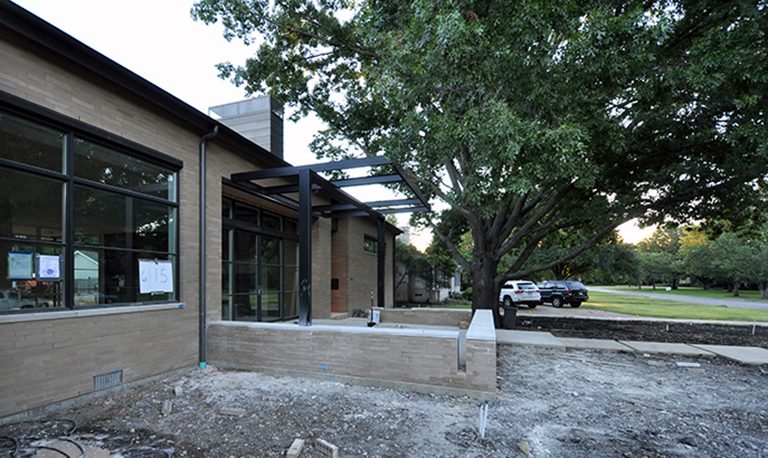
Now that the steel is in place and painted, and the low walls are built and finished, all that left at this point is to put the wood into the trellis.
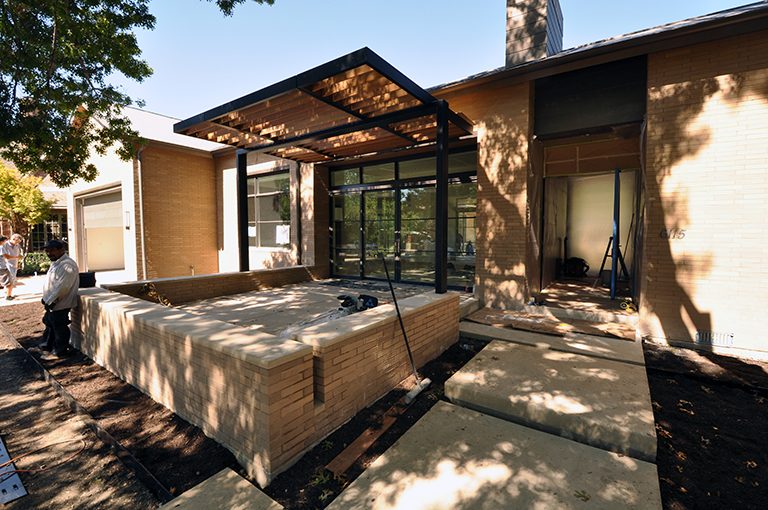
We used ípe wood for the trellis slats due to its durability.We did not put any sort of sealer or finish on it, so over time, it will patina out to a fine silver color. The spacing of the slats was not critical for sun control (this trellis is mostly under the canopy of a large red oak shade tree) so they are there more to imply a ceiling space – something to help bring the scale of the space down to suit the activities expected to take place here … most an extension of the living room during parties.
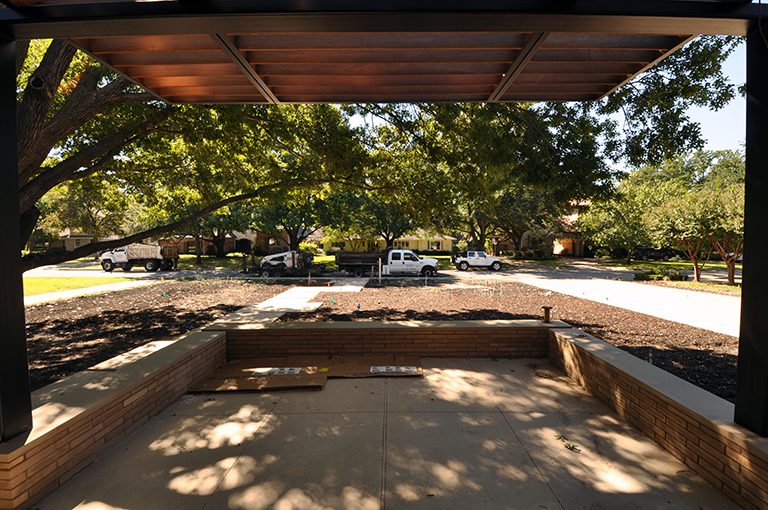
Hopefully, this picture gives you a sense of how the space is extended out into the yard, but the cantilever keeps the space feeling wide open – something that would not have been true if there had been posts located in the corners.
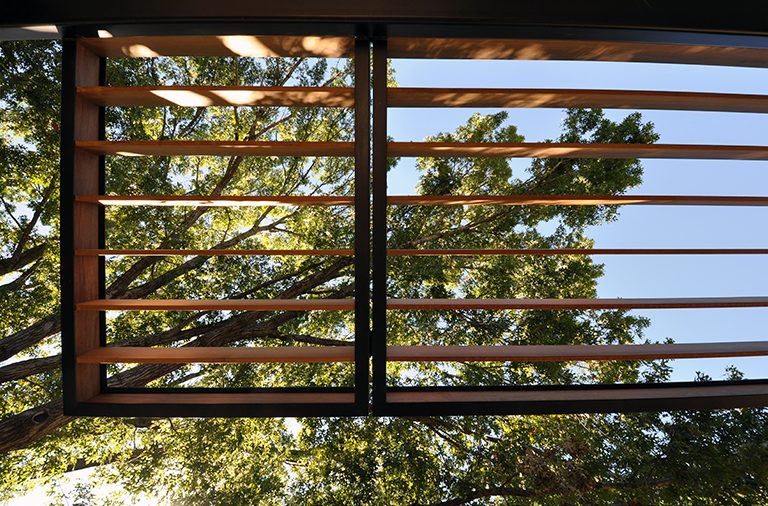
Here’s a look at the 3/4″ gaps I mentioned earlier – the gaps that separate the individual trellis elements from one another.
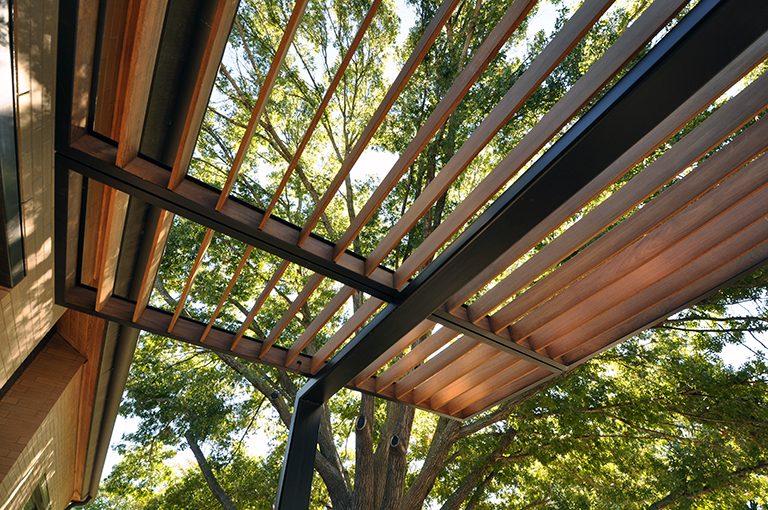
I didn’t mention it earlier because it would have been difficult to see – but the trellis portion of this structure is made up of c-channel steel sections. Set into the steel is the same ípe wood that we are using for the slats. This technique gives us a way of installing the wood members without any visible fasteners. Read this if you want a bit more detail on how the trellis wood boards are attached without fasteners.
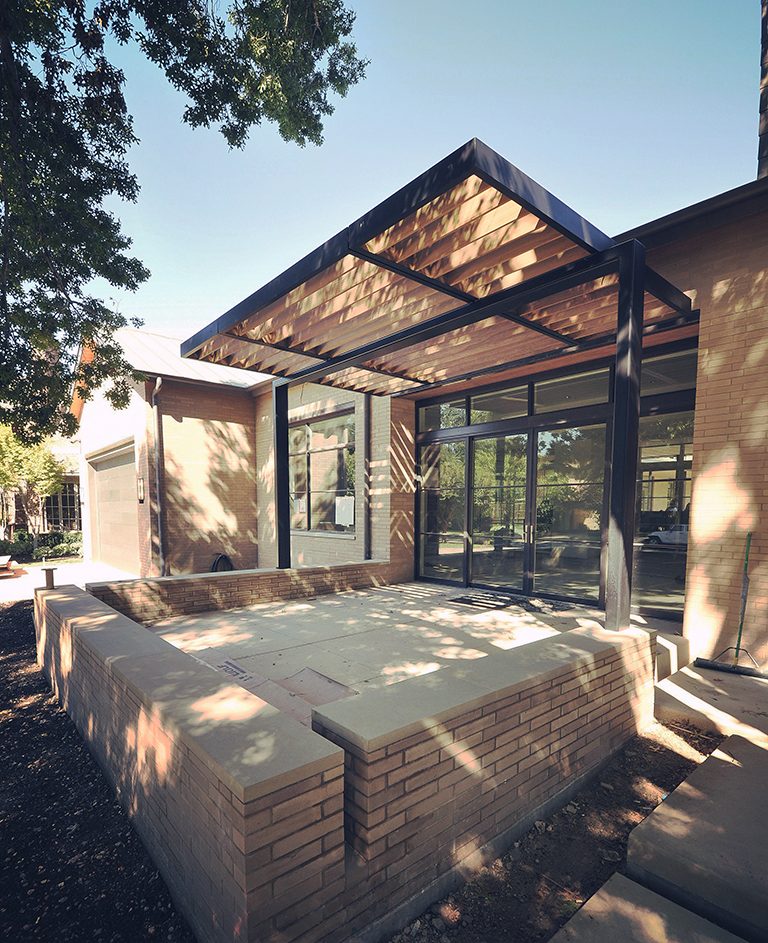
There you have it – a very simple, yet very important, steel and wood trellis. A lot of effort goes into the design and fabrication of an architectural element such as this one. We try very hard to make something look completely simple and obvious when the truth of the matter is that the success of an element such as this one is in the execution of an infinite number of small moves.
I hope you like this patio as much as I do, the owners don’t know it yet but I plan on spending a few Friday evenings sitting under this trellis with a glass of wine in my hand. Hopefully, they’ll be there with me.
Cheers,


